|
 |
Stefan Viljoen wrote:
> Impressive - how'd you do that?
Thanks! I started by scanning the blueprints. They get scaled to the POV
resolution I'm using (1 unit = 1 meter) and I can turn them on or off
for each deck when I render. They are then a guide for laying the other
stuff out.
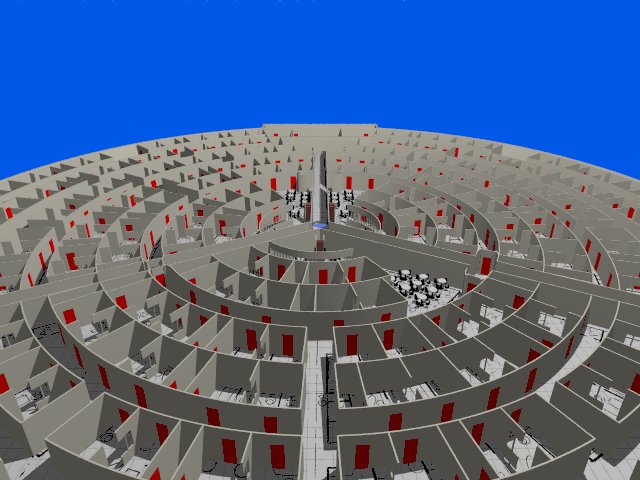
The gazillion curved staterooms turned out to be easier than I had
expected. In the end I was able to do them all with three macros,
which, themselves, called one basic macro. It looks like this:
// left & right from POV of center of circle
// leftAngle : left/anticockwise side
// rightAngle : right/clockwise side
// insideRadius : inner wall
// outsideRadius : outer wall
// leftWall : 0 = skip, 1 = solid, 2 = partition, 3 = door
// rightWall : 0 = skip, 1 = solid, 2 = partition, 3 = door
// insideWall : 0 = skip, 1 = solid, 2 = solid with doors
// outsideWall : 0 = skip, 1 = solid, 2 = solid with doors
#macro deck_room(leftAngle, rightAngle, insideRadius, outsideRadius,
leftWall, rightWall, insideWall, outsideWall)
Basically it draws a curved rectangular room. Instead of "left, right,
top, bottom", you pass in "left angle, right angle, inner radius, outer
radius". The remaining variables control what sorts of walls are drawn
(if any).
This gets rolled up into three higher level macros for drawing the three
basic room types: lounges, bedrooms, and bathrooms.
#macro deck_room_lounge(leftAngle, rightAngle, insideRadius,
outsideRadius, leftWall, rightWall, insideWall, outsideWall)
#macro deck_room_bedroom(leftAngle, rightAngle, insideRadius,
outsideRadius, leftWall, rightWall, insideWall, outsideWall)
#macro deck_room_bathroom(leftAngle, rightAngle, insideRadius,
outsideRadius, leftWall, rightWall, insideWall, outsideWall)
Presently these macros just draw the walls. Ultimately they would put
all the furnishings into the room as well.
These three macros are then used by the final macros:
#macro deck_room_stateroom_onedouble(leftAngle, rightAngle,
insideRadius, outsideRadius, leftWall, rightWall, insideWall, outsideWall)
#macro deck_room_stateroom_twodoubles(leftAngle, rightAngle,
insideRadius, outsideRadius, leftWall, rightWall, insideWall, outsideWall)
#macro deck_room_stateroom_quad(leftAngle, rightAngle, insideRadius,
outsideRadius, leftWall, rightWall, insideWall, outsideWall, leftDouble,
rightDouble)
These lay out the basic room group types. These final macros are then
used when laying out the deck. E.g:
// ring 5
#local a = deck_width_to_angle(DECK_ELEVATOR_RADIUS,
DECK6_CORR3_OUTER_RADIUS);
deck_room_stateroom_twodoubles( 0+a, 30-a,
DECK6_CORR3_OUTER_RADIUS, DECK6_CORR4_INNER_RADIUS, 0, 1, 2, 1)
deck_room_stateroom_twodoubles( 30+a, 60-a,
DECK6_CORR3_OUTER_RADIUS, DECK6_CORR4_INNER_RADIUS, 1, 1, 2, 1)
deck_room_stateroom_twodoubles( 60+a, 90-a,
DECK6_CORR3_OUTER_RADIUS, DECK6_CORR4_INNER_RADIUS, 1, 1, 2, 1)
deck_room_stateroom_twodoubles( 90+a, 120-a,
DECK6_CORR3_OUTER_RADIUS, DECK6_CORR4_INNER_RADIUS, 1, 0, 2, 1)
I've posted the entire deckroom.inc file over in p.t.scene-files if you
are interested. The whole source code is a bit large. But I have it on a
public CVS server if anyone is interested. Collaborators welcome!
Cheers,
Jo
Post a reply to this message
|
|
|
|
Alf Peake wrote:
> Neat and looks very complicated. I look forward to the animated
> walk-through ;)
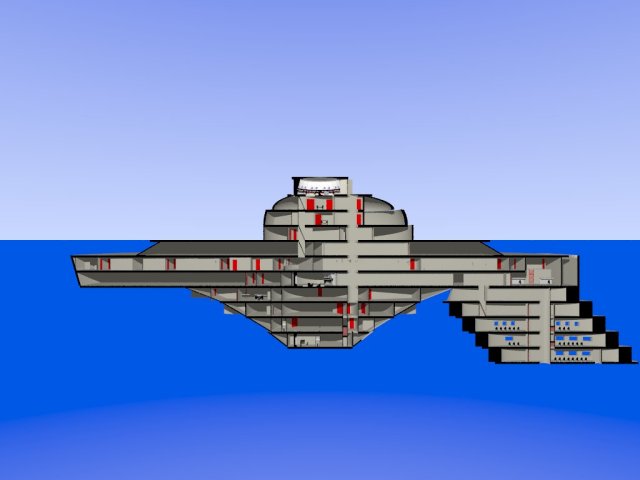
Ha ha ha! The cross section took 36 hours to render! I've come up with a
bounded_by for the curved rectangular rooms that will hopefully cut that
down. Also the way the model is designed I can draw only one deck at a
time. So there could be animated walk throughs in the future. I'd love
to do one zooming up and down the central staircases.
> I have not checked your source but wonder if you calculate all 4 walls
> of a room at the same time?
Not necessarily. The basic macros let you choose what perimeter walls to
draw. They are also smart enough to override those to draw interior
walls. It was a little tricky to work out, but I'm a programmer by
profession, not an artist, so it was familiar territory.
For example for the port staterooms, ring one looks like this:
deck_room_stateroom_twodoubles(DECK6_MESS_ANG, 120-a,
DECK6_CORR1_OUTER_RADIUS, DECK6_ROOM12_RADIUS, 1, 0, 2, 1)
// second four parameters = draw left wall, don't draw right wall,
// draw inner wall with doors, draw outer wall
And ring two:
deck_room_stateroom_quad(DECK6_MESS_ANG+a, 120-a, DECK6_ROOM12_RADIUS,
DECK6_CORR2_INNER_RADIUS, 1, 0, 0, 2, 1, 0)
// second four parameters = draw left wall, don't draw right wall
// don't draw inner wall, draw outer wall with doors
I.e. the rings are adjacent so ring 1's outer wall becomes ring 2's
inner wall. So it should be reasonably optimal.
> The floor will also be the ceiling of the cell below.
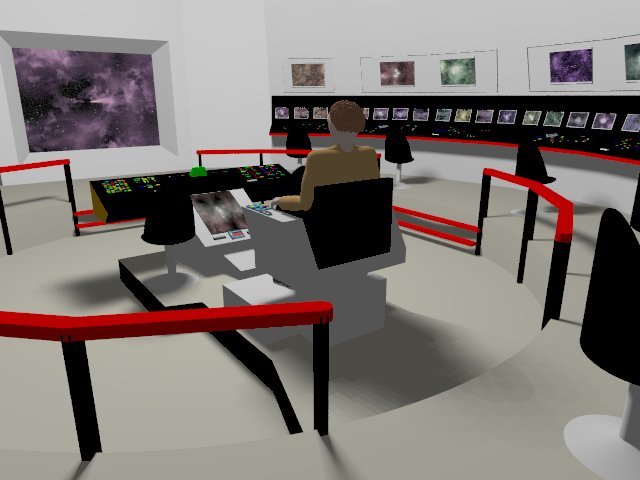
I have that with the decks too. But I've got a lot more work to do on
putting in ceiling and wall decorations. (The original sets didn't have
ceilings!)
30 years ago? Wow. I can only imagine the impositions on rendering time.
:-)
Cheers,
Jo
Post a reply to this message
|
|