|
|
|
|
|
|
| |
| |
|
|
|
|
| |
| |
|
|
"Trevor G Quayle" <Tin### [at] hotmail com> wrote:
> "alphaQuad" <alp### [at] earthlinknet> wrote:
> >
> > Today I tried to find a suitable replacement for my Lego water:
> > <web.49472c24399f7e1d778c150@news.povray.org>
> >
> > I could not. I was able to make some watery chrome.
> >
> > I'd love to see someone find something better than f_ridge for the Lego pool.
>
> The water probably doesn't look that bad. The issue with water that makes it
> interesting looking it what is available to reflect. Your sky and background
> is rather simple which ends up making the reflection very simple and chromey
> looking.
>
> I always point out that reflective surfaces only look as good as what is
> available for them to reflect.
> (see :
>
http://news.povray.org/povray.binaries.images/message/%3Cweb.464c611a4ef76416c150d4c10%40news.povray.org%3E/#%3Cweb.4
64
> c611a4ef76416c150d4c10%40news.povray.org%3E
> for an example)
>
> -tgq
I played around with coming up with a nice water today. com> wrote:
> "alphaQuad" <alp### [at] earthlinknet> wrote:
> >
> > Today I tried to find a suitable replacement for my Lego water:
> > <web.49472c24399f7e1d778c150@news.povray.org>
> >
> > I could not. I was able to make some watery chrome.
> >
> > I'd love to see someone find something better than f_ridge for the Lego pool.
>
> The water probably doesn't look that bad. The issue with water that makes it
> interesting looking it what is available to reflect. Your sky and background
> is rather simple which ends up making the reflection very simple and chromey
> looking.
>
> I always point out that reflective surfaces only look as good as what is
> available for them to reflect.
> (see :
>
http://news.povray.org/povray.binaries.images/message/%3Cweb.464c611a4ef76416c150d4c10%40news.povray.org%3E/#%3Cweb.4
64
> c611a4ef76416c150d4c10%40news.povray.org%3E
> for an example)
>
> -tgq
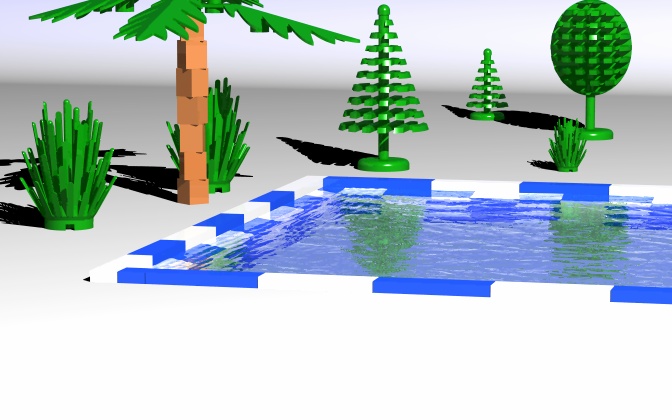
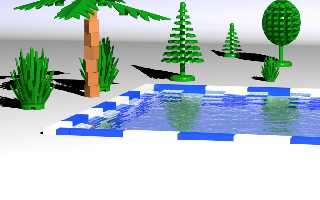
I played around with coming up with a nice water today.
Post a reply to this message
Attachments:
Download 'legopool1.jpg' (84 KB)
Preview of image 'legopool1.jpg'
|
|
| |
| |
|
|
|
|
| |
| |
|
|
"Trevor G Quayle" <Tin### [at] hotmailcom> wrote:
> "alphaQuad" <alp### [at] earthlinknet> wrote:
> >
> > Today I tried to find a suitable replacement for my Lego water:
> > <web.49472c24399f7e1d778c150@news.povray.org>
> >
> > I could not. I was able to make some watery chrome.
> >
> > I'd love to see someone find something better than f_ridge for the Lego pool.
>
> The water probably doesn't look that bad. The issue with water that makes it
> interesting looking it what is available to reflect. Your sky and background
> is rather simple which ends up making the reflection very simple and chromey
> looking.
>
> I always point out that reflective surfaces only look as good as what is
> available for them to reflect.
> (see :
>
http://news.povray.org/povray.binaries.images/message/%3Cweb.464c611a4ef76416c150d4c10%40news.povray.org%3E/#%3Cweb.4
64
> c611a4ef76416c150d4c10%40news.povray.org%3E
> for an example)
>
> -tgq
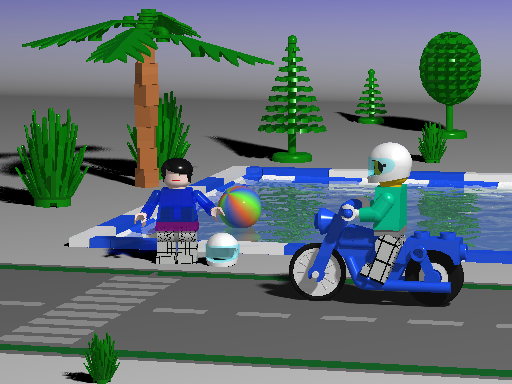
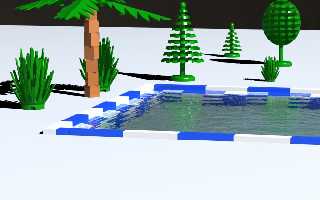
Again, but with an environment map rather than plain sky.
Post a reply to this message
Attachments:
Download 'legopool2.jpg' (80 KB)
Preview of image 'legopool2.jpg'
|
|
| |
| |
|
|
|
|
| |
| |
|
|
"Trevor G Quayle" <Tin### [at] hotmailcom> wrote:
> "alphaQuad" <alp### [at] earthlinknet> wrote:
> >
> > Today I tried to find a suitable replacement for my Lego water:
> > <web.49472c24399f7e1d778c150@news.povray.org>
> >
> > I could not. I was able to make some watery chrome.
> >
> > I'd love to see someone find something better than f_ridge for the Lego pool.
>
> The water probably doesn't look that bad. The issue with water that makes it
> interesting looking it what is available to reflect. Your sky and background
> is rather simple which ends up making the reflection very simple and chromey
> looking.
>
> I always point out that reflective surfaces only look as good as what is
> available for them to reflect.
> (see :
>
http://news.povray.org/povray.binaries.images/message/%3Cweb.464c611a4ef76416c150d4c10%40news.povray.org%3E/#%3Cweb.4
64
> c611a4ef76416c150d4c10%40news.povray.org%3E
> for an example)
>
> -tgq
The actual water (as a heightfield as in the renders):
//start
#declare ASiz=250;
#declare RHIT=0.25;
#declare FREQ=15;
#declare WDep=75;
#declare WHit=0.45;
#declare TDep=WDep+WHit+RHIT+1;
#declare TFunk1=function{max(min(abs(x),1)-0.5,0)/(1-0.5)}
#declare PPIG3= //Pool Side Ripples
pigment {
function{TFunk1(x,y,z)}
pigment_map{
[0.0 rgb 0]
[1.0 function{TFunk1(x,y,z)} frequency ASiz/FREQ sine_wave]
}
scale 1/2
poly_wave 3
translate x*1/2
scale 5
warp{turbulence 0.05*x}
scale 1/5
warp{turbulence 0.05*x}
}
#declare WCol=rgb <0.51373, 0.70588, 0.70588>; //Water colour
#local FD=-60/ln(0.58); //Fade distance
#declare RScal=1/10;
#declare RFreq=50;
#declare SRip =
function{
pigment {
marble
frequency ASiz/RFreq*RScal
scale 1/5
warp{turbulence 1.5}
scale 5
warp{turbulence 0.5}
sine_wave
scale RScal
}
}
#local FTILEA = function {SRip(x,y,z).gray*0.5+SRip(y,x,z).gray*0.5}
#local FTILEB = function {pigment{PPIG3 }}
#local FTILEC = function {pigment{PPIG3 rotate z*90}}
#declare aaa=WHit/TDep;
#declare bbb=RHIT/TDep;
#local FTILE = function
{FTILEA(x,y,z)*aaa+FTILEB(x,y,z).gray*bbb+FTILEC(x,y,z).gray*bbb+(1-aaa-bbb*2)}
#declare WW2=
height_field{
function 600,600 {pattern{function{FTILE(x,y,z)}}}
smooth
hollow
scale <ASiz,TDep,ASiz>
}
#declare MWater=
material{
texture{
pigment{rgbt 1}
finish{conserve_energy diffuse 0.0 ambient 0 reflection{0 1 fresnel on
metallic 0}}
}
interior{
ior 1.33
media{
absorption rgb 1-WCol
density{rgb 1/FD}
}
}
}
// water
intersection{
box { <-8, -77, -8> <216, 1, 216>}
object{WW2 translate <-10,-76,-10>}
hollow
material { MWater translate <-10,0,-10>}
}
//END
it can also be expressed as a normal by using modifying and using the function:
//START
#declare ASiz=250;
#declare RHIT=0.25;
#declare FREQ=15;
#declare WDep=75;
#declare WHit=0.45;
#declare TDep=WDep+WHit+RHIT+1;
#declare TFunk1=function{max(min(abs(x),1)-0.5,0)/(1-0.5)}
#declare PPIG3= //Pool Side Ripples
pigment {
function{TFunk1(x,y,z)}
pigment_map{
[0.0 rgb 0]
[1.0 function{TFunk1(x,y,z)} frequency ASiz/FREQ sine_wave]
}
scale 1/2
poly_wave 3
translate x*1/2
scale 5
warp{turbulence 0.05*x}
scale 1/5
warp{turbulence 0.05*x}
}
#declare WCol=rgb <0.51373, 0.70588, 0.70588>; //Water colour
#local FD=-60/ln(0.58); //Fade distance
#declare RScal=1/10;
#declare RFreq=50;
#declare SRip =
function{
pigment {
marble
frequency ASiz/RFreq*RScal
scale 1/5
warp{turbulence 1.5}
scale 5
warp{turbulence 0.5}
sine_wave
scale RScal
}
}
#local FTILEA = function {SRip(x,y,z).gray*0.5+SRip(y,x,z).gray*0.5}
#local FTILEB = function {pigment{PPIG3 }}
#local FTILEC = function {pigment{PPIG3 rotate z*90}}
#declare aaa=WHit/TDep;
#declare bbb=RHIT/TDep;
#local FTILE = function
{FTILEA(x,y,z)*aaa+FTILEB(x,y,z).gray*bbb+FTILEC(x,y,z).gray*bbb+(1-aaa-bbb*2)}
#declare THit=WHit+RHIT*2;
#local FTILE2 = function
{FTILEA(x,y,z)*WHit/THit+FTILEB(x,y,z).gray*RHIT/THit+FTILEC(x,y,z).gray*RHIT/THit}
//#declare WW2=
//height_field{
// function 600,600 {pattern{function{FTILE(x,y,z)}}}
// smooth
// hollow
// scale <ASiz,TDep,ASiz>
//}
#declare MWater=
material{
texture{
pigment{rgbt 1}
finish{conserve_energy diffuse 0.0 ambient 0 reflection{0 1 fresnel on
metallic 0}}
normal{function{FTILE2(x,z,y)} scale <ASiz,TDep,ASiz> bump_size 0.1}
}
interior{
ior 1.33
media{
absorption rgb 1-WCol
density{rgb 1/FD}
}
}
}
// water
intersection{
box { <-8, -77, -8> <216, 1, 216>}
//object{WW2 translate <-10,-76,-10>}
hollow
material { MWater translate <-10,0,-10>}
}
//END
-tgq
Post a reply to this message
|
|
| |
| |
|
|
|
|
| |
| |
|
|
"Trevor G Quayle" <Tin### [at] hotmailcom> wrote:
> I played around with coming up with a nice water today.
Indeed.
log_E(0.58)
log(.58)/log(2.7182818284590452353602874713526) =
-0.544727175441672
#local FD=-60/ln(0.58); //Fade distance = 110.146882
so what does .58 refer to?
#declare WHit=0.45;
water-height ??? what does 0.45 refer to?
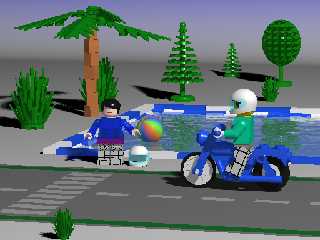
I can really appreciate the dimension considerations.
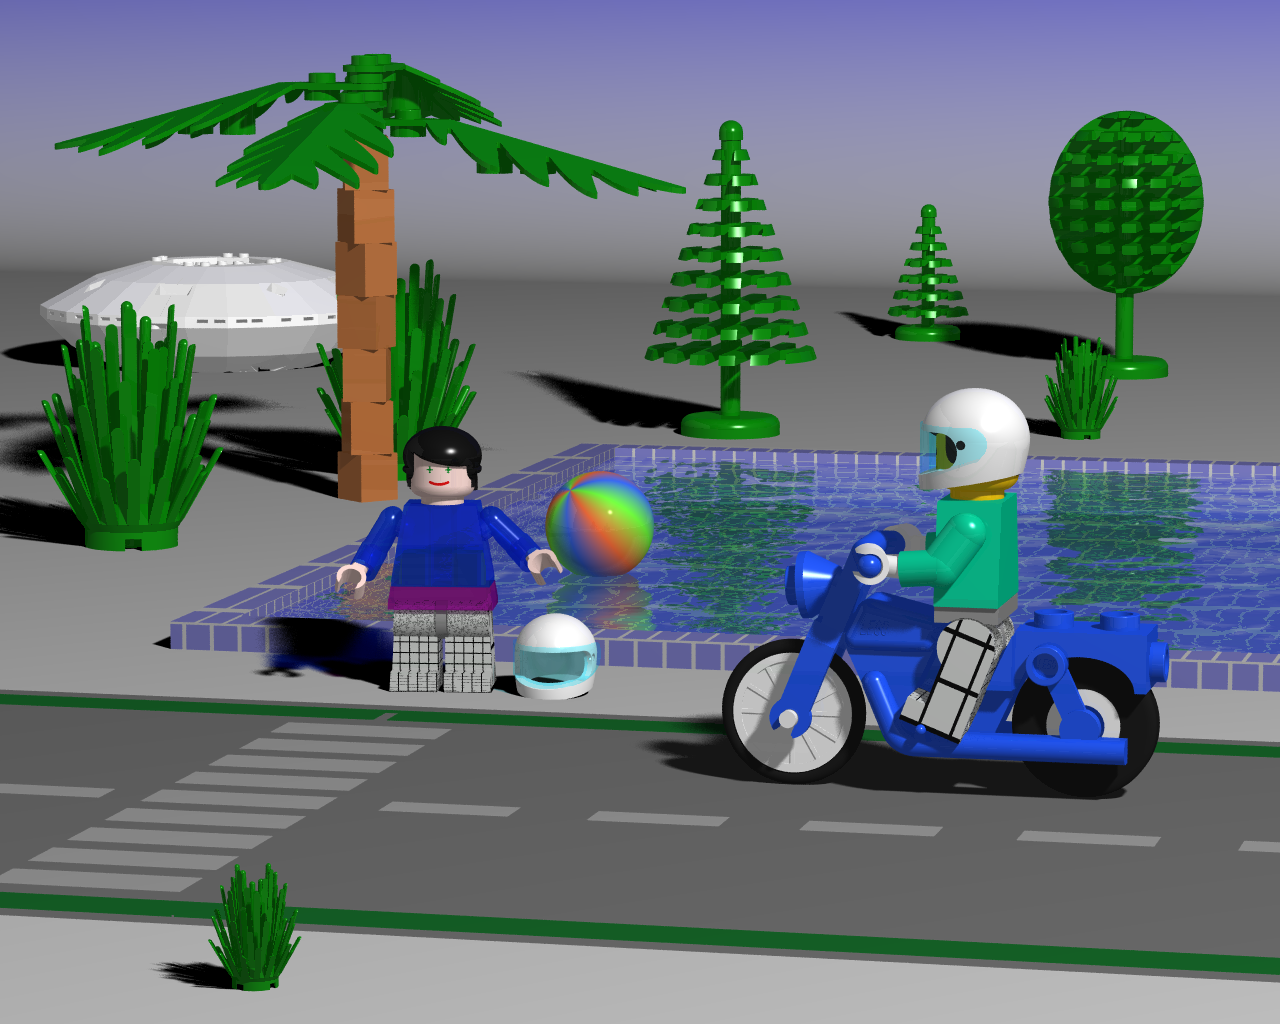
Reflection was unconvincing with 2 light-levels in the BG;
still working on a tile pool perhaps.
Sky and lighting remains the same.
absorption from: 1-<0.51373, 0.70588, 0.70588>
to: <0.272, 0.046, 0.010>
(c_H2O_abs // rgb 1-WCol)
Top quality Lego bricks = parse time. Brick quality should have been a
brick(param), then you could save time where it isnt needed and have highQ
bricks in view.
Post a reply to this message
Attachments:
Download 'legoworld_pool2.png' (107 KB)
Preview of image 'legoworld_pool2.png'
|
|
| |
| |
|
|
|
|
| |
| |
|
|
"alphaQuad" <alp### [at] earthlinknet> wrote:
> "Trevor G Quayle" <Tin### [at] hotmailcom> wrote:
>
> > I played around with coming up with a nice water today.
>
> Indeed.
>
> log_E(0.58)
> log(.58)/log(2.7182818284590452353602874713526) =
> -0.544727175441672
> #local FD=-60/ln(0.58); //Fade distance = 110.146882
>
> so what does .58 refer to?
Um, I don't recall off the top of my head. This was set up over a year ago. I
think it was to try to correlate with something but the exact reasoning escapes
me at the moment.
>
> #declare WHit=0.45;
> water-height ??? what does 0.45 refer to?
Sorry, I should've explained the variables.
ASiz=250; //~Length/Width of pool object
#declare RHIT=0.25; //Height of ripples (ripples at the sides of the pool)
#declare FREQ=15; //frequency of ripples actually period or spacing, higher
number means further apart)
#declare WDep=75; //Total depth of water
#declare WHit=0.45; //Height of main wave pattern
#declare TDep=WDep+WHit+RHIT+1; //Total depth of water with waves/ripples added
- actually should be #declare TDep=WDep+WHit+RHIT*2;
#declare WCol=rgb <0.51373, 0.70588, 0.70588>; //Water colour
#local FD=-60/ln(0.58); //Fade distance
#declare RScal=1/10; //relative overall scaling of wave pattern
#declare RFreq=50; //frequency of waves (similar to FREQ above but for the
main waves)
#local FTILEA = function {SRip(x,y,z).gray*0.5+SRip(y,x,z).gray*0.5} //main
wave pattern. two perpendicular marble patterns with sine_wave and much
turbulence
#local FTILEB = function {pigment{PPIG3 }} //side ripples
#local FTILEC = function {pigment{PPIG3 rotate z*90}} //side ripples
#declare aaa=WHit/TDep; //proportional height of waves
#declare bbb=RHIT/TDep; //proportional height of ripples
#local FTILE = function
{FTILEA(x,y,z)*aaa+FTILEB(x,y,z).gray*bbb+FTILEC(x,y,z).gray*bbb+(1-aaa-bbb*2)}
//total surface function
Note that when using function patterns/pigments, care must be taken to keep the
maximum total values between 0 and 1 as anything outside that range wraps back
around (ie jumps back down to 0 after 1, etc) and gives wrong and awful
results.
In FTILEA the two 0.5 values can be altered but make sure they add to 1 (0.4 &
0.6, etc)
In FTILE, the combination of aaa+bbb+bbb+(1-aaa-bbb2) makes the wave pattern
sizing proportional keeping the values between 0 and 1.
>
> I can really appreciate the dimension considerations.
>
> Reflection was unconvincing with 2 light-levels in the BG;
> still working on a tile pool perhaps.
As I have said, reflection is generally not helped with lighting, but with what
there is to reflect. Maybe add a sun where your light is and some clouds to
the sky.
Adding a sun is as simple as making a sphere with high ambient values:
within light source
looks_like{
sphere{0,1 //size and locate accordingly
pigment{rgb 1} //or use whatever colour you want the sun to be
finish{diffuse 0 ambient 10} //it is important to have a high ambient value
here, otherwise it looks like a plain white ball
}
}
Using it with looks_like within a light source automatically lets light pass
through. If it is not within a light source, add no_shadow to the object so it
doesn't interfere with the light.
-tgq
Post a reply to this message
|
|
| |
| |
|
|
|
|
| |
| |
|
|
"Trevor G Quayle" <Tin### [at] hotmailcom> wrote:
> The actual water (as a heightfield as in the renders):
> -tgq
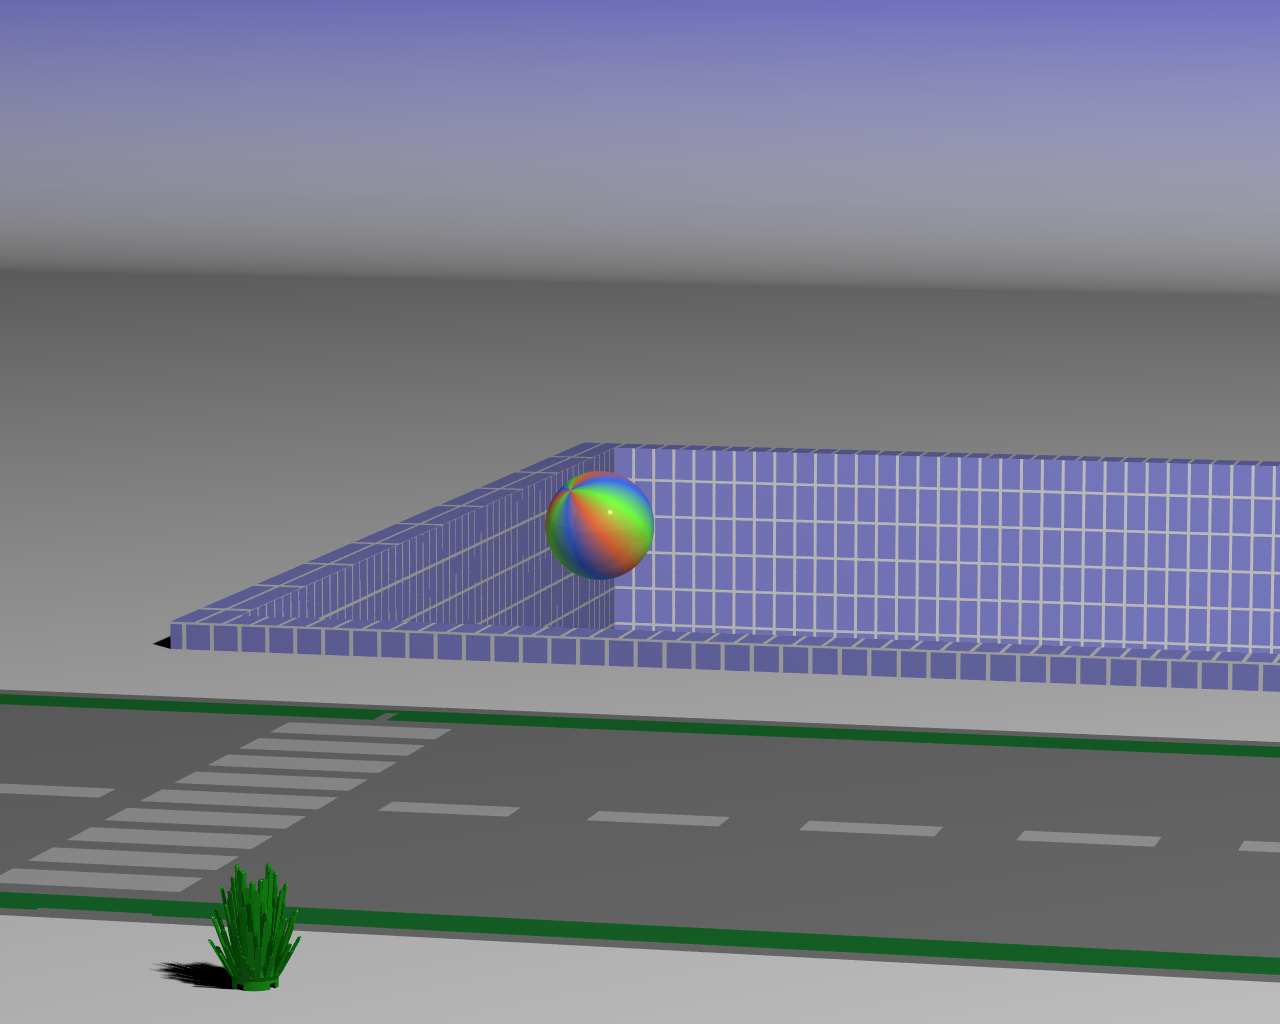
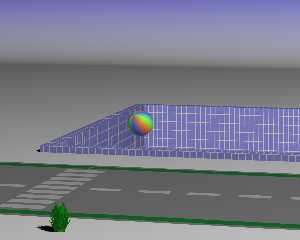
Big enough to see the tile is starting to swirl like the outdoor pool image.
I am scaling the tile to get an approx 0.4 to 1 tile size (eyeballed), but that
scales the grout also. It's boggling.
This pool has a depth of 60; I wanted to see how far down the wall could be
seen. The outdoor pool looked like 3.5 feet. (about 10 for Lego ppl)
Tile scaling needs ... ? doh!
#declare tileplaid =
texture {
pigment { uv_mapping
gradient x
pigment_map{
[1/7 rgb 1][1/7 gradient y
colour_map{
[1/7 rgb 1]
[1/7 rgb <.6,.6,1> ]
}
]
}
scale <1/160,1/20,1>*.7
}
finish { basic_finish }
}
#declare pool_box =
difference {
box { <-16, -66.5, -16> <224, 0, 224> } // legoworld hole
box { <-8, -60, -8> <216, 1, 216> }
texture { tileplaid }
}
Many thanks go to Professor Trevor G Quayle.
Thank you, this is great water.
(have yet to discover what went wrong with 1st poolwater)
Beginning to look like "outdoor-pool-image" could be achieved.
Post a reply to this message
Attachments:
Download 'legoworld_pool2test.png' (529 KB)
Preview of image 'legoworld_pool2test.png'

|
|
| |
| |
|
|
|
|
| |
| |
|
|
"alphaQuad" <alp### [at] earthlinknet> wrote:
>
> I am scaling the tile to get an approx 0.4 to 1 tile size (eyeballed), but that
> scales the grout also. It's boggling.
>
> Tile scaling needs ... ? doh!
>
> #declare tileplaid =
> texture {
> pigment { uv_mapping
> gradient x
> pigment_map{
> [1/7 rgb 1][1/7 gradient y
> colour_map{
> [1/7 rgb 1]
> [1/7 rgb <.6,.6,1> ]
> }
> ]
> }
> scale <1/160,1/20,1>*.7
> }
> finish { basic_finish }
> }
The 1/7 value is the grout width value. The tile is 6/7 units and the grout is
1/7 units.
Use declare and math to adust tile/grout sizes:
#declare TilSiz= <xdim,ydim,0>; //tile offsetting (tile size plus grout line)
#declare GrtSiz= gwid; //grout width
texture {
pigment { uv_mapping
gradient x
pigment_map{
[GrtSiz/(TilSiz.x+GrtSiz) rgb 1]
[GrtSiz/(TilSiz.x+GrtSiz) gradient y
colour_map{
[GrtSiz/(TilSiz.y+GrtSiz) rgb 1]
[GrtSiz/(TilSiz.y+GrtSiz) rgb <.6,.6,1> ]
}
]
}
scale TilSiz
}
finish { basic_finish }
}
This way you can make the tiles bigger (change TilSiz) without changing the
grout size, or vice versa.
-tgq
Post a reply to this message
|
|
| |
| |
|
|
|
|
| |
| |
|
|
previously had a lego-floor bottom,
bottom tiled at a depth of 65.
#declare RHIT=0.25;
#declare WHit=0.45;
ripple height
and
wave height
Am I understanding your naming convention? Kinda important to grasping the math
logic.
Ship looks like it sustained damage or landed on the wicked, depraved witch.
Post a reply to this message
Attachments:
Download 'lego_pool.png' (537 KB)
Preview of image 'lego_pool.png'

|
|
| |
| |
|
|
|
|
| |
| |
|
|
"alphaQuad" <alp### [at] earthlinknet> wrote:
> previously had a lego-floor bottom,
>
> bottom tiled at a depth of 65.
>
> #declare RHIT=0.25;
> #declare WHit=0.45;
>
> ripple height
> and
> wave height
>
> Am I understanding your naming convention? Kinda important to grasping the math
> logic.
>
> Ship looks like it sustained damage or landed on the wicked, depraved witch.
OK, my original water pattern was just thrown together using some previously
developed code so it wasn't commented or named with consistency. I have
reworked it with better naming conventions and commenting and have also
optimizified the code somewhat. Note that the dimensions used for the declared
values (PoolSiz, PoolDep, WavHt, WavSpac, RipHt, RipSpac) correspond to the
final scene level dimensions for ease of use.
//START
#declare PoolSiz=216+8; //length of pool sides (square)
#declare PoolDep=75; //depth of pool
#declare WavHt=0.45; //height of waves
#declare WavSpac=30; //spacing of waves
#declare RipHt=0.25; //height of ripples (pool sides)
#declare RipSpac=4; //spacing of ripples
#declare TotDep=PoolDep+WavHt+RipHt; //total water depth
#declare FWav1 = //wave function
function{
pigment{
marble frequency PoolSiz/WavSpac sine_wave
scale 1/5
warp{turbulence 1.5}
scale 5
warp{turbulence 0.5}
}
}
#local FWav2 = function {FWav1(x,y,z).gray*0.5+FWav1(y,x,z).gray*0.5} //wave
function 2
#local FRip1 = //ripple function
function {
pigment{
function{pow(max(min(abs(x*2-1),1)-0.5,0)/(1-0.5),3)}
pigment_map{
[0.0 rgb 0]
[1.0 marble frequency PoolSiz/RipSpac sine_wave]
}
scale 1/5
warp{turbulence 0.05*x}
scale 5
}
}
#local FRip2 = function {FRip1(x,y,z).gray*0.5+FRip1(y,x,z).gray*0.5} //ripple
function 2
#declare WHt=WavHt/TotDep; //relative depth of waves (% total depth)
#declare RHt=RipHt/TotDep; //relative depth of ripples (% total depth)
#local FWat = function {FWav2(x,y,z)*WHt+FRip2(x,y,z)*RHt+(1-WHt-RHt)} //water
surface function
#declare WatHF= //water heightfield
height_field{
function 600,600 {pattern{function{FWat(x,y,z)}}}
smooth
hollow
scale <PoolSiz,TotDep,PoolSiz>
}
#declare WatCol=rgb <0.51373, 0.70588, 0.70588>; //Water colour
#local FadeDis=-60/ln(0.58); //fade distance
#declare MWater= //water material
material{
texture{
pigment{rgbt 1}
finish{conserve_energy diffuse 0.0 ambient 0 reflection{0 1 fresnel on
metallic 0}}
}
interior{
ior 1.33
media{
absorption rgb 1-WatCol //coastal
density{rgb 1/FadeDis}
}
}
}
// water
object{WatHF translate <-8,-76,-8> hollow material { MWater translate
<-10,0,-10>}}
//END
-tgq
Post a reply to this message
|
|
| |
| |
|
|
|
|
| |
| |
|
|
"Trevor G Quayle" <Tin### [at] hotmailcom> wrote:
> The 1/7 value is the grout width value. The tile is 6/7 units and the grout is
> 1/7 units.
>
> Use declare and math to adust tile/grout sizes:
>
> #declare TilSiz= <xdim,ydim,0>; //tile offsetting (tile size plus grout line)
> #declare GrtSiz= gwid; //grout width
>
> texture {
> pigment { uv_mapping
> gradient x
> pigment_map{
> [GrtSiz/(TilSiz.x+GrtSiz) rgb 1]
> [GrtSiz/(TilSiz.x+GrtSiz) gradient y
> colour_map{
> [GrtSiz/(TilSiz.y+GrtSiz) rgb 1]
> [GrtSiz/(TilSiz.y+GrtSiz) rgb <.6,.6,1> ]
> }
> ]
> }
> scale TilSiz
> }
> finish { basic_finish }
> }
>
> This way you can make the tiles bigger (change TilSiz) without changing the
> grout size, or vice versa.
>
> -tgq
when you said "The 1/7 value is the grout width value." , a light sort of went
on ... but there is y grout and and x grout.
the math for the correct y-grout-[scale] due to y-scaling is ... ? puzzling
".5" value which I guessed at, since it looked 2 times too big.
In the real Lego world this is what worked:
#declare TilSiz= <6/7,12/7,1>; //tile offsetting (tile size plus grout line)
#declare GrtSiz= 1/7; //grout width
//0.142857
echof(GrtSiz/(TilSiz.x+GrtSiz)) // 0.14286
cr()
echof(GrtSiz/(TilSiz.y+GrtSiz)) // 0.07143
cr()
#declare tileplaid =
#if (10)
texture {
pigment { uv_mapping
gradient x
pigment_map{
[GrtSiz/(TilSiz.x+GrtSiz) rgb 1]
[GrtSiz/(TilSiz.x+GrtSiz) gradient y
colour_map{
[GrtSiz/(TilSiz.y+GrtSiz) rgb 1]
[GrtSiz/(TilSiz.y+GrtSiz) rgb <.6,.6,1> ]
}
]
}
//scale TilSiz*.01
scale <1/160,1/20,1>*.7
}
finish { basic_finish }
}
#else
texture {
pigment { uv_mapping
gradient x
pigment_map{
[1/7 rgb 1]
[1/7 gradient y
colour_map{
[(1/7)*.5 rgb 1]
[(1/7)*.5 rgb <.6,.6,1> ]
}
]
}
scale <1/160,1/20,1>*.7 // == 0.00625 / .05 = 0.125 1/8
}
finish { basic_finish }
} #end
still had to scale by something else not TilSiz
scale by TilSiz = a grout line half the pool's width and tiles with a greater
xdim
Post a reply to this message
Attachments:
Download 'lego_pool2.png' (169 KB)
Preview of image 'lego_pool2.png'
|
|
| |
| |
|
|
|
|
| |
|
|