|
|
|
|
|
|
| |
| |
|
|
|
|
| |
| |
|
|
Hi all,
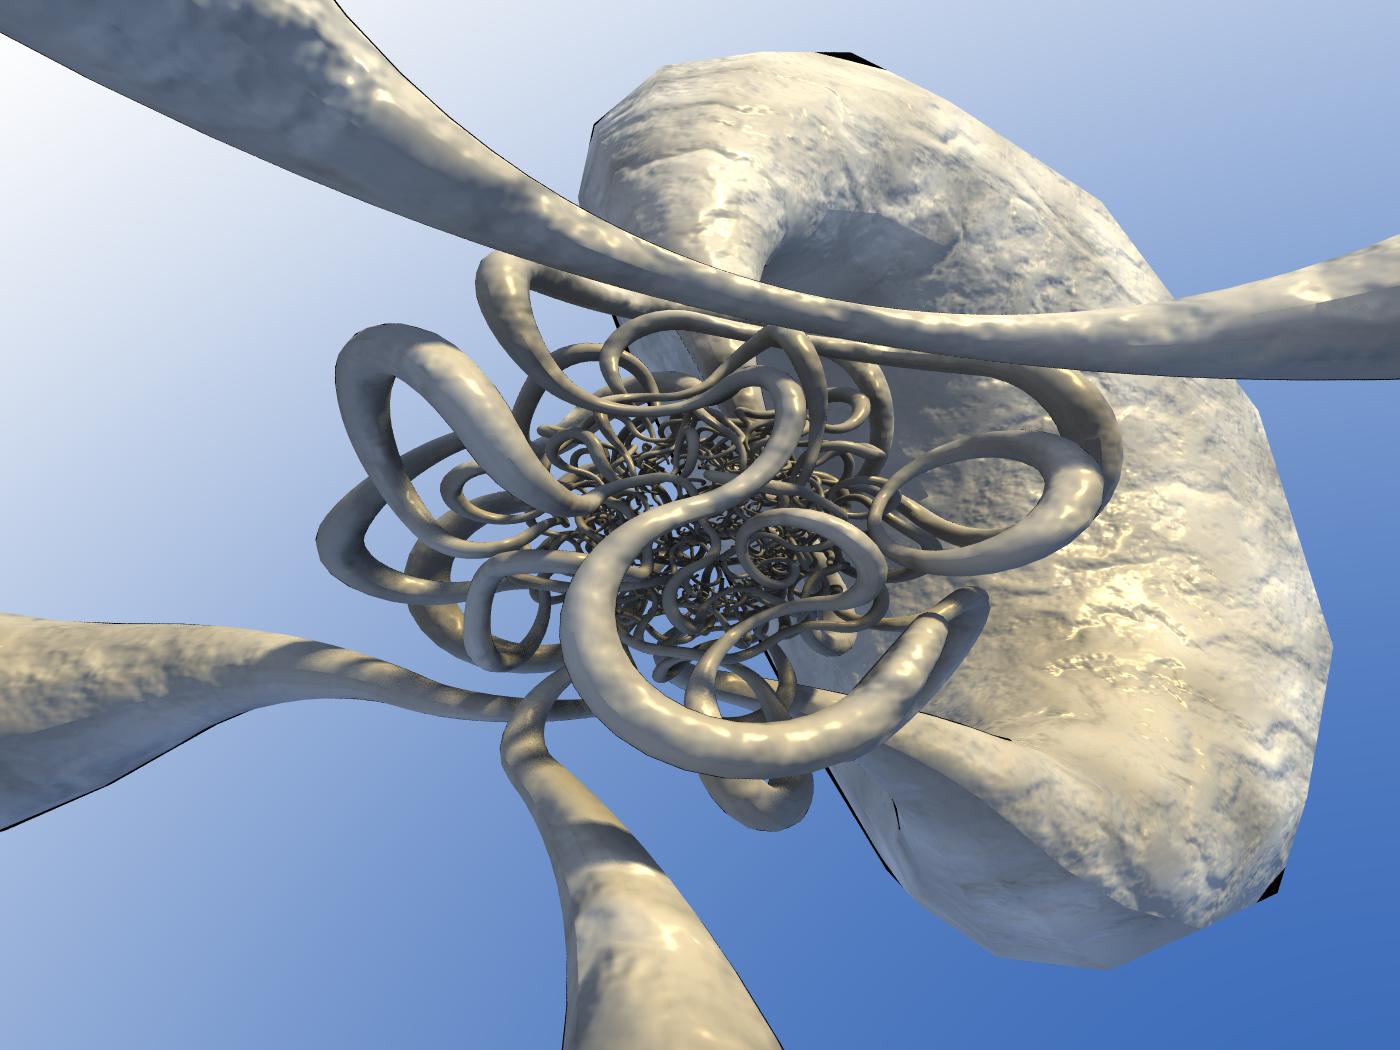
This is my first attempt at a povray render. It didn't turn out quite like I
intended, but I was quite happy with it. I started with an interesting
geometric object which I wanted to raytrace, so think of this image as an
attempt to show off the object, not my very basic povray skills.
As said in the title, it is an inversion of a 3d truchet tiling. The
geometry was created in Mathematica, and exported to povray as a mesh.
Since I don't know anything about texturing, I just grabbed one of Tor Olav
Kristensen's textures. I was hoping to get the same rough effect over all
parts of the mesh, but it didn't work out that way.
If anyone has any advice or tips I'd love to hear them.
Cheers.
Post a reply to this message
Attachments:
Download 'tubes.jpg' (130 KB)
Preview of image 'tubes.jpg'
|
|
| |
| |
|
|
|
|
| |
| |
|
|
> This is my first attempt at a povray render. It didn't turn out quite like
I
> intended, but I was quite happy with it. I started with an interesting
> geometric object which I wanted to raytrace, so think of this image as an
> attempt to show off the object, not my very basic povray skills.
It's pretty cool, the perspective is great and the contrast in the size of
the object at different areas is good.
Because your mesh has relatively few polygons, it is suffering pretty badly
from a known POV-Ray bug which is causing those black spots around the
edges. If you don't have any shadowless lights in your scene, you can work
around this bug by adding "double_illuminate" to the end of the mesh object.
You may also want to increase the polygon count in order to smooth out the
edges and the shadow transitions along the surface.
> As said in the title, it is an inversion of a 3d truchet tiling.
Oh, of course! A truchet tiling! What's that? ;)
> If anyone has any advice or tips I'd love to hear them.
If you're new, go through the tutorials in the help files. It's a good way
to learn how to make scenes from scratch and how to make your own textures.
- Slime
[ http://www.slimeland.com/ ]
Post a reply to this message
|
|
| |
| |
|
|
|
|
| |
| |
|
|
"Slime" <fak### [at] email address> wrote:
> Because your mesh has relatively few polygons, it is suffering pretty badly
> from a known POV-Ray bug which is causing those black spots around the
> edges. If you don't have any shadowless lights in your scene, you can work
> around this bug by adding "double_illuminate" to the end of the mesh object.
>
> You may also want to increase the polygon count in order to smooth out the
> edges and the shadow transitions along the surface.
>
Thanks for the tips. When I generated the geometry I didn't have much ram to
work with, and so I was forced to go with a low poly count (150,000
rectangles before exporting). I have access to some much beefier hardware
though, and next time I render it I'll have five times as many polygons up
my sleeve. That, with your suggestion to turn on double_illuminate, should
alleviate the first two problems.
>
> > As said in the title, it is an inversion of a 3d truchet tiling.
>
> Oh, of course! A truchet tiling! What's that? ;)
>
Sorry about that, didn't want to bore everyone with the details. Since you
asked though... a truchet tiling is formed from a single special tile which
is laid down side by side without regard to orientation. The tile is chosen
so that its pattern at any side joins smoothly with any other side. Its a
bit hard to explain, so check out
http://mathworld.wolfram.com/TruchetTiling.html for an example. Anyway you
can do the same thing in 3d with a cube containing, say, three one quater
segments of a torus. Once you have your 3d 'tile', you can stick a bunch of
them together, and then use the operation r -> r/(r.r), where r is a vector
representing any point, to get the effect in the image posted.
Thanks again for the tips, version 2 should be miles ahead of my first
attempt. address> wrote:
> Because your mesh has relatively few polygons, it is suffering pretty badly
> from a known POV-Ray bug which is causing those black spots around the
> edges. If you don't have any shadowless lights in your scene, you can work
> around this bug by adding "double_illuminate" to the end of the mesh object.
>
> You may also want to increase the polygon count in order to smooth out the
> edges and the shadow transitions along the surface.
>
Thanks for the tips. When I generated the geometry I didn't have much ram to
work with, and so I was forced to go with a low poly count (150,000
rectangles before exporting). I have access to some much beefier hardware
though, and next time I render it I'll have five times as many polygons up
my sleeve. That, with your suggestion to turn on double_illuminate, should
alleviate the first two problems.
>
> > As said in the title, it is an inversion of a 3d truchet tiling.
>
> Oh, of course! A truchet tiling! What's that? ;)
>
Sorry about that, didn't want to bore everyone with the details. Since you
asked though... a truchet tiling is formed from a single special tile which
is laid down side by side without regard to orientation. The tile is chosen
so that its pattern at any side joins smoothly with any other side. Its a
bit hard to explain, so check out
http://mathworld.wolfram.com/TruchetTiling.html for an example. Anyway you
can do the same thing in 3d with a cube containing, say, three one quater
segments of a torus. Once you have your 3d 'tile', you can stick a bunch of
them together, and then use the operation r -> r/(r.r), where r is a vector
representing any point, to get the effect in the image posted.
Thanks again for the tips, version 2 should be miles ahead of my first
attempt.
Post a reply to this message
|
|
| |
| |
|
|
From: Florian Brucker
Subject: Re: First Image: Inverted 3d truchet tiling
Date: 23 Aug 2004 08:55:11
Message: <4129e92f@news.povray.org>
|
|
|
| |
| |
|
|
> Once you have your 3d 'tile', you can stick a bunch of
> them together, and then use the operation r -> r/(r.r), where r is a vector
> representing any point, to get the effect in the image posted.
OK. Understood all of it but this part. Could you explain it some more
please? To me it looks like your applying some kind of
matrix/transformations to all points of the object, to get that uneven
scaling, is that true?
And BTW, your image rocks!
Florian
Post a reply to this message
|
|
| |
| |
|
|
|
|
| |
| |
|
|
Florian Brucker <tor### [at] torfboldcom> wrote:
> > Once you have your 3d 'tile', you can stick a bunch of
> > them together, and then use the operation r -> r/(r.r), where r is a vector
> > representing any point, to get the effect in the image posted.
>
> OK. Understood all of it but this part. Could you explain it some more
> please? To me it looks like your applying some kind of
> matrix/transformations to all points of the object, to get that uneven
> scaling, is that true?
The easiest way to understand the transformation is to consider a plane.
Pick any point as your origin, and then draw a unit circle in the plane
centered on the origin. If you were to apply the transformation r -> r/|r|,
where |r| is the mod or distance of the point from the origin, then all
points would be mapped onto the unit circle. You can see this by
considering the length of an arbitrary transformed point: |(r/|r|)| =
|r|/|r| = 1. The transformation used in the image is r -> r/(|r|^2).
Because of the square, now every point outside the unit circle will be
moved inside the unit circle, and every point inside will be moved outside.
Again, you can see this by looking at the length of an arbitrary
transformed point: |r/(|r|^2)| = |r|/(|r|^2) = 1/|r|. Of course r can refer
to a point in three dimensions, and so the above argument is identical with
the unit circle replaced by a unit sphere. The resulting uneven scaling is
most easily understood by considering a plot of x and 1/x. One is a
straight line, the other is a curve.
The last point is that you apply the transformation to the vertices of your
polygons, so the final object has the same number of polygons, just moved
around. This is also the reason that the large parts of the object look
like they have a course mesh, while the small parts look quite smooth.
Creating the geometry in Mathematica is quite easy, although I don't know if
it is possible to do the same thing directly in povray, or if there would
be any advantages. I can't think of a way to avoid dealing with the
vertices of polygons you wish to transform, and so that seems to rule out
using the basic shapes that come with povray.
Post a reply to this message
|
|
| |
| |
|
|
|
|
| |
|
|