|
|
|
|
|
|
| |
| |
|
|
|
|
| |
| |
|
|
This is a great tool - one that is obvious in retrospect, but I had never
thought of.
It's great that it's possible to save an image with a certain gamma and then use
it as a height field, but the obvious question that affects the real utility of
this is:
Is it possible to READ the existing, non-gamma modified image in using a certain
gamma value for use in a height field?
So, for example, use TdG's gamma 1.0 image to generate his gamma 2.2 height
field?
Post a reply to this message
|
|
| |
| |
|
|
|
|
| |
| |
|
|
Am 05.03.2018 um 14:27 schrieb Bald Eagle:
> This is a great tool - one that is obvious in retrospect, but I had never
> thought of.
>
> It's great that it's possible to save an image with a certain gamma and then use
> it as a height field, but the obvious question that affects the real utility of
> this is:
>
> Is it possible to READ the existing, non-gamma modified image in using a certain
> gamma value for use in a height field?
>
> So, for example, use TdG's gamma 1.0 image to generate his gamma 2.2 height
> field?
Well, yes, absolutely: In the height field, just specify "gamma FLOAT"
after the image file name.
I think you need to specify "gamma 1/2.2" for the intended effect.
There may be slight differences due to different rounding, but other
than that it should work just fine.
Post a reply to this message
|
|
| |
| |
|
|
|
|
| |
| |
|
|
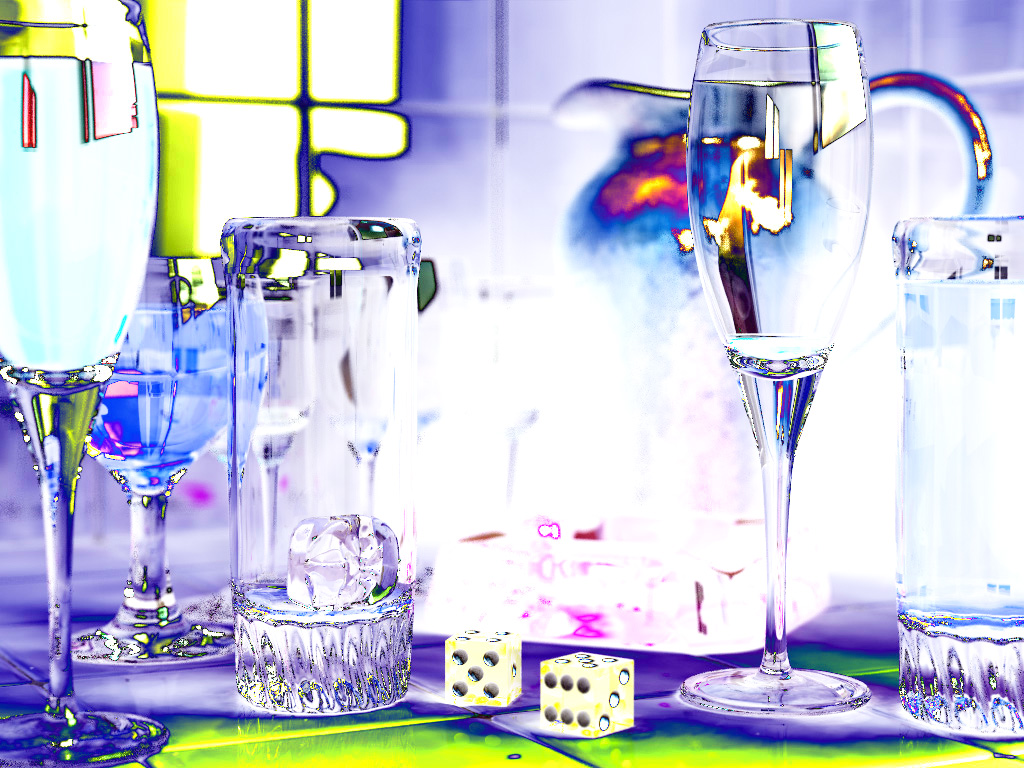
Stephen <mca### [at] aol com> wrote:
> Has anyone tried to produce a solarisation effect?
Hi,
with a simple approach I got this image - here is the code
// render with image resolution and No AA. Method is very memory intensive for
large image sizes!
#version 3.7;
global_settings {
assumed_gamma 1
}
#include "stdinc.inc"
camera {
orthographic
location <0,0,-2>
look_at 0
right x*image_width
up y*image_height
}
#declare image_width_Old = image_width;
#declare image_ratio = image_width/image_height;
#declare image_height_Old = image_width_Old/image_ratio;
#declare pig_map =
function {
pigment {
image_map {jpeg "glasses" gamma 2.2}
scale <image_width_Old,image_height_Old,1>
}
}
#declare nx = 0;
#while (nx < image_width)
#declare ny = 0;
#while (ny < image_height)
#declare paint_pig = pig_map (nx+0.5,ny+0.5,0);
box {
0, 1
pigment {color srgb <max (paint_pig.x,
1-paint_pig.x),max (paint_pig.y, 1-paint_pig.y),max (paint_pig.z,
1-paint_pig.z)>*2-1}
finish {emission 1 diffuse 0}
translate <nx-image_width*0.5,ny-image_height*0.5,0>
}
#declare ny = ny+1;
#end
#declare nx = nx+1;
#debug concat (str (nx/image_width*100, 0, 1)," % processed \n")
#end
Norbert com> wrote:
> Has anyone tried to produce a solarisation effect?
Hi,
with a simple approach I got this image - here is the code
// render with image resolution and No AA. Method is very memory intensive for
large image sizes!
#version 3.7;
global_settings {
assumed_gamma 1
}
#include "stdinc.inc"
camera {
orthographic
location <0,0,-2>
look_at 0
right x*image_width
up y*image_height
}
#declare image_width_Old = image_width;
#declare image_ratio = image_width/image_height;
#declare image_height_Old = image_width_Old/image_ratio;
#declare pig_map =
function {
pigment {
image_map {jpeg "glasses" gamma 2.2}
scale <image_width_Old,image_height_Old,1>
}
}
#declare nx = 0;
#while (nx < image_width)
#declare ny = 0;
#while (ny < image_height)
#declare paint_pig = pig_map (nx+0.5,ny+0.5,0);
box {
0, 1
pigment {color srgb <max (paint_pig.x,
1-paint_pig.x),max (paint_pig.y, 1-paint_pig.y),max (paint_pig.z,
1-paint_pig.z)>*2-1}
finish {emission 1 diffuse 0}
translate <nx-image_width*0.5,ny-image_height*0.5,0>
}
#declare ny = ny+1;
#end
#declare nx = nx+1;
#debug concat (str (nx/image_width*100, 0, 1)," % processed \n")
#end
Norbert
Post a reply to this message
Attachments:
Download 'glasses solarized.jpg' (359 KB)
Preview of image 'glasses solarized.jpg'
|
|
| |
| |
|
|
|
|
| |
| |
|
|
On 05/03/2018 15:13, Norbert Kern wrote:
> Stephen <mca### [at] aolcom> wrote:
>
>> Has anyone tried to produce a solarisation effect?
>
> Hi,
> with a simple approach I got this image - here is the code
>
Oo! shiny. I like.
You are on a roll, Norbert. :-)
> // render with image resolution and No AA. Method is very memory intensive for
> large image sizes!
>
> #version 3.7;
>
> global_settings {
> assumed_gamma 1
> }
>
> #include "stdinc.inc"
>
> camera {
> orthographic
> location <0,0,-2>
> look_at 0
> right x*image_width
> up y*image_height
> }
>
> #declare image_width_Old = image_width;
> #declare image_ratio = image_width/image_height;
> #declare image_height_Old = image_width_Old/image_ratio;
>
> #declare pig_map =
> function {
> pigment {
> image_map {jpeg "glasses" gamma 2.2}
> scale <image_width_Old,image_height_Old,1>
> }
> }
>
> #declare nx = 0;
> #while (nx < image_width)
> #declare ny = 0;
> #while (ny < image_height)
> #declare paint_pig = pig_map (nx+0.5,ny+0.5,0);
> box {
> 0, 1
> pigment {color srgb <max (paint_pig.x,
> 1-paint_pig.x),max (paint_pig.y, 1-paint_pig.y),max (paint_pig.z,
> 1-paint_pig.z)>*2-1}
> finish {emission 1 diffuse 0}
> translate <nx-image_width*0.5,ny-image_height*0.5,0>
> }
> #declare ny = ny+1;
> #end
> #declare nx = nx+1;
> #debug concat (str (nx/image_width*100, 0, 1)," % processed \n")
> #end
>
>
> Norbert
>
>
--
Regards
Stephen
Post a reply to this message
|
|
| |
| |
|
|
|
|
| |
| |
|
|
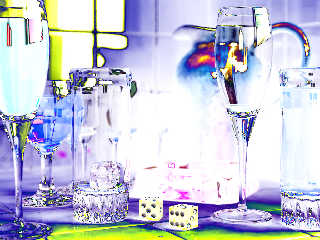
On 05/03/2018 16:50, Stephen wrote:
>
> Oo! shiny. I like.
>
> You are on a roll, Norbert. :-)
It looks good as a negative, too (also).
--
Regards
Stephen
Post a reply to this message
|
|
| |
| |
|
|
|
|
| |
| |
|
|
"Norbert Kern" <nor### [at] t-onlinede> wrote:
> Stephen <mca### [at] aolcom> wrote:
>
> > Has anyone tried to produce a solarisation effect?
>
> Hi,
> with a simple approach I got this image - here is the code
>
Brilliant! I actually didn't think it was possible.
Post a reply to this message
|
|
| |
| |
|
|
|
|
| |
| |
|
|
> On 4-3-2018 18:12, Norbert Kern wrote:
>> #declare p_o_x = function {p_original (x,y,z).x}
>> #declare p_o_y = function {p_original (x,y,z).y}
>> #declare p_o_z = function {p_original (x,y,z).z}
>>
>
> I had thought to use:
>
> #declare p_o_R = function {p_original (x,y,z).red}
> #declare p_o_G = function {p_original (x,y,z).green}
> #declare p_o_B = function {p_original (x,y,z).blue}
>
> But that should yield the same thing I guess. I was going to code that...
>
Yes, both forms will yield the same end result, but, the second form is
recommended whenever you are dealing with colours.
Alain
Post a reply to this message
|
|
| |
| |
|
|
|
|
| |
| |
|
|
Thomas de Groot <tho### [at] degrootorg> wrote:
> >
> > I shall make a small test scene. A way for me to remember stuff.
> >
>
> Like this. Left, image gamma is 1.0; right, image gamma is 2.2.
>
Nice! And you picked a good pattern to show it off.
The real *fun* begins when you take a height_field image (made elsewhere) and
*combine* it with a procedural pigment or pattern-- both of which can be
gamma-bent. It's a bit more complicated to code, but I was working up an example
anyway, and will post in a new thread. (BTW, some other interesting effects can
be gotten by making the gamma *less than* 1.0.)
Post a reply to this message
|
|
| |
| |
|
|
|
|
| |
| |
|
|
"Kenneth" <kdw### [at] gmailcom> wrote:
> (There's also a HF difference
> between images SAVED at different gamma values, for the same reason-- 1.0 being
> a linear slope, 2.2 being more of a curve.)
Uh, I'm not so sure about that now. I made a test scene a couple of weeks ago
that showed this. (Or so I thought.) Now, a newer test scene shows no
difference-- producing the same 'linear' height_field slopes no matter what
gamma the images are saved at (with either JPEG *or* PNG image files.) But then
again, I'm using my older wonky Photoshop 5 to make and save the original
images, which can't be completely trusted as far as gamma goes. Hmm, a mystery.
Post a reply to this message
|
|
| |
| |
|
|
|
|
| |
| |
|
|
On 5-3-2018 14:46, clipka wrote:
> Am 05.03.2018 um 14:27 schrieb Bald Eagle:
>> This is a great tool - one that is obvious in retrospect, but I had never
>> thought of.
>>
>> It's great that it's possible to save an image with a certain gamma and then use
>> it as a height field, but the obvious question that affects the real utility of
>> this is:
>>
>> Is it possible to READ the existing, non-gamma modified image in using a certain
>> gamma value for use in a height field?
>>
>> So, for example, use TdG's gamma 1.0 image to generate his gamma 2.2 height
>> field?
>
> Well, yes, absolutely: In the height field, just specify "gamma FLOAT"
> after the image file name.
>
> I think you need to specify "gamma 1/2.2" for the intended effect.
>
> There may be slight differences due to different rounding, but other
> than that it should work just fine.
>
And that is exactly what I did above; I see that I generated some
confusion with BaldEagle :-) The - single - original height_field image
has an unknown (to me) gamma. It is in POV-Ray that I declare the gamma
value to use, like Clipka said [code snippet]:
pigment {
image_map {
tga "Apophysis_06_hfisland.tga" gamma 2.2 //or 1.1
map_type 0
interpolate 2
}
}
--
Thomas
Post a reply to this message
|
|
| |
| |
|
|
|
|
| |
|
|