 |
 |
|
 |
|
 |
|  |
|  |
|
 |
|
 |
|  |
|  |
|
 |
> This should also be animated, so the caustics change realistically.
> See the following video:
> https://www.youtube.com/watch?v=Popg7ej4AUU (Pool first at minute 4:33)
That's a fascinating video, thanks for sharing the link.
> Attached an example with faked caustics of my current implementation (with
> bozo).
Your attachment is missing here :-(
>
> Does anyone have a tip how to get this as realistic as possible ?
>
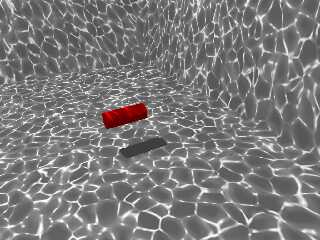
I think it is possible to get a good 'faked caustics' effect for your pool
water.
Ignoring the ior of the water for the moment, the caustics effect is produced by
the top surface of the water-- whether that is created by a simple 'normal'
pattern or with actual geometry (like a height_field). Actual geometry is
better. Applying a simple pigment to the water will not work.
It has been years since I worked with faked caustics, but I have put together a
simple test scene to play around with. It has two choices, both of which use
only a simple 'bumps' normal (which is far from ideal!) No actual 'wave'
geometry. The intensity or brightness of the caustics is the main problem to
overcome, as is the proper pattern to use. That will take some experimenting!
My own first thought would be to replace the water 'box' with a height_field--
made from some overlapping sine_wave or scallop_wave functions to create the
'wave' geometry. That gets tricky, of course. Take a look at "3.6.2.1.12.2
Function Image" in the documentation as a starting point; it has an example of a
'procedural' height_field.
-------
#version 3.7; // or whatever
global_settings{assumed_gamma 1.0}
#default {finish{ambient .05 emission 0 diffuse .8}}
#declare WHICH_WATER_TO_USE = 1; // 1 or 2
camera {
perspective
location <0, 4, -1.7>
look_at <0, 0, 0>
right x*image_width/image_height
// direction z
angle 30
}
light_source {
0*x
color rgb 1
translate <20, 40, -5>
// rotate(-20 + 90*clock)*z
}
background {rgb <1,.9,.7>}
// pool and water
union{
difference{ // pool shell
box{0,1 translate <-0.5,0,-0.5>}
box{0,1 translate <-0.5,.1,-0.5> scale <0.9,1.2,0.9>}
pigment{rgb 0.5}
}
#if(WHICH_WATER_TO_USE=1)
// full water in the pool
box{0,1 translate <-0.5,0.01,-0.5> scale <0.91,0.8,0.91>
hollow // may not be necessary
pigment{rgbf <0.6,1,1,0.9>}
normal{
bumps 0.04
scale 0.06*<1/1.5,1/0.5,1>
no_bump_scale
scallop_wave // may not have any effect?
}
interior{
ior 1.15
caustics 1.0 // or higher
}
}
#else
// a thin box (the bumps amount and the caustics amount interplay)
box{0,1 translate <-.5,0,-.5>
scale <.99,.01,.99> // try changing y-thickness
translate <0,.8,0>
pigment{rgbf <0.6,1,1,0.9>}
normal{
bumps .05
scale 0.08*<1/1.5,1/0.5,1>
no_bump_scale
scallop_wave // may not have any effect?
}
interior{ caustics .5}
//no_image // to see the pure caustics effect
}
#end
scale <1.5,0.5,1>
}
Post a reply to this message
|
 |
|  |
|  |
|
 |
|
 |
|  |
|  |
|
 |
wrote:
> Hi,
> I am currently working on a pool scene and would like to render realistic
> cautics there.
> Something like this:
> https://community.foundry.com/discuss/post/1221838/content/130646
> This should also be animated, so the caustics change realistically.
> See the following video:
> https://www.youtube.com/watch?v=Popg7ej4AUU (Pool first at minute 4:33)
>
> I tried it with photons, but this is not possible because of the enormous render
> time (there is also a larger mesh object in the scene).
> Secondly, I try it with an overlaid texture, based on a partially-transparent
> crackle.
> But the result is pretty modest in both cases.
> Attached an example with faked caustics of my current implementation (with
> bozo).
>
> Does anyone have a tip how to get this as realistic as possible ?
Maybe try the Fountain animation by Peterson Trethewey for inspiration?
http://paulbourke.net/miscellaneous/scc5/final.html
Post a reply to this message
|
 |
|  |
|  |
|
 |
|
 |
|  |
|  |
|
 |
Le 2022-03-06 à 18:11, a écrit :
> Hi,
> I am currently working on a pool scene and would like to render realistic
> cautics there.
> Something like this:
> https://community.foundry.com/discuss/post/1221838/content/130646
> This should also be animated, so the caustics change realistically.
> See the following video:
> https://www.youtube.com/watch?v=Popg7ej4AUU (Pool first at minute 4:33)
>
> I tried it with photons, but this is not possible because of the enormous render
> time (there is also a larger mesh object in the scene).
> Secondly, I try it with an overlaid texture, based on a partially-transparent
> crackle.
> But the result is pretty modest in both cases.
> Attached an example with faked caustics of my current implementation (with
> bozo).
>
> Does anyone have a tip how to get this as realistic as possible ?
>
>
>
>
>
In your case, using the caustics feature may be good enough.
The drawback is that the effect in independent from the distance, but,
especially if seen from above the surface, it may not even be obvious.
This renders a LOT faster than using photons.
Post a reply to this message
|
 |
|  |
|  |
|
 |
|
 |
|  |
|  |
|
 |
Hi,
I have been looking into the topic of caustics once again. Starting from a scene
that I found on the Internet, I have adapted for a need and have come after some
trying also to a useful result (1.Appendix "Photons..."). However, setting the
photon parameters is quite difficult until you get a good result. Especially you
have to override the number of photons (in my case with "spacing").
But still the problem with the needed computing time remains. The example in the
attachment takes about 100sec to calculate, my later scene, where I want to use
this, *over 10 hours*, where 99% goes for the photon calculation and the actual
render takes about 5 min. (And saving the photons is not possible, because this
is to be used later in an animation).
Therefore I have tried other variants:
1. cautics from Povray itself: here I got a "nice" result
2. a superimposed texture: you can forget it, it looks like crap in all
attempts.
3. simulation via a second, covered bright light source. A light source is
simply surrounded by a partially transparent sphere to achieve the corresponding
effects. Hereby I achieved the best result so far (attachment "lightsource...").
The problem here is that first the complete scene is covered with the texture.
If there are also areas in the picture that are outside the water, the light
source must be blocked additionally, so that these areas are not illuminated.
Furthermore, the cast shadows are just as sharp as with any other light source,
but I think you can live with that.
Translated with www.DeepL.com/Translator (free version)
Attachments:
http://www.cfjh.de/gal/div/pov/lightsource.jpg
http://www.cfjh.de/gal/div/pov/lightsource.zip
http://www.cfjh.de/gal/div/pov/photons_0.1.jpg
http://www.cfjh.de/gal/div/pov/photons.zip
Post a reply to this message
Attachments:
Download 'lightsource.jpg' (113 KB)
Preview of image 'lightsource.jpg'

|
 |
|  |
|  |
|
 |
|
 |
|  |
|  |
|
 |
On 12/03/2022 6:30 am, Juergen wrote:
> The problem here is that first the complete scene is covered with the texture.
Light Group Might be the solution.
Light groups make it possible to create a union of light sources and
objects, where the objects in the group are illuminated by the lights in
the group or, if so desired, by the global light sources as well.
m@
Post a reply to this message
|
 |
|  |
|  |
|
 |
|
 |
|  |
|  |
|
 |
Le 2022-03-11 à 20:21, m@b a écrit :
> On 12/03/2022 6:30 am, Juergen wrote:
>> The problem here is that first the complete scene is covered with the
>> texture.
>
> Light Group Might be the solution.
>
> Light groups make it possible to create a union of light sources and
> objects, where the objects in the group are illuminated by the lights in
> the group or, if so desired, by the global light sources as well.
>
> m@
Another solution could be the use of projected_thru attribute for a light.
It create an «aperture» thru witch the light is projected. A bit like an
anti-shadow. Here, you just need a thin, untextured, box set just at the
water level.
light_group don't work with photons.
projected_thru DO work with photons.
Post a reply to this message
|
 |
|  |
|  |
|
 |
|
 |
|  |
|  |
|
 |
Alain Martel <kua### [at] videotron ca> wrote:
> > On 12/03/2022 6:30 am, Juergen wrote:
> >> The problem here is that first the complete scene is covered with the
> >> texture.
> >
> > Light Group Might be the solution.
> >
> > Light groups make it possible to create a union of light sources and
> > objects, where the objects in the group are illuminated by the lights in
> > the group or, if so desired, by the global light sources as well.
> >
> > m@
>
> Another solution could be the use of projected_thru attribute for a light.
> anti-shadow. Here, you just need a thin, untextured, box set just at the
> water level.
>
> light_group don't work with photons.
> projected_thru DO work with photons.
neat trick ! ca> wrote:
> > On 12/03/2022 6:30 am, Juergen wrote:
> >> The problem here is that first the complete scene is covered with the
> >> texture.
> >
> > Light Group Might be the solution.
> >
> > Light groups make it possible to create a union of light sources and
> > objects, where the objects in the group are illuminated by the lights in
> > the group or, if so desired, by the global light sources as well.
> >
> > m@
>
> Another solution could be the use of projected_thru attribute for a light.
> anti-shadow. Here, you just need a thin, untextured, box set just at the
> water level.
>
> light_group don't work with photons.
> projected_thru DO work with photons.
neat trick !
Post a reply to this message
|
 |
|  |
|  |
|
 |
|
 |
|  |
|  |
|
 |
This is a very beautiful effect. It is especially impressive because the
'caustics' are not produced by 'normals' or actual geometry, but by simply
projecting a light_source through a sophisticated texture on a small sphere. I
did not think that such a realistic effect could be achieved that way.
Congratulations!
I have been playing with your code; thanks for posting it.
To get a 'smoother' (blurred) effect, try replacing your 'sonne' light_source
with this area_light; the scene will take a somewhat longer time to render, but
certainly not as slowly as using photons.
//sonne
light_source {
<0,0,0>
color rgb 5
area_light
<.14, 0, 0> <0, 0, .14> // adjust values larger or smaller
5, 5
adaptive 0
jitter
circular
orient
translate <-50, 200, 0>
}
Post a reply to this message
Attachments:
Download 'caustics_sphere_with_area_light.jpg' (63 KB)
Preview of image 'caustics_sphere_with_area_light.jpg'

|
 |
|  |
|  |
|
 |
|
 |
|  |
|  |
|
 |
"Kenneth" <kdw### [at] gmail com> wrote:
>
> To get a 'smoother' (blurred) effect, try replacing your 'sonne' light_source
> with this area_light...
>
Or, use BOTH of the lights, in the same location-- and perhaps with different
colors for each...
// Sonne
light_source {
<-50,200, 0>
color 3*<1,1,.5>
}
light_source {
<0,0,0>
color rgb 6*<0,1,.92>
area_light
<.2, 0, 0> <0, 0, .2>
5, 5
adaptive 0
jitter
circular
orient
translate <-50, 200, 0>
} com> wrote:
>
> To get a 'smoother' (blurred) effect, try replacing your 'sonne' light_source
> with this area_light...
>
Or, use BOTH of the lights, in the same location-- and perhaps with different
colors for each...
// Sonne
light_source {
<-50,200, 0>
color 3*<1,1,.5>
}
light_source {
<0,0,0>
color rgb 6*<0,1,.92>
area_light
<.2, 0, 0> <0, 0, .2>
5, 5
adaptive 0
jitter
circular
orient
translate <-50, 200, 0>
}
Post a reply to this message
Attachments:
Download 'caustics_sphere_with_two_lights.jpg' (104 KB)
Preview of image 'caustics_sphere_with_two_lights.jpg'

|
 |
|  |
|  |
|
 |
|
 |
|  |
|  |
|
 |
Le 2022-03-14 à 13:19, Kenneth a écrit :
> "Kenneth" <kdw### [at] gmail com> wrote:
>>
>> To get a 'smoother' (blurred) effect, try replacing your 'sonne' light_source
>> with this area_light...
>>
>
> Or, use BOTH of the lights, in the same location-- and perhaps with different
> colors for each...
>
> // Sonne
> light_source {
> <-50,200, 0>
> color 3*<1,1,.5>
> }
>
> light_source {
> <0,0,0>
> color rgb 6*<0,1,.92>
> area_light
> <.2, 0, 0> <0, 0, .2>
> 5, 5
> adaptive 0
> jitter
> circular
> orient
> translate <-50, 200, 0>
> }
Regarding your area_light
With adaptive 0, you may even use a 129 by 129 array with almost no
performance penalty. That's the wonder of the adaptive mechanism. com> wrote:
>>
>> To get a 'smoother' (blurred) effect, try replacing your 'sonne' light_source
>> with this area_light...
>>
>
> Or, use BOTH of the lights, in the same location-- and perhaps with different
> colors for each...
>
> // Sonne
> light_source {
> <-50,200, 0>
> color 3*<1,1,.5>
> }
>
> light_source {
> <0,0,0>
> color rgb 6*<0,1,.92>
> area_light
> <.2, 0, 0> <0, 0, .2>
> 5, 5
> adaptive 0
> jitter
> circular
> orient
> translate <-50, 200, 0>
> }
Regarding your area_light
With adaptive 0, you may even use a 129 by 129 array with almost no
performance penalty. That's the wonder of the adaptive mechanism.
Post a reply to this message
|
 |
|  |
|  |
|
 |
|
 |
|  |
|
 |


![]()