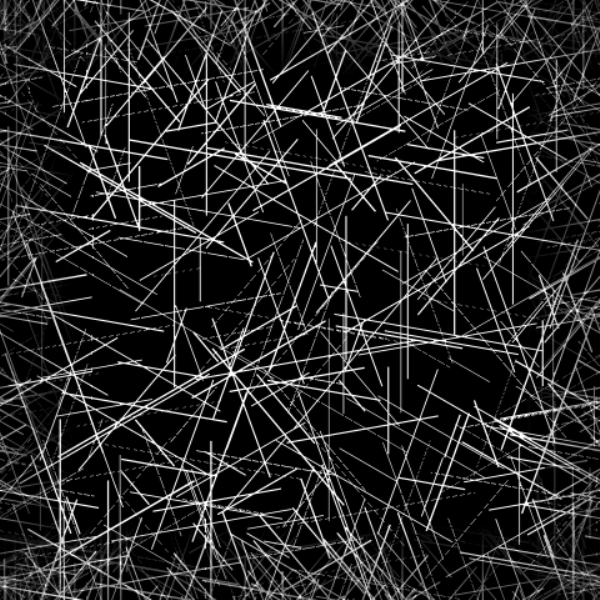
|
|
|
|
|
|
| |
| |
|
|
|
|
| |
| |
|
|
I'm sure everyone has seen this at some point:

When you look at a light source's reflection on a smooth piece of glass or metal
or plastic, the scratches all tend to appear as a series of arcs and lines
roughly in a circular pattern centered around the "hotspot".

I was wondering if anyone has ever attempted to replicate this effect, and
perhaps has an optical explanation for why the scratches appear in a circular
pattern.


https://st.depositphotos.com/1032492/3139/i/950/depositphotos_31397463-stock-photo-texture-of-scratched-metal-surface.j
pg

https://thumbs.dreamstime.com/thumblarge_2060/20605588.jpg

http://cpi.studiod.com/getty/caf73bdee00eeaa57d5e24c213f6b09c.jpg

http://www.performancemotorcare.com/blog/wp-content/uploads/2011/06/How_to_avoid_swirl_marks.jpg

https://www.wavesdetailpro.com.au/wp-content/uploads/2017/08/poi-1.jpg

..... you get the idea.
Post a reply to this message
|
|
| |
| |
|
|
|
|
| |
| |
|
|
On 23-1-2019 1:46, Bald Eagle wrote:
> I'm sure everyone has seen this at some point:
>
> When you look at a light source's reflection on a smooth piece of glass or metal
> or plastic, the scratches all tend to appear as a series of arcs and lines
> roughly in a circular pattern centered around the "hotspot".
>
> I was wondering if anyone has ever attempted to replicate this effect, and
> perhaps has an optical explanation for why the scratches appear in a circular
> pattern.
>
>
>
https://st.depositphotos.com/1032492/3139/i/950/depositphotos_31397463-stock-photo-texture-of-scratched-metal-surface.j
> pg

This one gets 404.

>
> https://thumbs.dreamstime.com/thumblarge_2060/20605588.jpg
>
> http://cpi.studiod.com/getty/caf73bdee00eeaa57d5e24c213f6b09c.jpg
>
>
http://www.performancemotorcare.com/blog/wp-content/uploads/2011/06/How_to_avoid_swirl_marks.jpg
>
> https://www.wavesdetailpro.com.au/wp-content/uploads/2017/08/poi-1.jpg
>
> ..... you get the idea.
>
>

Let me try an explanation: assuming that all scratches are randomly
orientated, only those parallel(?) to the light source get reflected
maximally, all others are dimmer or - when perpendicular to the light
source - do not reflect at all.

--
Thomas
Post a reply to this message
|
|
| |
| |
|
|
|
|
| |
| |
|
|
Thomas de Groot <tho### [at] degroot org> wrote:
> On 23-1-2019 1:46, Bald Eagle wrote:
> > I'm sure everyone has seen this at some point:
> >
> > When you look at a light source's reflection on a smooth piece of glass or metal
> > or plastic, the scratches all tend to appear as a series of arcs and lines
> > roughly in a circular pattern centered around the "hotspot".
> >
> > I was wondering if anyone has ever attempted to replicate this effect, and
> > perhaps has an optical explanation for why the scratches appear in a circular
> > pattern.
> >
> >
> >
https://st.depositphotos.com/1032492/3139/i/950/depositphotos_31397463-stock-photo-texture-of-scratched-metal-surfa
ce.j
> > pg
>
> This one gets 404.
Just needs the lopped off "pg" added to end. Same object as 2nd below, a smaller
size.
> > https://thumbs.dreamstime.com/thumblarge_2060/20605588.jpg
> >
> > http://cpi.studiod.com/getty/caf73bdee00eeaa57d5e24c213f6b09c.jpg
> >
> >
http://www.performancemotorcare.com/blog/wp-content/uploads/2011/06/How_to_avoid_swirl_marks.jpg
> >
> > https://www.wavesdetailpro.com.au/wp-content/uploads/2017/08/poi-1.jpg
> >
> > ..... you get the idea.
> >
> >
>
> Let me try an explanation: assuming that all scratches are randomly
> orientated, only those parallel(?) to the light source get reflected
> maximally, all others are dimmer or - when perpendicular to the light
> source - do not reflect at all.
>
> --
> Thomas
Not sure if that would be the way to put it, since mainly perpendicular
scratches are what reflect light most. Not parallel to the viewer/camera and
light source, because that would be along a line of view... I think.
Anyway... yes, this was something tried many years ago by me at least. I'm sure
others did too, probably before I ever did.
I couldn't locate a scene file of mine, and no luck finding anything online
either, so I retried something similar again now. Was to see how reflected light
formed those circular areas among twigs and thin branches (wet/icy is best).
So not exactly the scratches idea, mainly to show the effect on 'sticks', but I
did try that too and failed. My feeble attempt at a scene file here, notice the
white highlights on the sticks formed around the white sphere light_source:
// BEGIN SCENE FILE
//cmd: +w640 +h480 +am2 +a0.2 +r2
#version 3.7;
global_settings{ assumed_gamma 1.0 }
camera {
perspective angle 90
location <1.0, 3.0, -9.0>
right x*image_width/image_height
look_at <2.0, 3.0, 4.0>
}
light_source{< -6,-1,-9> color rgb <1,0,0> }
light_source{< 6,3,9> color rgb 1
looks_like {sphere {0,1 pigment {rgb 1} finish {emission 1}}}
area_light 1*x,1*y,8,8 area_illumination}
sky_sphere { pigment { gradient <0,1,0>
color_map { [0.0 rgb <0.3,0.2,0.1>]
[0.2 rgb <0.1,0.1,0.1>]
[0.5 rgb <0.0,0.0,0.0>]
[1.0 rgb <0.2,0.3,0.5>]
}
scale 2
}
}
// checkered floor
plane{ <0,1,0>, 0
texture{
pigment{
checker color rgb <0.5,0.5,0.5> color rgb <0.1,0.1,0.1>
scale 5
}
finish { phong 0.1}
}
translate -9*y
}
// random sticks
#for (R,1,333)
#local S=seed(R*9);
#local Rx=rand(S)*9;
cylinder {
-x,x,1
scale <3*Rx,0.1,0.1>
texture {
pigment {rgb 0}
finish {specular 1 roughness 0.05}
}
rotate <0,90,180>*Rx
translate <3*Rx,2*Rx,1*Rx>
rotate <360,360,360>*Rx
//scale 0.5
translate <-3,1,13>
}
#end
// reflective sphere with scratches/bumps?
sphere { <0,0,0>, 1.0 scale <1,1,1>
texture { pigment {rgb 0}
normal {
average
normal_map {
#for (R,1,33) //create axis lines, rotate randomly
#local S=seed(R);
#local Rx=rand(S)*3;
[1 function {(x)} bump_size 1 ramp_wave
frequency 33 rotate <0,360,360>*Rx]
[1 function {(y)} bump_size 1 ramp_wave
frequency 33 rotate <360,0,360>*Rx]
[1 function {(z)} bump_size 1 ramp_wave
frequency 33 rotate <360,360,0>*Rx]
#end
}
}
finish {
specular 1 roughness 0.02 reflection {0.1,0.9}
}
}
scale 3 rotate <0,0,0> translate <-3,1.5,3>
}
// reflective cylinder with curved scratches/bumps?
cylinder { <0,0,0>, <0,0,1>, 1.0 scale <1,1,1>
texture { pigment {rgb 0}
normal {
average
normal_map {
#for (R,1,33) //create axis lines, rotate randomly
#local S=seed(R);
#local Rx=rand(S)*3;
[1
//function {(x)}
onion scale <11,1,1>
bump_size 1 ramp_wave
frequency 50 rotate <0,360,360>*Rx]
[1
//function {(x)}
onion scale <1,11,1>
bump_size 1 ramp_wave
frequency 50 rotate <360,0,360>*Rx]
[1
//function {(x)}
onion scale <1,1,11>
bump_size 1 ramp_wave
frequency 50 rotate <360,360,0>*Rx]
#end
}
}
finish {
specular 1 roughness 0.02 reflection {0.1,0.9}
}
}
scale 4 rotate <-10,-15,0> translate <-4,-6,6>
}
// END SCENE FILE org> wrote:
> On 23-1-2019 1:46, Bald Eagle wrote:
> > I'm sure everyone has seen this at some point:
> >
> > When you look at a light source's reflection on a smooth piece of glass or metal
> > or plastic, the scratches all tend to appear as a series of arcs and lines
> > roughly in a circular pattern centered around the "hotspot".
> >
> > I was wondering if anyone has ever attempted to replicate this effect, and
> > perhaps has an optical explanation for why the scratches appear in a circular
> > pattern.
> >
> >
> >
https://st.depositphotos.com/1032492/3139/i/950/depositphotos_31397463-stock-photo-texture-of-scratched-metal-surfa
ce.j
> > pg
>
> This one gets 404.
Just needs the lopped off "pg" added to end. Same object as 2nd below, a smaller
size.
> > https://thumbs.dreamstime.com/thumblarge_2060/20605588.jpg
> >
> > http://cpi.studiod.com/getty/caf73bdee00eeaa57d5e24c213f6b09c.jpg
> >
> >
http://www.performancemotorcare.com/blog/wp-content/uploads/2011/06/How_to_avoid_swirl_marks.jpg
> >
> > https://www.wavesdetailpro.com.au/wp-content/uploads/2017/08/poi-1.jpg
> >
> > ..... you get the idea.
> >
> >
>
> Let me try an explanation: assuming that all scratches are randomly
> orientated, only those parallel(?) to the light source get reflected
> maximally, all others are dimmer or - when perpendicular to the light
> source - do not reflect at all.
>
> --
> Thomas
Not sure if that would be the way to put it, since mainly perpendicular
scratches are what reflect light most. Not parallel to the viewer/camera and
light source, because that would be along a line of view... I think.
Anyway... yes, this was something tried many years ago by me at least. I'm sure
others did too, probably before I ever did.
I couldn't locate a scene file of mine, and no luck finding anything online
either, so I retried something similar again now. Was to see how reflected light
formed those circular areas among twigs and thin branches (wet/icy is best).
So not exactly the scratches idea, mainly to show the effect on 'sticks', but I
did try that too and failed. My feeble attempt at a scene file here, notice the
white highlights on the sticks formed around the white sphere light_source:
// BEGIN SCENE FILE
//cmd: +w640 +h480 +am2 +a0.2 +r2
#version 3.7;
global_settings{ assumed_gamma 1.0 }
camera {
perspective angle 90
location <1.0, 3.0, -9.0>
right x*image_width/image_height
look_at <2.0, 3.0, 4.0>
}
light_source{< -6,-1,-9> color rgb <1,0,0> }
light_source{< 6,3,9> color rgb 1
looks_like {sphere {0,1 pigment {rgb 1} finish {emission 1}}}
area_light 1*x,1*y,8,8 area_illumination}
sky_sphere { pigment { gradient <0,1,0>
color_map { [0.0 rgb <0.3,0.2,0.1>]
[0.2 rgb <0.1,0.1,0.1>]
[0.5 rgb <0.0,0.0,0.0>]
[1.0 rgb <0.2,0.3,0.5>]
}
scale 2
}
}
// checkered floor
plane{ <0,1,0>, 0
texture{
pigment{
checker color rgb <0.5,0.5,0.5> color rgb <0.1,0.1,0.1>
scale 5
}
finish { phong 0.1}
}
translate -9*y
}
// random sticks
#for (R,1,333)
#local S=seed(R*9);
#local Rx=rand(S)*9;
cylinder {
-x,x,1
scale <3*Rx,0.1,0.1>
texture {
pigment {rgb 0}
finish {specular 1 roughness 0.05}
}
rotate <0,90,180>*Rx
translate <3*Rx,2*Rx,1*Rx>
rotate <360,360,360>*Rx
//scale 0.5
translate <-3,1,13>
}
#end
// reflective sphere with scratches/bumps?
sphere { <0,0,0>, 1.0 scale <1,1,1>
texture { pigment {rgb 0}
normal {
average
normal_map {
#for (R,1,33) //create axis lines, rotate randomly
#local S=seed(R);
#local Rx=rand(S)*3;
[1 function {(x)} bump_size 1 ramp_wave
frequency 33 rotate <0,360,360>*Rx]
[1 function {(y)} bump_size 1 ramp_wave
frequency 33 rotate <360,0,360>*Rx]
[1 function {(z)} bump_size 1 ramp_wave
frequency 33 rotate <360,360,0>*Rx]
#end
}
}
finish {
specular 1 roughness 0.02 reflection {0.1,0.9}
}
}
scale 3 rotate <0,0,0> translate <-3,1.5,3>
}
// reflective cylinder with curved scratches/bumps?
cylinder { <0,0,0>, <0,0,1>, 1.0 scale <1,1,1>
texture { pigment {rgb 0}
normal {
average
normal_map {
#for (R,1,33) //create axis lines, rotate randomly
#local S=seed(R);
#local Rx=rand(S)*3;
[1
//function {(x)}
onion scale <11,1,1>
bump_size 1 ramp_wave
frequency 50 rotate <0,360,360>*Rx]
[1
//function {(x)}
onion scale <1,11,1>
bump_size 1 ramp_wave
frequency 50 rotate <360,0,360>*Rx]
[1
//function {(x)}
onion scale <1,1,11>
bump_size 1 ramp_wave
frequency 50 rotate <360,360,0>*Rx]
#end
}
}
finish {
specular 1 roughness 0.02 reflection {0.1,0.9}
}
}
scale 4 rotate <-10,-15,0> translate <-4,-6,6>
}
// END SCENE FILE
Post a reply to this message
|
|
| |
| |
|
|
From: Thomas de Groot
Subject: Re: Apparent circular pattern of scratches
Date: 23 Jan 2019 06:46:26
Message: <5c485412@news.povray.org>
|
|
|
| |
| |
|
|
On 23-1-2019 9:47, omniverse wrote:

> Not sure if that would be the way to put it, since mainly perpendicular
> scratches are what reflect light most. Not parallel to the viewer/camera and
> light source, because that would be along a line of view... I think.

Well, I was not sure how to describe the orientation with regard to the
light source (and camera of course): parallel, perpendicular, a bit
confusing. You got the idea though.

--
Thomas
Post a reply to this message
|
|
| |
| |
|
|
|
|
| |
| |
|
|
Play with this (very rough):


#version 3.8;

global_settings {
   assumed_gamma 1.0
}

camera {
   location  <0, 100, -10>
   sky       y
   up        y
   direction z
   right     image_width/image_height
   angle     54
   look_at   <0, 0, 0>
}

light_source {
   <0,0,0>
   color rgb <1, 1, 0.7>*2
   translate <0, 50, 20>
}

background {rgb 0}

plane {
   y, 0
   pigment {rgb <0.1,0.1,0.1>}
   normal {
     average
     normal_map {
       [1.0 crackle 1.00 solid scale 1.5 warp {turbulence 0.05}]
       [0.4 granite 1.00 scale 0.001]
     }
     scale 5
   }
   finish {
     specular albedo 0.5
     diffuse albedo 0.5
     roughness 0.001
   }
}


--
Thomas
Post a reply to this message
|
|
| |
| |
|
|
|
|
| |
| |
|
|
Thomas de Groot <tho### [at] degrootorg> wrote:
> On 23-1-2019 9:47, omniverse wrote:
>
> > Not sure if that would be the way to put it, since mainly perpendicular
> > scratches are what reflect light most. Not parallel to the viewer/camera and
> > light source, because that would be along a line of view... I think.
>
> Well, I was not sure how to describe the orientation with regard to the
> light source (and camera of course): parallel, perpendicular, a bit
> confusing. You got the idea though.
>
> --
> Thomas

Maybe offset perpendicular... whatever. LOL

I like that crackle pattern idea, I was able to get the effect easily that way
going with your SDL.
Just probably needs a randomization of the averaged normal parameters.

Lighting/specular highlighting changes it drastically too.

/* from Thomas' circular scratches lighting effect */
camera {
   location  <11, 111, -11>
   sky       y
   up        y
   direction z
   right     x*image_width/image_height
   angle     50
   look_at   <0, 0, -11>
}

light_source {
   <0,0,0>
   color rgb <1, 1, 0.7>
   parallel point_at -y // spreads light
   area_light x*5,z*5,5,5
   area_illumination on // tones down shine
   translate <12, 123, 12>
}

background {rgb 0}

plane {
   y, 0
   pigment {rgb <0.1,0.1,0.1>}
   normal {
     average
     normal_map {
       [1.0 crackle 1.00 solid scale <3,0.5,0.1>
        warp {turbulence 0.05}]
       [1.0 crackle 1.00 solid scale <0.2,1,6>
        warp {turbulence 0.05}]
       [1.0 crackle 1.00 solid scale <4,1.5,1>
        warp {turbulence 0.05}]
       [1.0 crackle 1.00 solid scale <3,0.5,0.1> rotate 30*y
        warp {turbulence 0.05}]
       [1.0 crackle 1.00 solid scale <0.2,1,6> rotate -30*y
        warp {turbulence 0.05}]
       [1.0 crackle 1.00 solid scale <4,1.5,1> rotate 60*y
        warp {turbulence 0.05}]
       [1.0 crackle 1.00 solid scale <3,0.5,0.1> rotate 45*y
        warp {turbulence 0.05}]
       [1.0 crackle 1.00 solid scale <0.2,1,6> rotate -45*y
        warp {turbulence 0.05}]
       [1.0 crackle 1.00 solid scale <4,1.5,1> rotate 22.5*y
        warp {turbulence 0.05}]
       [0.4 granite 1.00 scale 0.001]
     }
     scale 3
   }
   finish {
     specular albedo 0.3
     diffuse albedo 0.5
     roughness 0.001
   }
}
Post a reply to this message
|
|
| |
| |
|
|
|
|
| |
| |
|
|
"omniverse" <omn### [at] charternet> wrote:
Retry of random sticks scene I posted before, thanks to Thomas for the different
pattern.
Still not sure what I'm doing with it, making guesses about warp {} and scaling.
Lighting and surface finishes really play a major part in how the scratches
appear. As does antialiasing and image/object size, to name other things.

// BEGIN SCENE
//cmd: +w640 +h480 +am2 +a0.2 +r2

#version 3.8;
global_settings{ assumed_gamma 1.0 }

camera {
 perspective angle 90
 location <1.0, 3.0, -9.0>
    right x*image_width/image_height
    look_at <2.0, 3.0, 4.0>
}

light_source { 0, color rgb <1,0.1,0.1>
 looks_like {
  sphere {0,3 pigment {rgb <1,0.1,0.1>}
  finish {emission <1,0.1,0.1>}
  }
 }
 area_light 1*x,1*y,8,8 area_illumination on
 translate <-6,-1,-9>
}

light_source { 0, color rgb 1
 looks_like {
  sphere {0,1 pigment {rgb 1}
  finish {emission 1}
  }
 }
 area_light 1*x,1*y,8,8 area_illumination on
 translate <6,3,9>
}

sky_sphere { pigment { gradient <0,1,0>
                       color_map { [0.0 rgb <0.3,0.2,0.1>]
                                   [0.2 rgb <0.1,0.1,0.1>]
                                   [0.5 rgb <0.0,0.0,0.0>]
                                   [1.0 rgb <0.2,0.3,0.5>]
                                 }
                       scale 2
                     }
           }

// checkered floor
plane{ <0,1,0>, 0
       texture{
        pigment{
        checker color rgb <0.5,0.5,0.5> color rgb <0.1,0.1,0.1>
        scale 5
        }
        finish { phong 0.1}
       }
       translate -9*y
     }

// random sticks
    #for (R,1,333)
    #local S=seed(R*9);
    #local Rx=rand(S)*9;
cylinder {
 -x,x,1
    scale <3*Rx,0.1,0.1>
 texture {
  pigment {rgb 0}
  finish {specular 1 roughness 0.05}
 }
    rotate <0,90,180>*Rx
 translate <3*Rx,2*Rx,1*Rx>
    rotate <360,360,360>*Rx
    //scale 0.5
    translate <-3,1,13>
}
    #end

#declare SphericalScratches=
material {
    texture {
     pigment {rgb <0.1,0.1,0.1>}
   normal {
    average
    normal_map {
 #for (R,3,33)
 #local S=seed(R);
 #local Rx=rand(S);
 #local Ry=rand(S);
 #local Rz=rand(S);
  [0.5+Ry/2
   crackle solid bump_size 3*Ry
   warp {turbulence 0.2*Rz}
   scale <0.9+9*Rx,0.2+0.3*Ry,0.5+1*Rz>
   rotate <9*Rx,360*Ry,9*Rz>
   ]
 #end
  [0.5 granite 1.00 scale 0.01]
    }
   scale 1/10 // adjust for object size
     warp {spherical}
   }
  finish {
   specular albedo 0.3
   diffuse albedo 0.5
   roughness 0.001
   reflection {0.05,0.5}
  }
    }
}

#declare CylindricalScratches=
material {
    texture {
     pigment {rgb <0.1,0.1,0.1>}
   normal {
    average
    normal_map {
 #for (R,3,33)
 #local S=seed(R);
 #local Rx=rand(S);
 #local Ry=rand(S);
 #local Rz=rand(S);
  [0.5+Ry/2
   crackle solid bump_size 3*Ry
   warp {turbulence 0.2*Rz}
   scale <0.9+9*Rx,0.2+0.3*Ry,0.5+1*Rz>
   rotate <9*Rx,360*Ry,9*Rz>
   ]
 #end
  [0.5 granite 1.00 scale 0.01]
    }
   scale 1/10 // adjust for object size
     warp {spherical}
   }
  finish {
   specular albedo 0.3
   diffuse albedo 0.5
   roughness 0.001
   reflection {0.05,0.5}
  }
    }
}

// reflective sphere with scratches/bumps?
sphere { <0,0,0>, 1.0 scale <1,1,1>
material {
 SphericalScratches
} // material
 scale 3 rotate <0,0,0> translate <-3,1.5,3>
}

// reflective cylinder with curved scratches/bumps?
cylinder { <0,0,0>, <0,1,0>, 1.0 scale <1,1,1>
material {
 CylindricalScratches
} // material
rotate 90*x
 scale 4 rotate <15,-15,0> translate <-6,-4,4>
}
// END SCENE
Post a reply to this message
|
|
| |
| |
|
|
|
|
| |
| |
|
|
"omniverse" <omn### [at] charternet> wrote:

> I like that crackle pattern idea, I was able to get the effect easily that way
> going with your SDL.
> Just probably needs a randomization of the averaged normal parameters.

I would have never thought that using crackle would give rise to this effect.
I was experimenting with wood and ripples...

> Lighting/specular highlighting changes it drastically too.

Yes, likely so.


This is getting close - something finer, less grainy, and with that "all other
scratches are invisible except the very few that reflect light" would be the
goal.   I'll hopefullly get a chance to try it out on something in a scene and
see how it works.

Also - pretty good for a plane --- now how do we achieve this on the surface of
a a 3D primitive?  Does the crackle / granite already take care of that?

We need a Scratched Sphere on a Checkered Plane scene... :)


Too many things to do lately, but this gave me the nudge to dig through the
source and look at how the crackle pattern is actually implemented, and I found
these comment gems that ought to make their way into the docs:

*   Large scale, without turbulence, makes a pretty good stone wall.
*   Small scale, without turbulence, makes a pretty good crackle ceramic glaze.
*   Highly turbulent (with moderate displacement) makes a good marble, solving
*   the problem of apparent parallel layers in Perlin's method.
*   2 octaves of full-displacement turbulence make a great "drizzled paint"
*   pattern, like a 1950's counter top.
*   Rule of thumb:  put a single colour transition near 0 in your colour map.


Very nice - I'm hoping this effect will get further honed into an include /
macro with a few options, so we can have a new easy-to-use tool for making more
realistic looking hard surfaces.
Post a reply to this message
|
|
| |
| |
|
|
|
|
| |
| |
|
|
On 24-1-2019 2:00, Bald Eagle wrote:
> "omniverse" <omn### [at] charternet> wrote:
>
>> I like that crackle pattern idea, I was able to get the effect easily that way
>> going with your SDL.
>> Just probably needs a randomization of the averaged normal parameters.
>
> I would have never thought that using crackle would give rise to this effect.
> I was experimenting with wood and ripples...
>

I guess that every surface perturbation would do the trick, except that
the more random the scratch patter the better the effect will look. Also
with straight, fairly long, scratches the effect will be stronger.

I was in a hurry when I posted my sdl and the render engine was busy
with a scene, but I wanted to use a scratch bump_map. I'll experiment today.

>> Lighting/specular highlighting changes it drastically too.
>
> Yes, likely so.
>
>
> This is getting close - something finer, less grainy, and with that "all other
> scratches are invisible except the very few that reflect light" would be the
> goal.   I'll hopefullly get a chance to try it out on something in a scene and
> see how it works.

Try a bump_map.

>
> Also - pretty good for a plane --- now how do we achieve this on the surface of
> a a 3D primitive?  Does the crackle / granite already take care of that?
>
> We need a Scratched Sphere on a Checkered Plane scene... :)

Now that you mention it, we have something like this by Przemek Loesch:
brushed_metal, from 2004, in p.b.s-f. Here it is:

//start code
camera {
   location <0,100,-1000>
   look_at <0,100,0>
   right     x*image_width/image_height
   angle 60
}

light_source { <500,1000,-1000> rgb 1}

#declare fin = finish {reflection 0.1 specular 0.5 metallic}
#declare col = color rgb 1;

#declare t0 = texture {
   pigment {col}
   finish {fin}
}
#declare t1 = texture {
   pigment {bozo scale 50 rotate y*0 color_map {[0 col] [1 rgbt <1,1,1,1>]}}
   normal { pigment_pattern {waves warp {repeat x*100} color_map {[0,
rgb 0][1, rgb 1]} translate 0 scale 3} 10}
   finish {fin}
}
#declare t2 = texture {
   pigment {bozo scale 50 rotate y*30 color_map {[0 col] [.8 rgbt
<1,1,1,1>]}}
   normal { pigment_pattern {waves warp {repeat y*100} color_map {[0,
rgb 0][1, rgb 1]} translate 30 scale 3} 10}
   finish {fin}
}
#declare t3 = texture {
   pigment {bozo scale 50 rotate y*70 color_map {[0 col] [.7 rgbt
<1,1,1,1>]}}
   normal { pigment_pattern {waves warp {repeat z*100} color_map {[0,
rgb 0][1, rgb 1]} translate -30 scale 3} 10}
   finish {fin}
}

#declare metal =
texture {t0}
texture {t1}
texture {t2}
texture {t3}

sphere {<300,200,0>, 200 texture {metal}}
cylinder {<-400,200,0>,<0,200,600>, 200 texture {metal}}
plane {y,0 texture {metal}}
cone {<0,0,-100>, 150, <0,350,-100>, 0 texture {metal}}

sky_sphere {
   pigment {
     gradient y
     color_map {[0 rgb 1] [.5 rgb <0,0.3,1>]}
   }
}
//end code

This might be a good start to investigate the matter at hand.

>
>
>
> Too many things to do lately, but this gave me the nudge to dig through the
> source and look at how the crackle pattern is actually implemented, and I found
> these comment gems that ought to make their way into the docs:
>
> *   Large scale, without turbulence, makes a pretty good stone wall.
> *   Small scale, without turbulence, makes a pretty good crackle ceramic glaze.
> *   Highly turbulent (with moderate displacement) makes a good marble, solving
> *   the problem of apparent parallel layers in Perlin's method.
> *   2 octaves of full-displacement turbulence make a great "drizzled paint"
> *   pattern, like a 1950's counter top.
> *   Rule of thumb:  put a single colour transition near 0 in your colour map.
>
>
> Very nice - I'm hoping this effect will get further honed into an include /
> macro with a few options, so we can have a new easy-to-use tool for making more
> realistic looking hard surfaces.
>

Yes, I remember those. Worth investigating further too.

--
Thomas
Post a reply to this message
|
|
| |
| |
|
|
From: Thomas de Groot
Subject: Re: Apparent circular pattern of scratches
Date: 24 Jan 2019 03:00:59
Message: <5c4970bb@news.povray.org>
|
|
|
| |
| |
|
|
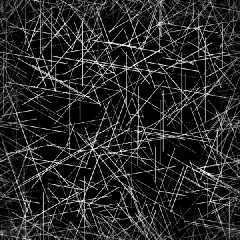
Replace the normal {} as given, by this (download the bump_map):

   normal {
     bump_map {png "Scratches.png" gamma 1}
     rotate 90*x
     scale 10
     bump_size 1
   }

Going into the right direction but it is more difficult than I initially
realised.

--
Thomas
Post a reply to this message
Attachments:
Download 'scratches.png' (345 KB)
Preview of image 'scratches.png'
|
|
| |
| |
|
|
|
|
| |
| |
|
|
"Bald Eagle" <cre### [at] netscapenet> wrote:
> I'm sure everyone has seen this at some point:
>
> When you look at a light source's reflection on a smooth piece of glass
> or metal or plastic, the scratches all tend to appear as a series of
> arcs and lines roughly in a circular pattern centered around the "hotspot".
>

Sometimes, spider webs look like that too. Which gave me the idea to do someting
similar to the twigs code already posted. Mine conists of just a bunch of
cylinders randomly arranged, with a 'moon' reflected in them. But the cylinders
aren't round, they're more like a flat oval shape-- to present more of a surface
for the moon to reflect off of. (I'm using reflection rather than phong or
specular.) It's not very good, but works. The reflections are VERY 'thin' and
noisy, due to the extreme angle of incidence with the moon.

Here, the light source itself doesn't really produce the 'tunnel' effect, it's
mostly the moon reflection. I also used max_trace_level of only 2, to try and
keep secondary reflections to a minimum.
-----

global_settings {assumed_gamma 1.0 max_trace_level 2}

camera {
  perspective
  location  <1.5, 1.5, -4>
  look_at   <1.5, 1.5, 0>
  right     x*image_width/image_height
  angle 67
}

light_source {
  0*x
  color rgb 20
  looks_like{sphere{0,7 pigment{rgb 1} finish{ambient 10
         emission 0 diffuse 0}}}
  translate <15, 20, 100>
}

background{rgb 0}

#declare S = seed(13);

#declare STRAND =
cylinder{-10*x,10*x, 0.008 scale <1,1,15>
texture{
  pigment{rgb 0.03}
  finish{ambient 0.09 diffuse 0.05 reflection {0.0,0.6}}
  /*
  normal{
     gradient x // try z too
     scale .001
     sine_wave
     bump_size .5
     }
     */
     }
}

union{
#for(i,1,150)
object{STRAND
 rotate 720*rand(S)*z
 translate <-4 + 8*rand(S), -3 + 6*rand(S), 1 + 2*rand(S)>
 }
 #end
 }
Post a reply to this message
|
|
| |
| |
|
|
|
|
| |
| |
|
|
This scene comes close to the initial examples given. I still have
trouble to get the reflection of the light to be broader to right and left.

//start code
#version 3.8;

global_settings {
   assumed_gamma 1.0
}

camera {
   location  <0, 100, -100>
   look_at   <0, 0, 100>
   direction z
   right     x*image_width/image_height
   angle     54
}

light_source {
   <0,0,0>
   color rgb <1, 1, 1>*1
   translate <0, 50, 100>*100
}

sky_sphere {
   pigment {
     gradient y
     color_map {[0 rgb 1] [.5 rgb <0,0.3,1>]}
   }
}

#local N_scratch =
normal {
   bump_map {png "scratches.png" gamma 1}
   rotate 90*x
}

plane {
   y, 0
   pigment {rgb 0.3}
   normal {
     average
     normal_map {
       [1.0 N_scratch scale 50 bump_size -1]
       [1.0 N_scratch scale 40 bump_size -0.8]
       [1.0 N_scratch scale 30 bump_size -0.6]
       [1.0 N_scratch scale 20 bump_size -0.4]
       [1.0 N_scratch scale 10 bump_size -0.2]
     }
   }
   finish {
     specular albedo 0.1
     diffuse albedo 0.9
     roughness 0.001
     metallic
     reflection {0.5, 1.0 metallic}
     conserve_energy
   }
}
//end code

--
Thomas
Post a reply to this message
|
|
| |
| |
|
|
|
|
| |
| |
|
|
On 25-1-2019 9:51, Thomas de Groot wrote:
> This scene comes close to the initial examples given. I still have
> trouble to get the reflection of the light to be broader to right and left.
>

Well, that last one is simple: change the finish roughness to a higher
value, e.g. 0.005 .

Also, build a pseudo orthographic scene:

camera {
   location  <0, 100, 0>
   look_at   <0, 0, 0>
   direction z
   right     x*image_width/image_height
   angle     54
}

light_source {
   <0,0,0>
   color rgb <1, 1, 1>*1
   translate <0, 500, 0>
}

--
Thomas
Post a reply to this message
|
|
| |
| |
|
|
|
|
| |
| |
|
|
The latest variant, as shown in p.b.i, using the same scratch image_map,
results from the following code:

//start code
#version 3.8;

global_settings {
   assumed_gamma 1.0
   radiosity {
     pretrace_start 0.08
     pretrace_end   0.004
     count 50, 1000
     nearest_count 10, 5
     error_bound 1
     recursion_limit 1
     low_error_factor .3
     gray_threshold 0.0
     minimum_reuse 0.015
     maximum_reuse 0.1
     brightness 1

     adc_bailout 0.01/2
     normal on
     media off
     always_sample off
     //max_sample 1.0
   }
}

camera {
   location  <0, 100, 0>
   look_at   <0, 0, 0>
   direction z
   right     x*image_width/image_height
   angle     54
}

light_source {
   <0,0,0>
   color rgb <1, 1, 1>*1
   translate <0, 10e6, 0>
}

sky_sphere {
   pigment {
     gradient y
     color_map {
       [0.0 rgb <0.6,0.7,1.0>*0.7]
       [0.7 rgb <0.0,0.1,0.8>*0.7]
     }
   }
}

#local N_scratch =
normal {
   bump_map {png "scratches.png" gamma 1}
   rotate 90*x
}

#local Strength = -1;

plane {
   y, 0
   material {
     texture {
       pigment {srgb <1.00, 0.62, 0.28>}
       finish {
         diffuse albedo 0.01
         brilliance 1
         specular albedo 0.7
         roughness 0.00001
         metallic on
         fresnel on
         reflection {0.0, 0.9 metallic on fresnel on}
         conserve_energy
       }
     }
     interior {
       ior 1.5
     }
   }
   material {
     texture {
       pigment {srgbt <1.00, 0.62, 0.28, 1>}
       normal {
         average
         normal_map {
           [1.0 N_scratch scale 50 rotate  30*y bump_size 1.0*Strength]
           [0.5 N_scratch scale 40 rotate  60*y bump_size 0.8*Strength]
           [0.4 N_scratch scale 30 rotate  90*y bump_size 0.6*Strength]
           [0.3 N_scratch scale 20 rotate -90*y bump_size 0.4*Strength]
           [0.2 N_scratch scale 10 rotate -60*y bump_size 0.2*Strength]
           [0.1 N_scratch scale 1  rotate -30*y bump_size 0.1*Strength]
         }
       }
       finish {
         diffuse albedo 0.01
         brilliance 1
         specular albedo 0.1
         roughness 0.001
         metallic on
         fresnel off
         reflection {0.0, 0.9 metallic on fresnel on}
         conserve_energy
       }
     }
     interior {
       ior 1.5
     }
   }
}
//end code

--
Thomas
Post a reply to this message
|
|
| |
| |
|
|
|
|
| |
| |
|
|
Note: To be entirely orthodox, the specular and reflection values should
be identical. So, in the lower of the layered materials given above set
them to e.g. 0.5, and in the upper material to e.g. 0.7

--
Thomas
Post a reply to this message
|
|
| |
| |
|
|
|
|
| |
| |
|
|
"Bald Eagle" <cre### [at] netscapenet> wrote:
> I'm sure everyone has seen this at some point:
>
> When you look at a light source's reflection on a smooth piece of glass or metal
> or plastic, the scratches all tend to appear as a series of arcs and lines
> roughly in a circular pattern centered around the "hotspot".
>
> I was wondering if anyone has ever attempted to replicate this effect, and
> perhaps has an optical explanation for why the scratches appear in a circular
> pattern.


This effect is the base for "scratch holograms"!! Have a look at
http://amasci.com/amateur/holohint.html

igmar
Post a reply to this message
|
|
| |
| |
|
|
|
|
| |
| |
|
|
On 16-5-2019 9:19, IGM wrote:
> "Bald Eagle" <cre### [at] netscapenet> wrote:
>> I'm sure everyone has seen this at some point:
>>
>> When you look at a light source's reflection on a smooth piece of glass or metal
>> or plastic, the scratches all tend to appear as a series of arcs and lines
>> roughly in a circular pattern centered around the "hotspot".
>>
>> I was wondering if anyone has ever attempted to replicate this effect, and
>> perhaps has an optical explanation for why the scratches appear in a circular
>> pattern.
>
>
> This effect is the base for "scratch holograms"!! Have a look at
> http://amasci.com/amateur/holohint.html
>
> igmar
>
>
>

LOL This is brilliant!

--
Thomas
Post a reply to this message
|
|
| |
| |
|
|
|
|
| |
| |
|
|
Resurrecting an old thread, since I'm digging around with a search engine to
find old scenes / files/ etc. for the organized archive project.

> When you look at a light source's reflection on a smooth piece of glass or metal
> or plastic, the scratches all tend to appear as a series of arcs and lines
> roughly in a circular pattern centered around the "hotspot".

https://blenderartists.org/t/scratches-around-relflection/614851/16

https://web.archive.org/web/20180201063002/http://viscorbel.com/microscratches-swirl-marks-spiderwebbing-vray-tutorial/


- BW
Post a reply to this message
|
|
| |
| |
|
|
|
|
| |
|
|