|
|
|
|
|
|
| |
| |
|
|
|
|
| |
| |
|
|
Greeting,

continuing experiments with Python (which continues to piss me off), I
decided to write small program to convert image heightfields into
triangle meshes. My may intention was to improve quality for
heightfields having both small image size and low bit depth - I supposed
that converting them into meshes will make POVRay interpolate
nonexisting data, thus improving visual appearance.

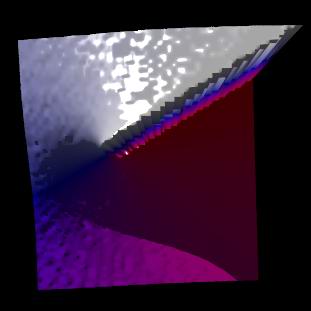
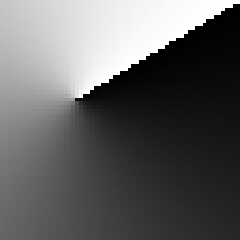
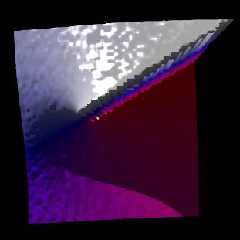
Attached is my test image 1.test grey 001.png, used as a heightfield
(with "smooth" on) for rendering 2.heightfield.jpg. Since the source is
only 64 * 64 pixels, result looks... well, correspondingly.

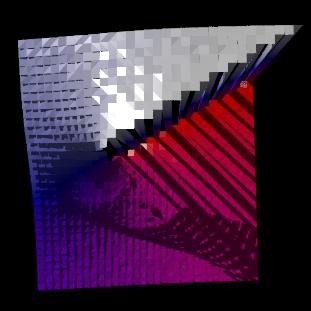
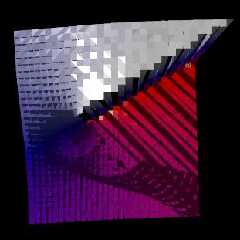
Next, I created my converter (attached as img2mesh.01.004.py.bz2) and
used it to convert the same source into triangle mesh. Rendering result
is attached as 3.img2mesh.01.004.jpg and, as you can see, it's clearer
but full of holes. After that I finally took a look at POVRay docs, that
say that POVRay internally uses 4 pixels for 2 triangles, just like my
program (never read docs before doing something yourself - it's
discouraging!), except for I didn't do force connection of square
corners, that lead to a holes. Instead of fixing it (I find fixing
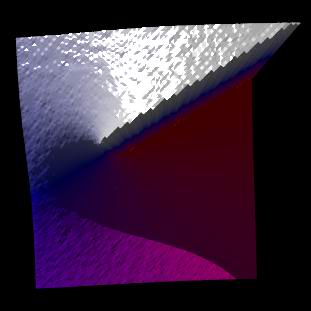
discouraging too), I simply invented different approach - using 4 pixels
for 4 triangles (don't tell me if this is described somewhere already),
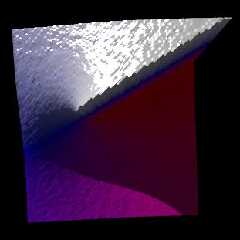
that lead to a completely different program, attached as
img2mesh.02.001.py.bz2), which provides output like attached
4.img2mesh.02.001.jpg.

The latter looks to me significantly better than POVRay heightfield
rendering (not to mention my first attempt), although I plan some
additional explorations (artifacts on flat surfaces are still
unexplained, and I even start to suspect POVRay roundoff errors).

Meanwhile, I hope someone will find this tiny utility useful, and
probably even come with new ideas.

Prerequisites:

1) Python (I used 3.12 but previous versions of Python 3 are supposed to
be fine). Seem to be preinstalled on many computers nowadays (that's how
I got it, for example). My program is equipped with minimal GUI, using
tkinter, which seem to be redistributed with all standard Python
distributions, so doesn't require separate download.
2) Pillow for reading images. As a simple image reading library, pillow
is distributed everywhere; at worst, it takes few seconds to download
and no seconds to install and configure.

So, have a day.

Ilya
Post a reply to this message
Attachments:
Download '1.test grey 001.png' (2 KB)
Download '2.heightfield.jpg' (9 KB)
Download 'img2mesh.01.004.py.bz2.zip' (3 KB)
Download '3.img2mesh.01.004.jpg' (14 KB)
Download 'img2mesh.02.001.py.bz2.zip' (2 KB)
Download '4.img2mesh.02.001.jpg' (10 KB)
Preview of image '1.test grey 001.png'
Preview of image '2.heightfield.jpg'
Preview of image '3.img2mesh.01.004.jpg'
Preview of image '4.img2mesh.02.001.jpg'
|
|
| |
| |
|
|
|
|
| |
| |
|
|
hi,
Ilya Razmanov <ily### [at] gmail com> wrote:
> Greeting,
>
> continuing experiments with Python (which continues to piss me off), I
> decided to write small program to convert image heightfields into
> triangle meshes. ...
> The latter looks to me significantly better than POVRay heightfield
> rendering ...
for data "extrapolated" from a 64x64 image, that last image looks real good I
think. wondering if the calculation could not be done in SDL ?
regards, jr. com> wrote:
> Greeting,
>
> continuing experiments with Python (which continues to piss me off), I
> decided to write small program to convert image heightfields into
> triangle meshes. ...
> The latter looks to me significantly better than POVRay heightfield
> rendering ...
for data "extrapolated" from a 64x64 image, that last image looks real good I
think. wondering if the calculation could not be done in SDL ?
regards, jr.
Post a reply to this message
|
|
| |
| |
|
|
|
|
| |
| |
|
|
On 30.11.2023 16:59, jr wrote:

> for data "extrapolated" from a 64x64 image, that last image looks real good I
> think.  wondering if the calculation could not be done in SDL ?

For this to be done within POVRay only, I need:
1) POVRay opening image as some sort of array with easy access to any
pixel data I want
2) Not only math but some programming (I need cycles first of all)

What as to 1), surely, POVRay have something to read images - after all,
it uses images as heightfield, that requires image reading and
representation as some data structure internally. But I see no way for
*me* to access these data directly. Well, after all, POVRay is neither a
bitmap editor, nor a programming environment (or, as our CC said,
"neither both"). So, I use external tool, taking advantage of that POV
language is simple text, easy to understand and write. I used Python
since I got my Windows notebook with Python 3.8 preinstalled, and I was
curious enough to take a look at what is this and what it is good for.
As long as I know, it also comes preinstalled with Linux, and, in
general, looks to be more widely available than POVRay itself, that
makes my tiny programs cross-platform. And, since POV files are so easy
to write, why not to use this advantage of POVRay? ;-)

Ilya
Post a reply to this message
|
|
| |
| |
|
|
|
|
| |
| |
|
|
hi,

Ilya Razmanov <ily### [at] gmailcom> wrote:
> > for data "extrapolated" from a 64x64 image, that last image looks real good I
> > think.  wondering if the calculation could not be done in SDL ?
> For this to be done within POVRay only, I need:
> 1) POVRay opening image as some sort of array with easy access to any
> pixel data I want
> 2) Not only math but some programming (I need cycles first of all)

aiui, POV-Ray (as of 3.7) has the "tools", and your first script (the spheres
image) would, I think, be fairly straightforward to code up in SDL.  hence my
question re the details of the height_field processing.


> ...
> As long as I know, it also comes preinstalled with Linux, and, in
> general, looks to be more widely available than POVRay itself, that
> makes my tiny programs cross-platform. And, since POV files are so easy
> to write, why not to use this advantage of POVRay? ;-)

:-)  I'm sure many/most (can) use Python, but all of us have POV-Ray to use.


regards, jr.
Post a reply to this message
|
|
| |
| |
|
|
|
|
| |
| |
|
|
Ilya Razmanov <ily### [at] gmailcom> wrote:
> On 30.11.2023 16:59, jr wrote:
>
> > for data "extrapolated" from a 64x64 image, that last image looks real good I
> > think.  wondering if the calculation could not be done in SDL ?
>
> For this to be done within POVRay only, I need:
> 1) POVRay opening image as some sort of array with easy access to any
> pixel data I want
> 2) Not only math but some programming (I need cycles first of all)

you can use an image as a pattern and you can use a pattern in a function. Then
you can sample the "image function" to fill arrays. But, the image will already
be interpolated.

ingo
Post a reply to this message
|
|
| |
| |
|
|
|
|
| |
| |
|
|
"jr" <cre### [at] gmailcom> wrote:
> Ilya Razmanov <ily### [at] gmailcom> wrote:
> ...> > For this to be done within POVRay only, I need:
> aiui, POV-Ray (as of 3.7) has the "tools", ...

proof of concept (640x480 image source).  ~20 minutes ;-)


regards, jr.

-----<snip>-----
/* cf Iyla's "spheres" script */

#version 3.8;

#include "functions.inc"

global_settings {assumed_gamma 1}

#declare im_ = pigment {
  image_map {
    png "s_o_l.png"
    gamma 1
  }
  scale <640,480,1>
};

#declare ext_ = max_extent(im_);

#declare arr_ = array [640][480];

#for (r_,0,479)
  #for (c_,0,639)
    #local arr_[c_][r_] = eval_pigment(im_,<c_,r_,.5>);
  #end
#end

#for (r_,0,479)
  #for (c_,0,639)
    sphere {
      <(c_+.5),(r_+.5),0>, .495
      texture {
        pigment {arr_[c_][r_]}
        finish {emission 1}
      }
    }
  #end
#end

camera {
  location <320,240,-275>
  right x * (4/3)
  up y
  angle 90
  look_at <320,240,0>
}
Post a reply to this message
Attachments:
Download '231201_ir.png' (960 KB)
Preview of image '231201_ir.png'

|
|
| |
| |
|
|
|
|
| |
| |
|
|
Op 1-12-2023 om 08:03 schreef jr:
> "jr" <cre### [at] gmailcom> wrote:
>> Ilya Razmanov <ily### [at] gmailcom> wrote:
>> ...> > For this to be done within POVRay only, I need:
>> aiui, POV-Ray (as of 3.7) has the "tools", ...
>
> proof of concept (640x480 image source).  ~20 minutes ;-)
>

LOL!

--
Thomas
Post a reply to this message
|
|
| |
| |
|
|
|
|
| |
| |
|
|
On 12/1/23 02:03, jr wrote:
> proof of concept (640x480 image source).  ~20 minutes 😉

This a good example to show the value of the yuqk / v4.0 idea of
providing a 'munctions.inc' / macro defined functions include.

The yuqk fork has no 'eval_pigment', but it does have a munction called
   M_evaluate_pigment(). The following runs in about 4.5 seconds,
elapsed, on my old i3.

In this case, I think, you can mostly emulate what was done with
M_evaluate_pigment() in official releases of POV-Ray - to some degree or
other.

Bill P.

----- snip ------
#version unofficial 3.8; // yuqk
#if (file_exists("version.inc"))
     #include "version.inc"
#end
#if (!defined(Fork_yuqk))
     #error "This POV-Ray SDL code requires the yuqk fork."
#end
global_settings { assumed_gamma 1 }
#declare Grey50 = srgb <0.5,0.5,0.5>;
background { Grey50 }
#declare VarOrthoMult =
     2.0/max(image_width/image_height,image_height/image_width);
#declare Camera01z = camera {
     orthographic
     location <0,0,-2>
     direction z
     right VarOrthoMult*x*max(1,image_width/image_height)
     up VarOrthoMult*y*max(1,image_height/image_width)
}
#declare PigIm = pigment {
     image_map {
         png "Test680x480.png"
         gamma srgb
         interpolate 0
     }
     scale <640,480,1>
};
#include "munctions.inc"
// Following defines FnPg00() so it can be used directly.
#declare Vec00 =
M_evaluate_pigment("FnPg00",PigIm,<0,0,0>,false);

//--- scene ---
union {
#for (R,0,479)
     #for (C,0,639)
         sphere {
           <(C+.5),(R+.5),0>, .495
           texture {
             pigment {
                 // Can call 'munction' repeatedly too, but it's
                 // 2x slower than FnPg00() due the macro call.
               //color
               //M_evaluate_pigment("FnPg00",PigIm,<C,R,0>,false)
                 color FnPg00(C,R,0)
             }
             finish {emission 1}
           }
         }
     #end
#end
scale <1/640,1/480,1>
translate <-0.5,-0.5,0>
scale <VarOrthoMult*max(1,image_width/image_height),
     VarOrthoMult*max(1,image_height/image_width),
     1>
}
camera { Camera01z }
----- snip ------
Post a reply to this message
Attachments:
Download 'jr.png' (33 KB)
Preview of image 'jr.png'
|
|
| |
| |
|
|
|
|
| |
| |
|
|
On 12/1/23 09:13, William F Pokorny wrote:
> This a good example

Apologies for attaching the pointless image. Foggy mind / autopilot :-(

Bill P.
Post a reply to this message
|
|
| |
| |
|
|
|
|
| |
| |
|
|
hi,

William F Pokorny <ano### [at] anonymousorg> wrote:
> On 12/1/23 02:03, jr wrote:
> > proof of concept (640x480 image source).  ~20 minutes 😉
> ...
> The yuqk fork has no 'eval_pigment', but it does have a munction called
>    M_evaluate_pigment(). The following runs in about 4.5 seconds,
> elapsed, on my old i3.

that's pretty good.  modifying my posted code to junk the array and call
'eval_pigment' inside the 'texture{}', I get parsing down to just under 5.5 secs
(plus ~1s render) using the beta.2.

have not tried tried to install the renamed branch yet, will try later tonight
to get your code to run with last-but-one-before-renaming version.


> Apologies for attaching the pointless image. Foggy mind / autopilot :-(

:-)


@Ilya

sorry about misspelling your name in the posted scene code, have corrected my
local copy.


regards, jr.
Post a reply to this message
|
|
| |
| |
|
|
|
|
| |
| |
|
|
"jr" <cre### [at] gmailcom> wrote:
> William F Pokorny <ano### [at] anonymousorg> wrote:
> > The yuqk fork has no 'eval_pigment', but it does have a munction called
> >    M_evaluate_pigment(). The following runs in about 4.5 seconds,
> > elapsed, on my old i3.
> ...
> have not tried tried to install the renamed branch yet, will try later tonight
> to get your code to run with last-but-one-before-renaming version.

Parse Warning:
Scene uses features not supported by any current official POV-Ray version.
The povr release 7 (3.8.0-x.povr_0883e2b6) version is: v0.6.1.0
----------------------------------------------------------------------------
Parser Statistics
----------------------------------------------------------------------------
Finite Objects:       307200
Infinite Objects:          0
Light Sources:             0
Total:                307200
----------------------------------------------------------------------------
Parser Time
  Parse Time:       0 hours  0 minutes  3 seconds (3.614 seconds)
              using 1 thread(s) with 3.570 CPU-seconds total
  Bounding Time:    0 hours  0 minutes  0 seconds (0.471 seconds)
              using 1 thread(s) with 0.470 CPU-seconds total
----------------------------------------------------------------------------
Render Options
  Quality:  9
  Bounding boxes.......On   Bounding threshold: 3
  Antialiasing.........Off
----------------------------------------------------------------------------
Render Statistics
Image Resolution 960 x 720
----------------------------------------------------------------------------
Pixels:           691200   Samples:               0   Smpls/Pxl: 0.00
Rays:             691200   Saved:                 0   Max Level: 1/5
----------------------------------------------------------------------------
Ray->Shape Intersection          Tests       Succeeded  Percentage
----------------------------------------------------------------------------
Sphere                          307200          307200    100.00
Bounding Box                  44635591         4401534      9.86
----------------------------------------------------------------------------
----------------------------------------------------------------------------
----------------------------------------------------------------------------
Render Time:
  Photon Time:      No photons
  Radiosity Time:   No radiosity
  Trace Time:       0 hours  0 minutes  0 seconds (0.454 seconds)
              using 4 thread(s) with 1.277 CPU-seconds total


regards, jr.
Post a reply to this message
|
|
| |
| |
|
|
|
|
| |
| |
|
|
"jr" <cre### [at] gmailcom> wrote:
>
> proof of concept (640x480 image source).  ~20 minutes ;-)
>
[then...]

>  Modifying my posted code to junk the array and call
> 'eval_pigment' inside the 'texture{}', I get parsing down to just
> under 5.5 secs (plus ~1s render) using the beta.2.

You *might* get it to run even faster by copy/pasting the eval_pigment macro
from functions.inc directly into your scene code, instead of 'including' the
full .inc file.

#macro eval_pigment(pigm, vec)
    #local fn = function { pigment { pigm } }
    #local result = (fn(vec.x, vec.y, vec.z));
    result
#end

I rarely use the .inc files directly, just the bits and pieces that I need.
Post a reply to this message
|
|
| |
| |
|
|
|
|
| |
| |
|
|
hi,

"Kenneth" <kdw### [at] gmailcom> wrote:
> >  Modifying my posted code to junk the array and call
> > 'eval_pigment' inside the 'texture{}', I get parsing down to just
> > under 5.5 secs (plus ~1s render) using the beta.2.
>
> You *might* get it to run even faster by copy/pasting the eval_pigment macro
> from functions.inc directly into your scene code, instead of 'including' the
> full .inc file.
> ...
> I rarely use the .inc files directly, just the bits and pieces that I need.

same here, things like 'RRand()' etc just copy from the .inc.  did a v quick
check with alpha.9945627, no real difference.  the macro caching seems to work
"as advertised" :-).


regards, jr.
Post a reply to this message
|
|
| |
| |
|
|
|
|
| |
| |
|
|
"ingo" <nomail@nomail> wrote:
>
> you can use an image as a pattern and you can use a pattern in a function. Then
> you can sample the "image function" to fill arrays. But, the image will already
> be interpolated.
>

This is interesting, and something that I have been trying to figure out for
quite awhile with no luck. Once the image is in function form, HOW do you
extract or 'sample' usable info from it? For example, finding a particular
individual pixel's color, or its location in the original image?
Post a reply to this message
|
|
| |
| |
|
|
|
|
| |
| |
|
|
"Kenneth" <kdw### [at] gmailcom> wrote:
> "ingo" <nomail@nomail> wrote:
> >
> > you can use an image as a pattern and you can use a pattern in a function. Then
> > you can sample the "image function" to fill arrays. But, the image will already
> > be interpolated.
> >
>
> This is interesting, and something that I have been trying to figure out for
> quite awhile with no luck. Once the image is in function form, HOW do you
> extract or 'sample' usable info from it? For example, finding a particular
> individual pixel's color, or its location in the original image?

We have been over this before, and you probably need to discard certain ideas
that you have about what is going on.

“It ain’t what you don’t know that gets you into trouble. It’s what you know for
sure that just ain’t so. “ – Mark Twain

The image is never "in function form" - POV-Ray simply has a mechanism by which
a function is indexed into the image by its pixel location - the x, y, and z
arguments of the function call.

You sample usable information from it by telling the function where in the image
you want to sample from, and POV-Ray looks up the color information at that part
of the image.   It's nothing but a lookup table.  "What piece is on the chess
board at THIS (<x, y, z> square?"

The pixel's color IS the information that gets returned from the function.

It's location is the location that you specify in the function.

You're not going to be able to (easily) do that in reverse, for a whole host of
reasons - but you could certainly process the information after you copy all the
pixel color info into a 1D or 2D array, and then make a cumulative distribution
function, or simply search for all of the pixels that have the rgb value you're
looking for.

It's nothing but a lookup algorithm.

https://news.povray.org/povray.binaries.images/message/%3Cweb.60344b9fa906d8e31f9dae300%40news.povray.org%3E/#%3Cweb.60
344b9fa906d8e31f9dae300%40news.povray.org%3E

- BW
Post a reply to this message
|
|
| |
| |
|
|
|
|
| |
| |
|
|
"Bald Eagle" <cre### [at] netscapenet> wrote:
> "Kenneth" <kdw### [at] gmailcom> wrote:
> >
> > For example, finding a particular
> > individual pixel's color, or its location in the original image?
>
> We have been over this before...

Yes indeed ;-)

The aforementioned link...
https://news.povray.org/povray.binaries.images/message/%3Cweb.60344b9fa906d8e31f9dae300%40news.povray.org%3E/#%3Cweb.60
344b9fa906d8e31f9dae300%40news.povray.org%3E

> ..and you probably need to discard certain ideas
> that you have about what is going on.

Alas, I'm still a dunce as to where my thinking has gone wrong. :-(

Of course, I could pull out the two pieces of information that I want-- PRIOR to
turning the image into a function-- by using eval_pigment + loop on the image or
image_map itself. But Ingo's comment implies that there is a code trick
POST-function to get (at least one of?) those values, which he would then enter
into an array.
>
> The image is never "in function form"...

'under the hood' that is, if I understand your older comments...but the user
creates and sees a single entity, 'the function', at the SDL-code level

> POV-Ray simply has a mechanism by which
> a function is indexed into the image by its pixel location - the x, y, and z
> arguments of the function call.
>
> You sample usable information from it by telling the function where in
> the image you want to sample from, and POV-Ray looks up the color
> information at that part of the image.   It's nothing but a lookup table.
> "What piece is on the chess board at THIS (<x, y, z> square?"
>
> The pixel's color IS the information that gets returned from the function.
>
> It's location is the location that you specify in the function.
>

That's the unknown mystery to me-- if I'm not still off-base with my thinking!

Let's say that I turn an image into a function...
#declare MY_IMAGE_AS_FUNCTION=
function{pigment{png "MY_IMAGE.png}}

Now, I could manipulate the function to pull out the grayscale values of only
the RED color channel for example, using dot notation...
pigment{function{MY_IMAGE_AS_FUNCTION(x,y,z).red}

then create an image_map of just that segregated channel. But that is for ALL of
the pixels at once. The dot notation trick provides no individual-pixel
'location' information; nor do the (x,y,z) function arguments-- they can be
thought of as overall pixel 'scalers', like (3*x,y,z).

Yet, your comments and Ingo's seem to imply that there IS a further
code-manipulation trick to extract a single pixel's color value (a grayscale
value in my example). And/or "It's *location* is the location that you specify
in the function." How to do either of those in SDL is my main question (and
mystery).

Am I still wrong-headed about this possibility?

------
My apologies to Ilya for going off-topic here.
Post a reply to this message
|
|
| |
| |
|
|
|
|
| |
| |
|
|
"Kenneth" <kdw### [at] gmailcom> wrote:

> Of course, I could pull out the two pieces of information that I want-- PRIOR to
> turning the image into a function-- by using eval_pigment + loop on the image or
> image_map itself.

You can.  Which in most regards in not really any different than what we're
talking about here.
If you look at the old thread, and the source code I quoted, eval_pigment is
making a function {pigment{image_map}} and using that to get your pixel info.

> But Ingo's comment implies that there is a code trick
> POST-function to get (at least one of?) those values, which he would then enter
> into an array.

Ingo said, "you can use an image as a pattern and you can use a pattern in a
function. Then
you can sample the "image function" to fill arrays. But, the image will already
be interpolated."

All he's doing there is your loop / eval_pigment thing.
The point he's trying to make is that stuff under the hood is going to be doing
interpolation between pixels, which may or may not be wanted.

> > The image is never "in function form"...
>
> 'under the hood' that is, if I understand your older comments...but the user
> creates and sees a single entity, 'the function', at the SDL-code level

Yes.  The function.
But the function is the function.   The image still remains untouched.

The function is merely a pointer into the image, like a computer-controlled
laser pointer might be used to light up a certain point on a painting.


> Let's say that I turn an image into a function...
> #declare MY_IMAGE_AS_FUNCTION=
> function{pigment{png "MY_IMAGE.png}}

You instantiate a "function" that is linked to a specific image.

> Now, I could manipulate the function to pull out the grayscale values of only
> the RED color channel for example, using dot notation...
> pigment{function{MY_IMAGE_AS_FUNCTION(x,y,z).red}

Much of what goes on with the dot-notation is simple a matter of POV-Ray's
function parser not being very robust or flexible.
You do not need to use the dot notation with a pigment function when directly
using the result.

https://wiki.povray.org/content/Reference:Function
"Declaring User-Defined Color Functions
Right now you may only declare color functions using one of the special function
types. The only supported type is the pigment function. You may use every valid
pigment. This is a very simple example:"

The peculiarities of the function parser require you to choose a single scalar
color channel if the result will be further used in a more complex function, but
that's the function parser's problem, not anything to do with what the pigment
function natively returns, which is an <r, g, b> color vector.

> then create an image_map of just that segregated channel. But that is for ALL of
> the pixels at once. The dot notation trick provides no individual-pixel
> 'location' information; nor do the (x,y,z) function arguments-- they can be
> thought of as overall pixel 'scalers', like (3*x,y,z).

It does nothing to the image pixels.  It only ever returns information for a
single pixel at any given time.  The image_map is restricted to the <0, 0, 0> to
<1, 1, 0> range due to the way POV-Ray imports it into an internal data
structure.
A sane way to handle this information is to use max_extent to get the image size
/ resolution of the image and scale the image_map by that.  Then you link a
function to it, and then every x, y position is a 1:1 correspondence to the
image pixels.

> Yet, your comments and Ingo's seem to imply that there IS a further
> code-manipulation trick to extract a single pixel's color value (a grayscale
> value in my example). And/or "It's *location* is the location that you specify
> in the function."

In the carpet I made for the 2014 Secret Passage TCRTC competition, I used TdG's
eval_pigment method to make a nice carpet from an image.

Here's a direct copy-paste from the .inc file that I wrote for that scene.

#declare ImageMap = pigment {image_map {jpeg "NYLON-carpet-2001.jpg" once} };
#declare Resolution = max_extent (ImageMap);
#declare Resolution = Resolution + <0, 0, 1>;

#declare Carpet =
union {
#declare CarpetX = 0;
#while (CarpetX < Resolution.x)
 #declare CarpetY = 0;
 #while (CarpetY < Resolution.y)
  #declare Tilt = (rand (Seed1)-0.5)*4;
  #declare Rotate = rand (Seed2)*360;

  #declare X = CarpetX/Resolution.x;
  #declare Y = CarpetY/Resolution.y;
  #declare Strand = eval_pigment (ImageMap, <X, Y, 0>);
  #declare Point1 = <X*XSize, Y*(Resolution.y/Resolution.x)*XSize, 0>;
  #declare Point2 = <X*XSize, Y*(Resolution.y/Resolution.x)*XSize, 0> + <0, 0,
-0.5>;
  #declare Length = 0.25*rand (Seed3);

  cone {0, 0.25, <0, 0, -(0.25+Length)>, 0.125 pigment {Strand} rotate x*Tilt
rotate y*Rotate translate Point1}

  #debug concat("Strand = <", vstr(3, Point2, ", ", 0, 1), ">, to <", vstr(3,
Point1, ", ", 0, 1), ">, rgb <", vstr(3, Strand, ", ", 0, 1), "> "," \n")

  #declare CarpetY = CarpetY + 5;
 #end
#declare CarpetX = CarpetX + 5;
#end
}

As you can see, I use fractional values based on the resolution, which spans the
0-1 range of the imported image - which is just an arbitrary choice.  It works
just as well either way.
#declare Strand = eval_pigment (ImageMap, <X, Y, 0>);
Give me a full color vector that I then use to pigment my carpet strand
primitives.

NO. MAGIC.

The very interesting thing that I do see here is that I have:
#macro eval_pigment (pigm, vec)
 #local fn = function {pigment {pigm} }
 #local result = (fn(vec.x, vec.y, vec.z));
 result
#end

which apparently allowed me to use dot notation in function _arguments_, which
I've experienced trouble with on numerous occasions.   I'll have to look into
and experiment to find what the limitations on that are.
(Thanks for making me look back at that scene :) )

- BW
Post a reply to this message
|
|
| |
| |
|
|
|
|
| |
| |
|
|
"jr" <cre### [at] gmailcom> wrote:
> hi,
>
> Ilya Razmanov <ily### [at] gmailcom> wrote:
> > Greeting,
> >
> > continuing experiments with Python (which continues to piss me off), I
> > decided to write small program to convert image heightfields into
> > triangle meshes. ...
> > The latter looks to me significantly better than POVRay heightfield
> > rendering ...
>
> for data "extrapolated" from a 64x64 image, that last image looks real good I
> think.


>wondering if the calculation could not be done in SDL ?
>
> regards, jr.

 I didn't really know where I should post this so here it is...

 A while back when I was exploring mars. They had just out with fairly large
Mars maps.(4096*2048) But even so, at that resolution it was still around 2
kilometers
per pixel. I wanted to get closer. What I did was take a chuck of the main map
and
using a large array , a pigment function and splines, I blew it up into any size
I liked. When I saw these posts I had to go back and find That code.

 To make a long story short I found it and modified it but it needs  a lot of
work to present it. But I have to show ya something I'm proud of. Using a 16*16
image
I made a  Mesh2 with 12800 triangles and 81*81 pov units square.
Post a reply to this message
Attachments:
Download 'flat_inter.png' (203 KB)
Preview of image 'flat_inter.png'

|
|
| |
| |
|
|
|
|
| |
| |
|
|
"Leroy" <whe### [at] gmailcom> wrote:
> But I have to show ya something I'm proud of. Using a 16*16 image.
> I made a  Mesh2 with 12800 triangles and 81*81 pov units square.

Wow, such smooth recreated detail-- and from a crude 16X16-pixel area!

Yes, definitely post your code when it's ready. Very impressive.
Post a reply to this message
|
|
| |
| |
|
|
|
|
| |
| |
|
|
"Leroy" <whe### [at] gmailcom> wrote:
> I made a  Mesh2 with 12800 triangles and 81*81 pov units square.

Very very nice!

I always wondered why POV-Ray does not interpolate the image for height fields,
as it can for image_maps. It is one of the reasons I wrote my curves.inc. The
idea to use it to interpolate images with different splines to vary the HF
output. Imagine using a TCB spline and vary the tension of the curvature.

But then I got side tracked by doing the curves.nim version and povmesh.nim to
speed things up a lot, but never got to create any proper HF mesh with it.

curve.inc:
https://ingoogni.nl/download/

curve.nim:
https://gist.github.com/ingoogni/490d2d50710bab4fe5e689714e9ef287
(the Nim version has better explanation of what the various parameters do than
the inc file)

povmesh.nim:
https://gist.github.com/ingoogni/ca030e955daf7f8138cedfe488ca0013

ingo
Post a reply to this message
|
|
| |
| |
|
|
|
|
| |
| |
|
|
Here's the code, It was pretty old, wrote for pov 3.6. I didn't update it much.
Had to remove a lot of junk. I tested a bunch of bmp files, they where easiest
to make the 16*16 size I wanted. When I thought I had everything set, I found
that the pigment function acted like it was read pass the end of the image map.
Probably floating point troubles. So I rewrote it, scale the image map the size
of the image map and read the colors from the center of each scale pixel
location.
 Hopefully I have commented it enough.
Have Fun!
Post a reply to this message
Attachments:
Download 'flat_x.pov.txt' (10 KB)
|
|
| |
| |
|
|
|
|
| |
| |
|
|
"Leroy" <whe### [at] gmailcom> wrote:
> Here's the code, [...]
> Have Fun!

Leroy,

reading onther ones code is always a problem for me. Is the following what you
are doing?


Interpolate image:
create array with the size of the new image

.. . . . . . . . . . . . .
.. . . . . . . . . . . . .
.. . . . . . . . . . . . .
.. . . . . . . . . . . . .
.. . . . . . . . . . . . .
.. . . . . . . . . . . . .
.. . . . . . . . . . . . .
.. . . . . . . . . . . . .
.. . . . . . . . . . . . .
.. . . . . . . . . . . . .
.. . . . . . . . . . . . .
.. . . . . . . . . . . . .
.. . . . . . . . . . . . .


Fill the array positions with values from image in proper locations (*)

* . . . * . . . * . . . *
.. . . . . . . . . . . . .
.. . . . . . . . . . . . .
.. . . . . . . . . . . . .
* . . . * . . . * . . . *
.. . . . . . . . . . . . .
.. . . . . . . . . . . . .
.. . . . . . . . . . . . .
* . . . * . . . * . . . *
.. . . . . . . . . . . . .
.. . . . . . . . . . . . .
.. . . . . . . . . . . . .
* . . . * . . . * . . . *


Use the values on rows to create a spline.
Use spline to fill gaps (x)

* x x x * x x x * x x x *
.. . . . . . . . . . . . .
.. . . . . . . . . . . . .
.. . . . . . . . . . . . .
* x x x * x x x * x x x *
.. . . . . . . . . . . . .
.. . . . . . . . . . . . .
.. . . . . . . . . . . . .
* x x x * x x x * x x x *
.. . . . . . . . . . . . .
.. . . . . . . . . . . . .
.. . . . . . . . . . . . .
* x x x * x x x * x x x *


Use the values on cols to create a spline.
Use spline to fill gaps (y)

* x x x * x x x * x x x *
y y y y y y y y y y y y y
y y y y y y y y y y y y y
y y y y y y y y y y y y y
* x x x * x x x * x x x *
y y y y y y y y y y y y y
y y y y y y y y y y y y y
y y y y y y y y y y y y y
* x x x * x x x * x x x *
y y y y y y y y y y y y y
y y y y y y y y y y y y y
y y y y y y y y y y y y y
* x x x * x x x * x x x *


If so there is an alternative method:

Use the values on cols to create a spline.
Use spline to fill gaps (y)

* x x x * x x x * x x x *
y . . . y . . . y . . . y
y . . . y . . . y . . . y
y . . . y . . . y . . . y
* x x x * x x x * x x x *
y . . . y . . . y . . . y
y . . . y . . . y . . . y
y . . . y . . . y . . . y
* x x x * x x x * x x x *
y . . . y . . . y . . . y
y . . . y . . . y . . . y
y . . . y . . . y . . . y
* x x x * x x x * x x x *


Detail top left

x1y1  x2y1  x3y1  x4y1  x5y1
x1y2  .     .     .     x5y2
x1y3  .     .     .     x5y3
x1y4  .     .     .     x5y4
x1y5  x2y5  x3y5  x4y5  x5y5

for example to fill the centre dot,
construct spline through x3y1, x3y5 and a spline x1y3, x5y3
get the value of both splines for x3y3 and average those.

Is it better? Pff, what is better? Does it give a different result, yes. It is
closer to the algorithms for bicubic image interpolation.

Thanks for your code.


ingo
Post a reply to this message
|
|
| |
| |
|
|
|
|
| |
| |
|
|
"ingo" <nomail@nomail> wrote:
> "Leroy" <whe### [at] gmailcom> wrote:
> > Here's the code, [...]
> > Have Fun!
>
> Leroy,
>
> reading onther ones code is always a problem for me. Is the following what you
> are doing?
>
>
> Interpolate image:
> create array with the size of the new image
>
> .. . . . . . . . . . . . .
> .. . . . . . . . . . . . .
> .. . . . . . . . . . . . .
> .. . . . . . . . . . . . .
> .. . . . . . . . . . . . .
> .. . . . . . . . . . . . .
> .. . . . . . . . . . . . .
> .. . . . . . . . . . . . .
> .. . . . . . . . . . . . .
> .. . . . . . . . . . . . .
> .. . . . . . . . . . . . .
> .. . . . . . . . . . . . .
> .. . . . . . . . . . . . .
>
>
> Fill the array positions with values from image in proper locations (*)
>
> * . . . * . . . * . . . *
> .. . . . . . . . . . . . .
> .. . . . . . . . . . . . .
> .. . . . . . . . . . . . .
> * . . . * . . . * . . . *
> .. . . . . . . . . . . . .
> .. . . . . . . . . . . . .
> .. . . . . . . . . . . . .
> * . . . * . . . * . . . *
> .. . . . . . . . . . . . .
> .. . . . . . . . . . . . .
> .. . . . . . . . . . . . .
> * . . . * . . . * . . . *
>
>
> Use the values on rows to create a spline.
> Use spline to fill gaps (x)
>
> * x x x * x x x * x x x *
> .. . . . . . . . . . . . .
> .. . . . . . . . . . . . .
> .. . . . . . . . . . . . .
> * x x x * x x x * x x x *
> .. . . . . . . . . . . . .
> .. . . . . . . . . . . . .
> .. . . . . . . . . . . . .
> * x x x * x x x * x x x *
> .. . . . . . . . . . . . .
> .. . . . . . . . . . . . .
> .. . . . . . . . . . . . .
> * x x x * x x x * x x x *
>
>
> Use the values on cols to create a spline.
> Use spline to fill gaps (y)
>
> * x x x * x x x * x x x *
> y y y y y y y y y y y y y
> y y y y y y y y y y y y y
> y y y y y y y y y y y y y
> * x x x * x x x * x x x *
> y y y y y y y y y y y y y
> y y y y y y y y y y y y y
> y y y y y y y y y y y y y
> * x x x * x x x * x x x *
> y y y y y y y y y y y y y
> y y y y y y y y y y y y y
> y y y y y y y y y y y y y
> * x x x * x x x * x x x *
>
>
> If so there is an alternative method:
>
> Use the values on cols to create a spline.
> Use spline to fill gaps (y)
>
> * x x x * x x x * x x x *
> y . . . y . . . y . . . y
> y . . . y . . . y . . . y
> y . . . y . . . y . . . y
> * x x x * x x x * x x x *
> y . . . y . . . y . . . y
> y . . . y . . . y . . . y
> y . . . y . . . y . . . y
> * x x x * x x x * x x x *
> y . . . y . . . y . . . y
> y . . . y . . . y . . . y
> y . . . y . . . y . . . y
> * x x x * x x x * x x x *
>
>
> Detail top left
>
> x1y1  x2y1  x3y1  x4y1  x5y1
> x1y2  .     .     .     x5y2
> x1y3  .     .     .     x5y3
> x1y4  .     .     .     x5y4
> x1y5  x2y5  x3y5  x4y5  x5y5
>
> for example to fill the centre dot,
> construct spline through x3y1, x3y5 and a spline x1y3, x5y3
> get the value of both splines for x3y3 and average those.
>
> Is it better? Pff, what is better? Does it give a different result, yes. It is
> closer to the algorithms for bicubic image interpolation.
>
> Thanks for your code.
>
>
> ingo

You got my ideal right.
I would go more into it now ,but
I'm on my phone.
Post a reply to this message
|
|
| |
| |
|
|
|
|
| |
| |
|
|
"Leroy" <whe### [at] gmailcom> wrote:

> You got my ideal right.
> I would go more into it now ,but [...]

All clear. The way you "by-pass" the scaling complexities by just inserting N
pixels (the Cut) works well. I may nick that for a Nim implementation.

ingo
Post a reply to this message
|
|
| |
| |
|
|
From: Ilya Razmanov
Subject: Version update (was Re: Height field to mesh - more resolution)
Date: 22 Dec 2023 23:15:54
Message: <65865efa$1@news.povray.org>
|
|
|
| |
| |
|
|
On 30.11.2023 7:59, Ilya Razmanov wrote:

> Meanwhile, I hope someone will find this tiny utility useful, and
> probably even come with new ideas.
While discussion in general switched to using of POVRay SDL, I guess
I'll still share the update of initial Python utility, including some
small bugfixes and stuff.

To reduce my contribution into wasting this server storage space, I
decided to waste github space instead, so from now on you can download
updated versions from:

https://github.com/Dnyarri/img2mesh

Ilya
Post a reply to this message
|
|
| |
| |
|
|
From: Ilya Razmanov
Subject: Re: Height field to mesh - more resolution
Date: 13 Jan 2024 05:04:36
Message: <65a26034@news.povray.org>
|
|
|
| |
| |
|
|
On 01.12.2023 10:03, jr wrote:
> "jr" <cre### [at] gmailcom> wrote:
>> Ilya Razmanov <ily### [at] gmailcom> wrote:
>> ...> > For this to be done within POVRay only, I need:
>> aiui, POV-Ray (as of 3.7) has the "tools", ...
>
> proof of concept (640x480 image source).  ~20 minutes ;-)
Cheating detected: you are using C4 symmetry, while I simulated real
packing with C3, which requires painful procedure of remembering medium
school math (funny enough, years ago I started with angular functions;
much later I managed to remember of Pythagorean theorem, and yesterday -
a triumph! - I finally managed to make all this down to sqrt(3), which I
hardcoded as a constant, thus removing all linkage to math, rotflmao.
The moral is, you should learn math to get rid of it.)

Anyway, some number of the now resides at
https://github.com/Dnyarri/POVmosaic
variants with, say, rotated boxes looks pseudo-artistic enough to start
boring people with it. Guess I miss C6 symmetry, but "I'll think of it
all tomorrow".

Ilya.
Post a reply to this message
|
|
| |
| |
|
|
|
|
| |
| |
|
|
hi,

Ilya Razmanov <ily### [at] gmailcom> wrote:
> On 01.12.2023 10:03, jr wrote:
> > "jr" <cre### [at] gmailcom> wrote:
> >> Ilya Razmanov <ily### [at] gmailcom> wrote:
> >> ...> > For this to be done within POVRay only, I need:
> >> aiui, POV-Ray (as of 3.7) has the "tools", ...
> >
> > proof of concept (640x480 image source).  ~20 minutes ;-)
> Cheating detected:

how so ?  "bog standard" SDL.


> you are using C4 symmetry, while I simulated real
> packing with C3, which requires painful procedure of remembering medium
> school math (funny enough, years ago I started with angular functions;
> much later I managed to remember of Pythagorean theorem, and yesterday -
> a triumph! - I finally managed to make all this down to sqrt(3), which I
> hardcoded as a constant, thus removing all linkage to math, rotflmao.
> The moral is, you should learn math to get rid of it.)
> Anyway, some number of the now resides at {...}
> variants with, say, rotated boxes looks pseudo-artistic enough to start
> boring people with it. Guess I miss C6 symmetry, but "I'll think of it
> all tomorrow".

so there's the confusion, "jr" and "maths" only fit into one sentence when
followed by laughter :-).  I have no idea (yet) what "C3" and "C4" symmetries
might be; on the ever-increasing ToDo list.


> Ilya.


regards, jr.
Post a reply to this message
|
|
| |
| |
|
|
|
|
| |
| |
|
|
"jr" <cre### [at] gmailcom> wrote:
I have no idea (yet) what "C3" and "C4" symmetries
> might be; on the ever-increasing ToDo list.

Those are symmetry groups.  They're used to define, and simplify geometric
permustations (at least in chemistry wrt to molecule shapes and electron orbital
/ energy states)
https://en.wikipedia.org/wiki/Group_theory#Chemistry_and_materials_science

https://en.wikipedia.org/wiki/Group_theory

C refers to a cylcical group, where the number refers to how many dicrete ways
you can arrange something and have it be "different".

A circle is C1
A "double semicircle", theta, "half moon" is C2, since you can rotate it 180
deg, and so you have 2 symmetric orientations.
triangles C3
Squares C4
pentagons C5
Hexagons C6

It gets a bit complicated when you start looking at even the simple, yet
non-trivial structures
https://www.globalsino.com/EM/page3137.html

which is every bit as "fun" as it looks.  Especially when your Inorganic
Chemistry professor is ... special.  ;)

It would certainly be interesting to have a library of transforms that would
reorient things based upon symmetry groups, and then it would probably be
possible to analyze a given object to determine what symmetry group it was
in....

(and NO, at this point I'm not doing that.  :P  )


- BW
Post a reply to this message
|
|
| |
| |
|
|
|
|
| |
| |
|
|
On 13.01.2024 14:29, jr wrote:
>
> I have no idea (yet) what "C3" and "C4" symmetries
> might be
> regards, jr.
>

C3 is triangle tiling ("parquet"), while C4 is square parquet. It's easy
to visualize bitmap image as square pixel parquet and, therefore, turn
it into C4 tiling of some 3D objects, having the same step distance
along both x and y axes. With C3, however, step along one axis (in my
version, x) is equal to triangle side (which, in my case, is
2*sphere_radius), while step along the other (in my version, y) is equal
to triangle height (which would be sqrt(3)*sphere_radius). As a result,
if you compare my s4zaika and s3zaika programs, both have just two
nested loops along y and x, across the image, but s4zaika have a normal

for y in range(0, Y, 1):

loop, while s3zaika have some weird

triangleheight = 0.5 * 1.7320508075688773
Ycount = int(Y/triangleheight)
for y in range(0, Ycount, 1):

loop, where 0.5 is the sphere radius; and apparently reads source PNG
pixels with non-integer coordinates; all this requires some work from my
rusty more than 0.5*century old encephalon :-)

So, now I have C2 (hidden inside C4 sourcecodes), C3 and C4; C5 does not
exist, as do not C7 and above; so I have only C6 ("honeycomb") remain
uncovered. But it need remembering some more school math...

Ilya
Post a reply to this message
|
|
| |
| |
|
|
|
|
| |
| |
|
|
hi,

"Bald Eagle" <cre### [at] netscapenet> wrote:
> "jr" <cre### [at] gmailcom> wrote:
> I have no idea (yet) what "C3" and "C4" symmetries
> > might be; on the ever-increasing ToDo list.

Ilya Razmanov <ily### [at] gmailcom> wrote:
> ...

thanking both of you for trying to explain, appreciated.  this "symmetries"
stuff is much deeper though than I can "cope with", for now.


regards, jr.
Post a reply to this message
|
|
| |
| |
|
|
|
|
| |
| |
|
|
During major update of img2mesh utility for conversion of PNG
heightfield into 3D mesh in an unusual way (and often better), complete
rewriting of POVRay export code was made, removing all POVRay transforms
(and apparently some artifacts) and supposedly making it render a tiny
bit faster.

Beside that, Wavefront OBJ and stereolithography STL format output
added. All Python sources available at:

https://github.com/Dnyarri/img2mesh

For Windows users, standalone Win64 exe compiled:

https://github.com/Dnyarri/img2mesh/releases/latest

--
Ilyich the Toad
https://dnyarri.github.io/
Post a reply to this message
|
|
| |
| |
|
|
|
|
| |
|
|