|
|
|
|
|
|
| |
| |
|
|
|
|
| |
| |
|
|
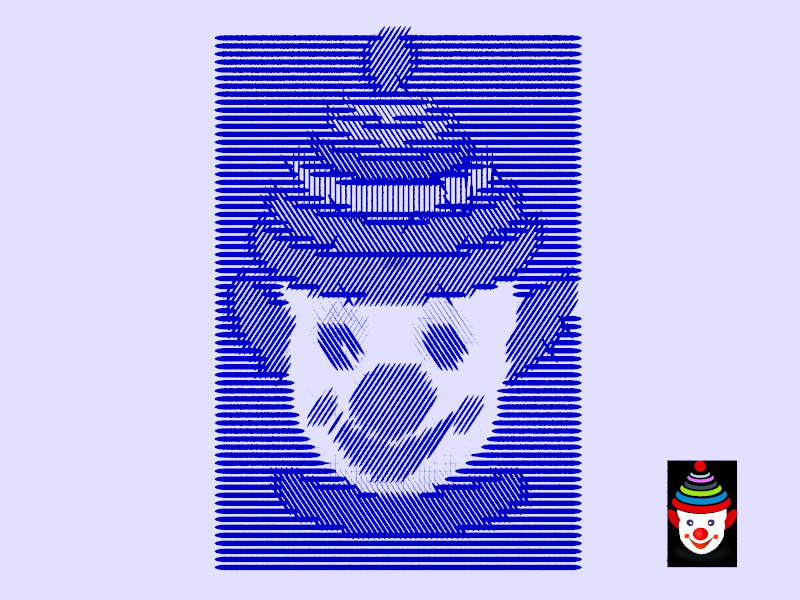
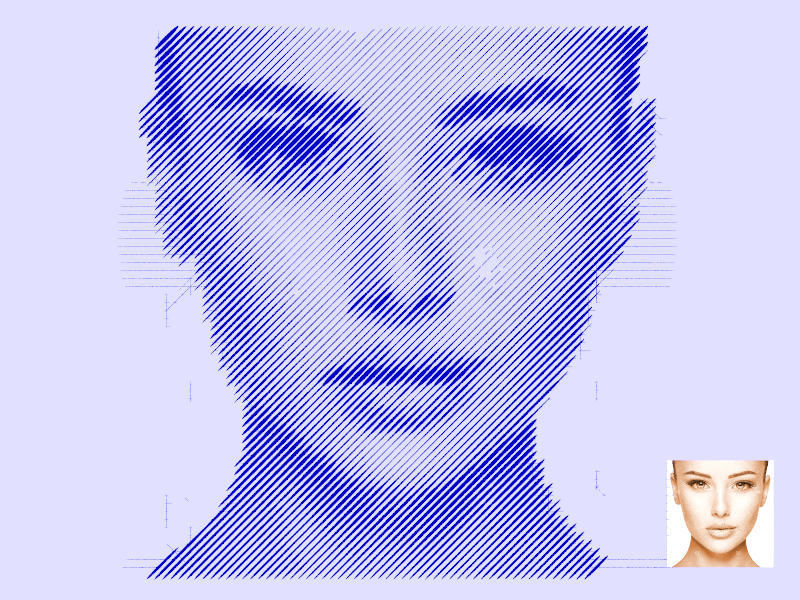
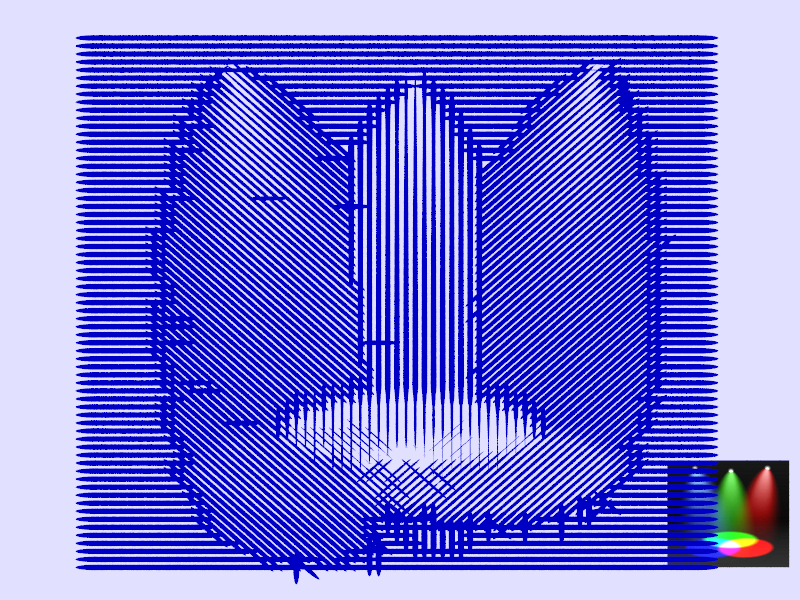
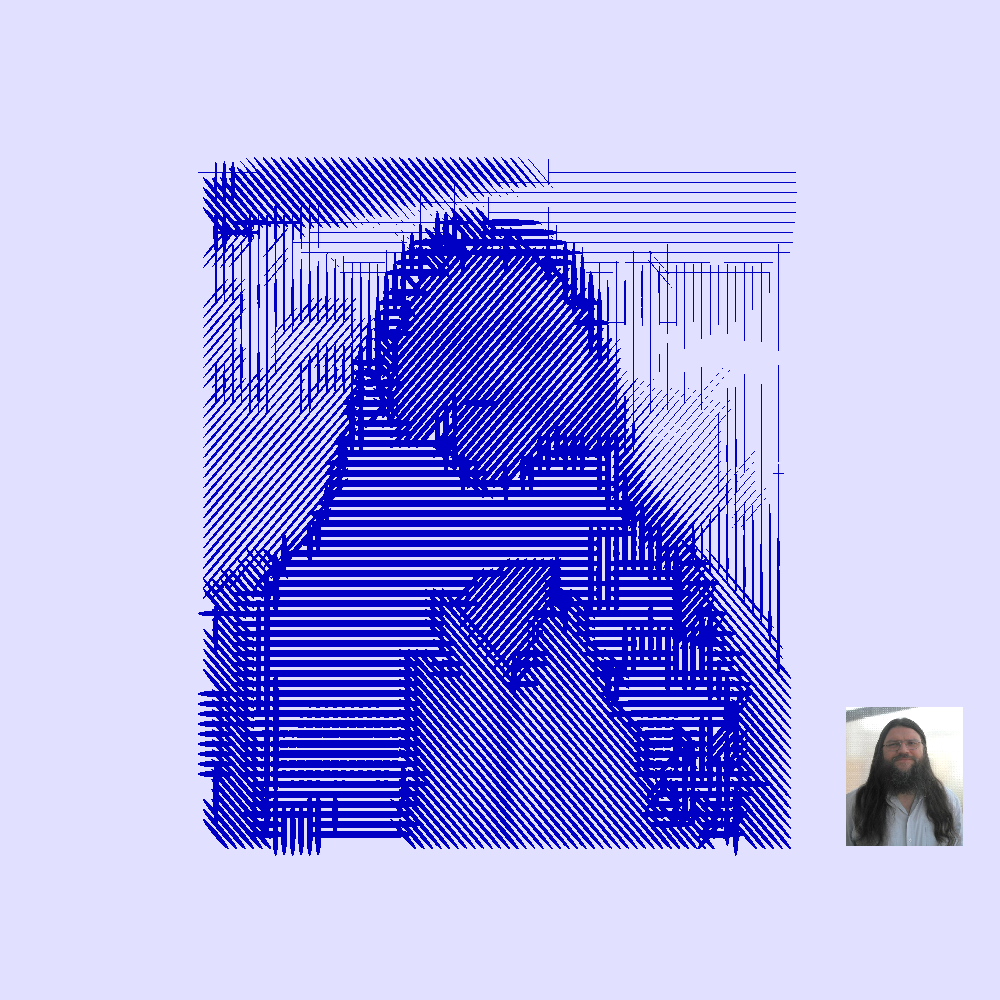
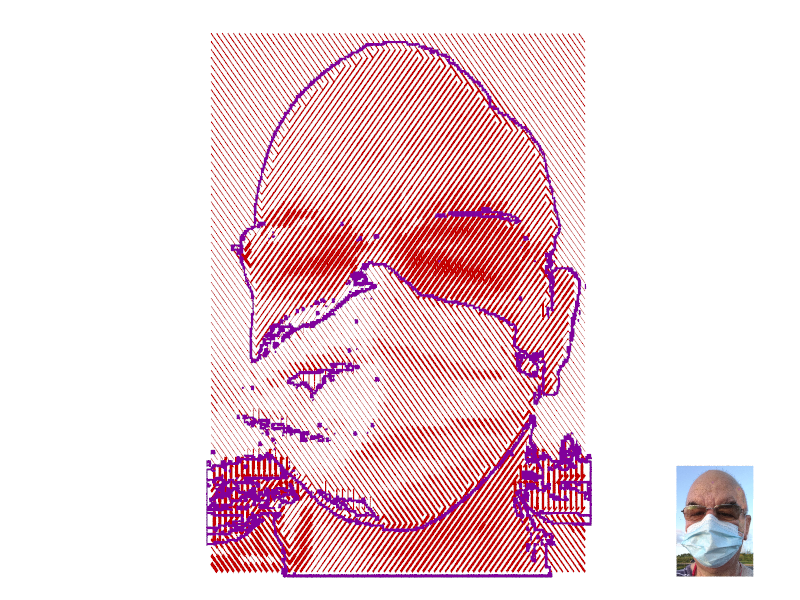
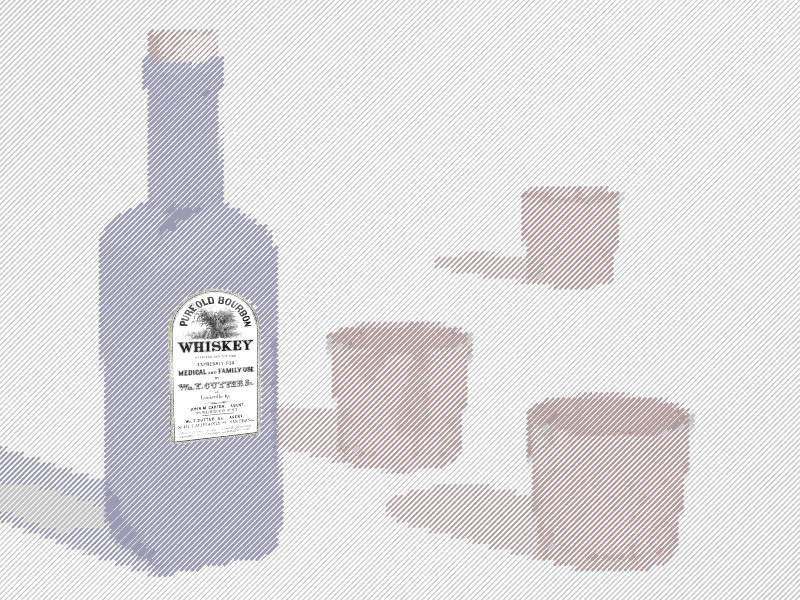
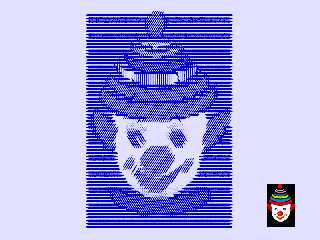
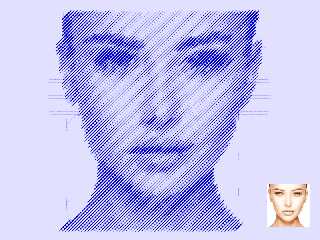
Trying to emulate mechanical shading.

m@
Post a reply to this message
Attachments:
Download 'test clown 01.png' (109 KB)
Download 'test face 01.png' (142 KB)
Download 'test spotlights 01.png' (165 KB)
Preview of image 'test clown 01.png'
Preview of image 'test face 01.png'
Preview of image 'test spotlights 01.png'
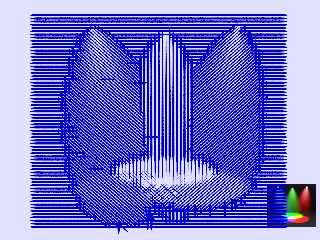
|
|
| |
| |
|
|
|
|
| |
| |
|
|
in news:60bee245@news.povray.org m@b wrote:

> Trying to emulate mechanical shading.
>
> m@
>

Very nice.

Ingo
Post a reply to this message
|
|
| |
| |
|
|
|
|
| |
| |
|
|
"m@b" <sai### [at] googlemail com> wrote:
> Trying to emulate mechanical shading.
>
> m@
Nice!
How does it work? com> wrote:
> Trying to emulate mechanical shading.
>
> m@
Nice!
How does it work?
Post a reply to this message
|
|
| |
| |
|
|
|
|
| |
| |
|
|
On 08/06/2021 4:24 pm, Mr wrote:
> "m@b" <sai### [at] googlemailcom> wrote:
>> Trying to emulate mechanical shading.
>>
>> m@
>
> Nice!
> How does it work?
>

The image is put into a function:

#declare MyTesti = function
{ pigment
   { image_map
     { "My image.png"  map_type 0
       once
     }
     // scale <1,1,1>
   }

}

(I am not sure where this function came from - I used it many years ago
in another project.)

These 4 functionas contain the information for each colour:

#declare TestR = function {MyTesti(x,y,z).red}      // Extract colours
#declare TestG = function {MyTesti(x,y,z).green}
#declare TestB = function {MyTesti(x,y,z).blue}
#declare TestK = function {MyTesti(x,y,z).grey}

Each point on the image is interrogated and a sphere is drawn.
The sphere is scaled by a constant in X and by brightness in Y.
The sphere is rotated depending on the predominant colour: R, G, B or
neutral. (Rotation must be a multiple of 45 degrees or the spheres don't
join up to make a line.)
The sphere is scaled to match the aspect of the input image.

I can post the code, but it needs to be cleaned up first.

m@
Post a reply to this message
|
|
| |
| |
|
|
|
|
| |
| |
|
|
m@b wrote on 08/06/2021 11:32:
> On 08/06/2021 4:24 pm, Mr wrote:
>> "m@b" <sai### [at] googlemailcom> wrote:
>>> Trying to emulate mechanical shading.
>>>
>>> m@
>>
>> Nice!
>> How does it work?
>>
>
> The image is put into a function:
>
> #declare MyTesti = function
> { pigment
>    { image_map
>      { "My image.png"  map_type 0
>        once
>      }
>      // scale <1,1,1>
>    }
> }
>
> (I am not sure where this function came from - I used it many years ago
> in another project.)
>
> These 4 functionas contain the information for each colour:
>
> #declare TestR = function {MyTesti(x,y,z).red}      // Extract colours
> #declare TestG = function {MyTesti(x,y,z).green}
> #declare TestB = function {MyTesti(x,y,z).blue}
> #declare TestK = function {MyTesti(x,y,z).grey}
>
> Each point on the image is interrogated and a sphere is drawn.
> The sphere is scaled by a constant in X and by brightness in Y.
> The sphere is rotated depending on the predominant colour: R, G, B or
> neutral. (Rotation must be a multiple of 45 degrees or the spheres don't
> join up to make a line.)
> The sphere is scaled to match the aspect of the input image.
>
> I can post the code, but it needs to be cleaned up first.
>
> m@
>
>
>

The results are very promising, looking in the code would be
interesting, thank you,
   Paolo
Post a reply to this message
|
|
| |
| |
|
|
|
|
| |
| |
|
|
Here is the script:

// author:  Matthew Bradwell
// date:    2021
//--------------------------------------------------------------------------
#version 3.7;
global_settings{ assumed_gamma 1.0 }
#default{ finish{ ambient 0.1 diffuse 0.9 }}
// camera ------------------------------------------------------------------
camera {perspective
     angle 28
     location  <0,5,-30>
     look_at   <0,5,0>
     right x*image_width/image_height}

#background{rgb<0.5,0.5,1>*1.5}

//---------------------------------------------------------------------------
//---------------------------- objects in scene ----------------------------
//---------------------------------------------------------------------------


// Input fie name and dimensions

//#declare In_Image = "Face 1a.jpg";  #declare In_Height = 1575;
#declare In_Width  = 1587;
#declare In_Image = "RGBColors 3.jpg";  #declare In_Height = 811;
#declare In_Width  = 925;

#declare In_Ratio  = In_Width/In_Height;

// Reference image bottom right
box{<0,0,0>,<1,1,0.01> pigment{image_map {In_Image map_type 0}} scale
<In_Ratio,1,1>*2 translate<5,0,-1> finish{emission 1}}

#declare MyTesti = function    // In order to get the HF_ macros to read
{ pigment                      // imported pictures they have to be
   { image_map                  // declared this way.
     { In_Image  map_type 0 // <----
       once
     }
   }

}

#declare TestR = function {MyTesti(x,y,z).red}      // Extract colours
#declare TestG = function {MyTesti(x,y,z).green}
#declare TestB = function {MyTesti(x,y,z).blue}
#declare TestK = function {MyTesti(x,y,z).grey}


#declare Resolution = 0.015;        // Spacing between the lines,
remember image maps are 1 x 1
#declare Gain = 1.3;                // Line thickness
#declare Bias = 0.07;               // To increase the output if very
light areas are not drawing
#declare Grey_threshold = 0.003;    // Greyness is detected if R, G & B
are equal, this sets the acceptance level


#for(X, 0, 1, Resolution)
         // Scan the functions
     #for(Y, 0, 1, Resolution)

         #declare Brightness =  Bias+(Gain*(1-TestK(X,Y,0)));

         #declare GreyTest = 0.001 + abs(TestK(X,Y,0) -
abs((TestR(X,Y,0)+TestG(X,Y,0)-TestB(X,Y,0))));

         #if(GreyTest < Grey_threshold)
          // Decide the line angle
             #declare Angle = 0;
          // Grey (Incuding black and white)
         #else
             #if(TestR(X,Y,0) > TestG(X,Y,0) & TestR(X,Y,0) > TestB(X,Y,0))
                 #declare Angle = 45; #declare Brightness =
Brightness*0.8;      // Red
             #else
                 #if(TestG(X,Y,0) > TestB(X,Y,0))
                     #declare Angle = 90;
          // Green
                 #else
                     #declare Angle = -45; #declare Brightness =
Brightness*0.8; // Blue
                 #end
             #end
         #end
         // Draw the line segment
         sphere{<0,0,0>,0.04 pigment{rgb <0,0,0.5>}
scale<8,Brightness,0.1> rotate<0,0,Angle> translate<X-0.5,Y,0>*10
finish{emission 1} scale<In_Ratio,1,1>}

     #end
#end
Post a reply to this message
|
|
| |
| |
|
|
|
|
| |
| |
|
|
Hi(gh)!

On 09.06.21 11:09, m@b wrote:
 > // Reference image bottom right
 > box{<0,0,0>,<1,1,0.01> pigment{image_map {In_Image map_type 0}} scale
<In_Ratio,1,1>*2 translate<5,0,-1> finish{emission 1}}
 >
 > #declare MyTesti = function    // In order to get the HF_ macros to read
 > { pigment                      // imported pictures they have to be
 >   { image_map                  // declared this way.
 >     { In_Image  map_type 0 // <----
 >       once
 >     }
 >   }
 > }
 >
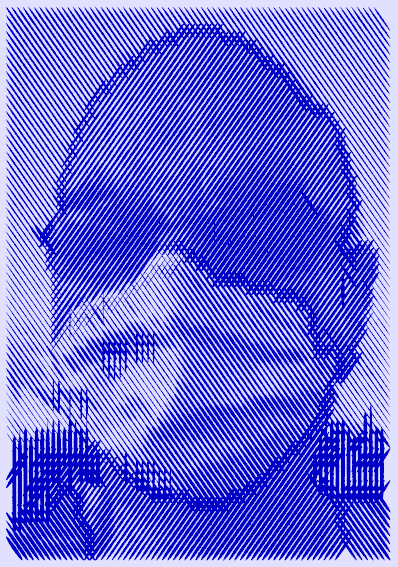
I had to add the file type in the image_map blocks, now it runs fine,
see attachment!

May I use this "filter" to process one of my bicycle handle cam videos
and publish it on Vimeo, of course crediting you?

See you in Khyberspace!

Yadgar

Now playing: Horizon (Jon and Vangelis)
Post a reply to this message
Attachments:
Download 'rastered_yadgar2011.png' (68 KB)
Preview of image 'rastered_yadgar2011.png'
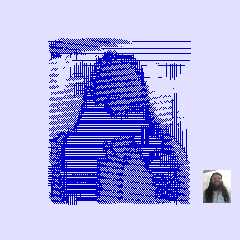
|
|
| |
| |
|
|
|
|
| |
| |
|
|
Hi Matt,

> > "m@b" <sai### [at] googlemailcom> wrote:
> >> Trying to emulate mechanical shading.

This is clever!  I like it.  :)

> The image is put into a function:
>
> #declare MyTesti = function
> { pigment
>    { image_map
>      { "My image.png"  map_type 0
>        once
>      }
>      // scale <1,1,1>
>    }
>
> }
>
> (I am not sure where this function came from - I used it many years ago
> in another project.)

I see in your posted code that you comment that "map_type 0" is required - but
the docs say that this is the default planar mapping, so maybe it's not actually
a requirement?


> Each point on the image is interrogated and a sphere is drawn.
> The sphere is scaled by a constant in X and by brightness in Y.
> The sphere is rotated depending on the predominant colour: R, G, B or
> neutral. (Rotation must be a multiple of 45 degrees or the spheres don't
> join up to make a line.)
> The sphere is scaled to match the aspect of the input image.

I had this bouncing around in my head today,  and maybe it would be faster to
make some pigment patterns and use a pigment map instead of sphere primitives.

http://news.povray.org/povray.binaries.images/thread/%3Cweb.5a7774f01a0c102c5cafe28e0%40news.povray.org%3E/

You could even just make a single linear pattern and the others would just be
rotations or scales of it. (have the line thickness be dependent on the color
channel value)

The other thing I was thinking was that you might also be able to get an outline
or shape-following effect if you calculated not only the value of any given
pixel, but the gradient of the function there as well.  Then you could make the
lines perpendicular to the gradient / tangent to the curve.

I know TOK wrote the gradient functions in the distributed include files, and
there are edge-finding algorithms that give you the gradient of the image as a
bonus.

This looks like something super fun to play with, with a lot of potential for
future development!  Good work  :)
Post a reply to this message
|
|
| |
| |
|
|
|
|
| |
| |
|
|
"Bald Eagle" <cre### [at] netscapenet> wrote:
>...
> I know TOK wrote the gradient functions in the distributed include files, and
> there are edge-finding algorithms that give you the gradient of the image as a
> bonus.
>...

Hi Bill

Please note that most of the credit for the Vector analysis macros should go to
Christoph Hormann, which did the heavy lifting. I just suggested some
corrections.

Btw.:
I agree with you; it may be that experimenting with pigment maps will be
rewarding here.

--
Tor Olav
http://subcube.com
https://github.com/t-o-k
Post a reply to this message
|
|
| |
| |
|
|
|
|
| |
| |
|
|
On 10/06/2021 1:00 am, Jörg "Yadgar" Bleimann wrote:

..........

>
> May I use this "filter" to process one of my bicycle handle cam videos
> and publish it on Vimeo, of course crediting you?
>
> See you in Khyberspace!
>
> Yadgar
>
> Now playing: Horizon (Jon and Vangelis)

Yes - of course - post a link.

My next thought was to try it with an animation.

m@
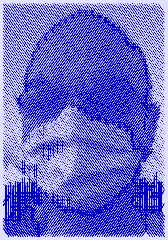
Post a reply to this message
Attachments:
Download 'my_face_a.png' (144 KB)
Preview of image 'my_face_a.png'
|
|
| |
| |
|
|
|
|
| |
| |
|
|
On 10/06/2021 2:25 am, Bald Eagle wrote:
> Hi Matt,
>
>>> "m@b" <sai### [at] googlemailcom> wrote:
>>>> Trying to emulate mechanical shading.
>
> This is clever!  I like it.  :)
>

Thanks.


................ snip

>> (I am not sure where this function came from - I used it many years ago
>> in another project.)
>
> I see in your posted code that you comment that "map_type 0" is required - but
> the docs say that this is the default planar mapping, so maybe it's not actually
> a requirement?
.
You are right - it is the default, perhaps it was a requirement 20 years
ago when I last played with POV-Ray


>
> I had this bouncing around in my head today,  and maybe it would be faster to
> make some pigment patterns and use a pigment map instead of sphere primitives.

But I would need some primitives to put the pattern on?

>
>
http://news.povray.org/povray.binaries.images/thread/%3Cweb.5a7774f01a0c102c5cafe28e0%40news.povray.org%3E/
>
> You could even just make a single linear pattern and the others would just be
> rotations or scales of it. (have the line thickness be dependent on the color
> channel value)
>
> The other thing I was thinking was that you might also be able to get an outline
> or shape-following effect if you calculated not only the value of any given
> pixel, but the gradient of the function there as well.  Then you could make the
> lines perpendicular to the gradient / tangent to the curve.
>
> I know TOK wrote the gradient functions in the distributed include files, and
> there are edge-finding algorithms that give you the gradient of the image as a
> bonus.

Hmm - I need to think about these things. Interesting suggestions.

>
> This looks like something super fun to play with, with a lot of potential for
> future development!  Good work  :)
>
>
Post a reply to this message
|
|
| |
| |
|
|
|
|
| |
| |
|
|
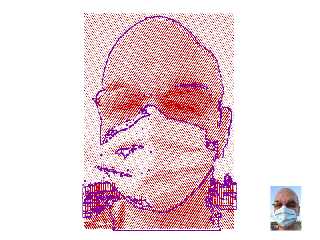
On 08/06/2021 11:21 am, m@b wrote:
> Trying to emulate mechanical shading.
>
> m@

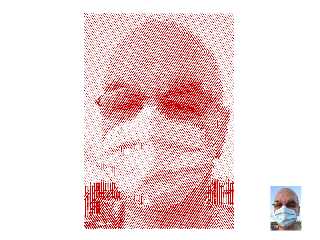
An example with cylinders instead of spheres, I like the maze effect at
the boundaries.

And a first attempt at edge detection.

m@
Post a reply to this message
Attachments:
Download 'test cylinders 01.png' (128 KB)
Download 'image cross hatch 03.png' (181 KB)
Preview of image 'test cylinders 01.png'
Preview of image 'image cross hatch 03.png'
|
|
| |
| |
|
|
|
|
| |
| |
|
|
"m@b" <sai### [at] googlemailcom> wrote:

> But I would need some primitives to put the pattern on?

Of course.  A thin box or the union of 2 triangles works well.  A plane if you
just want to have the largest possible palette.

But the idea is that you have a lot of stuff going on after you "extract" the
colors.  Rather than do that, you use the color values directly to select a
pigment, by using a pigment_map.

I am curious about
#declare GreyTest = 0.001 + abs(TestK(X,Y,0) -
abs((TestR(X,Y,0) + TestG(X,Y,0) - TestB(X,Y,0))));

What is the underlying logic/reasoning behind this "greyness test"?

> > there are edge-finding algorithms that give you the gradient of the image as a
> > bonus.
>
> Hmm - I need to think about these things. Interesting suggestions.

https://www.youtube.com/watch?v=uihBwtPIBxM
skip to 3:30 if you want.
Post a reply to this message
|
|
| |
| |
|
|
|
|
| |
| |
|
|
"Tor Olav Kristensen" <tor### [at] TOBEREMOVEDgmailcom> wrote:

> Hi Bill
>
> Please note that most of the credit for the Vector analysis macros should go to
> Christoph Hormann, which did the heavy lifting. I just suggested some
> corrections.

So noted!  He did an excellent job, especially that clever bit about employing
f_r - which took me a bit of time to wrap my head around.

http://www.povray.org/documentation/view/3.6.1/448/
f_r(x,y,z) = sqrt( x*x + y*y + z*z )
When used alone, the "R" function gives a surface that consists of all the
points that are a specific distance (threshold value) from the origin, i.e. a
sphere.


> Btw.:
> I agree with you; it may be that experimenting with pigment maps will be
> rewarding here.

Indeed.  I think he could get some interesting half-tone effects as well.

rgbf would look great if unmodified spheres of all 3 colors were used.

There's also the potential for using different shapes - boxes, triangles,
hexagons, etc.  I'm also thinking that using cones would give a Voronoi effect.
Post a reply to this message
|
|
| |
| |
|
|
|
|
| |
| |
|
|
"Bald Eagle" <cre### [at] netscapenet> wrote:

> I'm also thinking that using cones would give a Voronoi effect.

I just did this one because it was quick.
Post a reply to this message
Attachments:
Download 'monochrome_be.png' (567 KB)
Preview of image 'monochrome_be.png'

|
|
| |
| |
|
|
|
|
| |
| |
|
|
=?UTF-8?Q?J=c3=b6rg_=22Yadgar=22_Bleimann?= <yaz### [at] gmxde> wrote:

> Yadgar

I really just have to say that if you got some dark sunglasses and a leather
biker vest, you could totally pull off that "bouncer at a biker bar" look.

:D
Post a reply to this message
|
|
| |
| |
|
|
|
|
| |
| |
|
|
"Bald Eagle" <cre### [at] netscapenet> wrote:
> "Bald Eagle" <cre### [at] netscapenet> wrote:
>
> > I'm also thinking that using cones would give a Voronoi effect.
>
> I just did this one because it was quick.

They make a nice texture that reminds me of mashed paper.

--
Tor Olav
http://subcube.com
https://github.com/t-o-k
Post a reply to this message
|
|
| |
| |
|
|
|
|
| |
| |
|
|
This is a multi-part message in MIME format.
Post a reply to this message
Attachments:
Download 'monochrome_be.png' (615 KB)
Preview of image 'monochrome_be.png'

|
|
| |
| |
|
|
|
|
| |
| |
|
|
On 11/06/2021 2:27 am, Bald Eagle wrote:
> I am curious about
> #declare GreyTest = 0.001 + abs(TestK(X,Y,0) -
> abs((TestR(X,Y,0) + TestG(X,Y,0) - TestB(X,Y,0))));
>
> What is the underlying logic/reasoning behind this "greyness test"?

I wish to represent 4 colours - R, G, B and Grey.

The 0.001 is now redundant, I put it in to prevent a divide by zero
error in a previous version.

TestK(X,Y,0) returns the mean value of R, G, B. (1)

R+G-B will also return the mean if R, G and B are all the same, i.e.
colour is Grey. (Black and White are just shades of Grey :-))  (2)

So the GreyTest (1)-(2) returns zero if R, G and B are equal and a small
value if they are close.

BUT --------------------------------------------------------

You got me thinking, are there any cases where the test returns zero but
R, G, B are not equal?

Answer - yes, the test sometimes falls down when the 3 numbers are
equally spaced. e.g  0.1, 0.2, 0.3    or 0.3, 0.6, 0.9

I was over thinking, maybe this will work:

#declare GreyTest = abs(TestR(X,Y,0)-TestG(X,Y,0)) +
abs(TestR(X,Y,0)-TestB(X,Y,0)) + abs(TestB(X,Y,0)-TestG(X,Y,0));

m@
Post a reply to this message
|
|
| |
| |
|
|
|
|
| |
| |
|
|
Hi(gh)!

On 10.06.21 23:55, Bald Eagle wrote:
> =?UTF-8?Q?J=c3=b6rg_=22Yadgar=22_Bleimann?= <yaz### [at] gmxde> wrote:
>
>> Yadgar
>
> I really just have to say that if you got some dark sunglasses and a leather
> biker vest, you could totally pull off that "bouncer at a biker bar" look.

Yes, and I'm about as heavyweight as the typical biker bar bouncer - but
unfortunately, it's more fat than muscle... but nevertheless, I prefer
muscle-powered cycling over motorbiking!

Now playing: Nobody Home (Pink Floyd)
Post a reply to this message
|
|
| |
| |
|
|
|
|
| |
| |
|
|
"m@b" <sai### [at] googlemailcom> wrote:

> I was over thinking, maybe this will work:
>
> #declare GreyTest = abs(TestR(X,Y,0)-TestG(X,Y,0)) +
> abs(TestR(X,Y,0)-TestB(X,Y,0)) + abs(TestB(X,Y,0)-TestG(X,Y,0));


I thought a bit about this, underthought it while playing with the idea, and
then realized that what I wanted to suggest was making use of the HSV color
space.

That way when all of the color channels are equal, the Hues cancel each other
out, or if they are close, then they give a small Saturation vector.  You can
then set the threshold and test the length of that Saturation vector.
Brightness would correspond to the Value.

Then you just use the CRGB2HSV color conversion macro in colors.inc (requires
CRGB2H).

// Converts a color in RGB color space to a color in HSV color space.
// Input:  < Red, Green, Blue, Filter, Transmit >
// Output: < Hue, Saturation, Value, Filter, Transmit >
#macro CRGB2HSV(Color)
   #local RGBFT = color Color;
   #local R = (RGBFT.red);
   #local G = (RGBFT.green);
   #local B = (RGBFT.blue);
   #local Min = min(R,min(G,B));
   #local Max = max(R,max(G,B));
   #local Span = Max-Min;
   #local H = CRGB2H (<R,G,B>, Max, Span);
   #local S = 0; #if (Max!=0) #local S = Span/Max; #end
   <H,S,Max,(RGBFT.filter),(RGBFT.transmit)>
#end


// Takes RGB vector, Max component, and Span as input,
// returns Hue value.
#macro CRGB2H (RGB, Max, Span)
   #local H = 0;
   #local R = RGB.red;
   #local G = RGB.green;
   #local B = RGB.blue;
   #if (Span>0)
      #local H = (
         + (R = Max & G != Max ? 0 + (G - B)/Span : 0)
         + (G = Max & B != Max ? 2 + (B - R)/Span : 0)
         + (B = Max & R != Max ? 4 + (R - G)/Span : 0)
      )*60;
   #end
   H
#end
Post a reply to this message
|
|
| |
| |
|
|
|
|
| |
| |
|
|
On 08/06/2021 11:21 am, m@b wrote:
> Trying to emulate mechanical shading.
>
> m@

Here is an animated version with colour. Including the traditional
checkered floor and blue sky:

<https://youtu.be/N2Z-DXoJBUY>

m@
Post a reply to this message
|
|
| |
| |
|
|
|
|
| |
| |
|
|
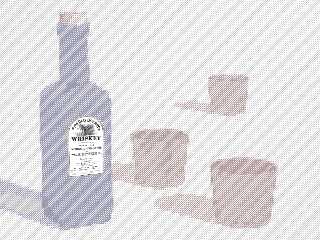
On 08/06/2021 11:21 am, m@b wrote:
> Trying to emulate mechanical shading.
>
> m@

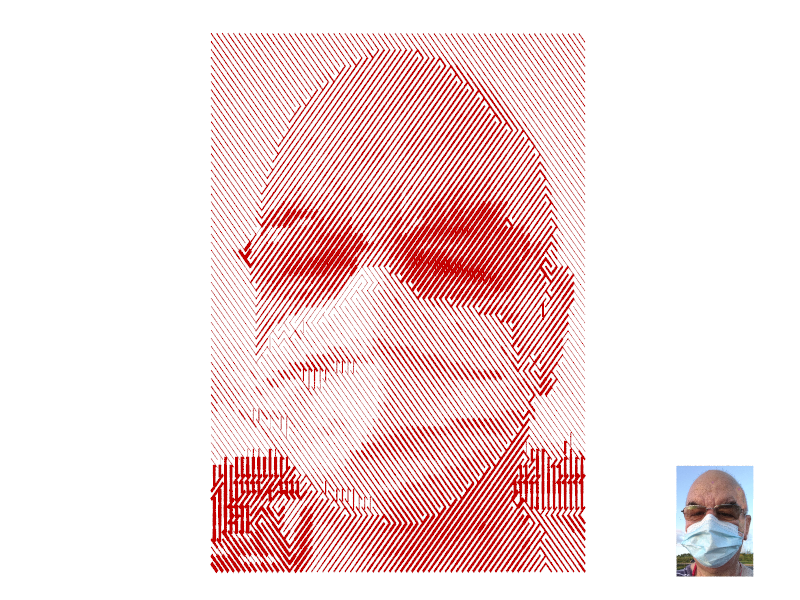
Latest:
Post a reply to this message
Attachments:
Download 'image cross hatch 04.png' (279 KB)
Preview of image 'image cross hatch 04.png'
|
|
| |
| |
|
|
|
|
| |
| |
|
|
Op 18-6-2021 om 11:25 schreef m@b:
> On 08/06/2021 11:21 am, m@b wrote:
>> Trying to emulate mechanical shading.
>>
>> m@
>
> Latest:
>
Oh yes! I prefer this one to those with different cross-hatches.

--
Thomas
Post a reply to this message
|
|
| |
| |
|
|
|
|
| |
| |
|
|
"m@b" <sai### [at] googlemailcom> wrote:
> On 08/06/2021 11:21 am, m@b wrote:
> > Trying to emulate mechanical shading.
> >
> > m@
>
> Latest:

The technique refines ! result looks excellent !
Post a reply to this message
|
|
| |
| |
|
|
|
|
| |
|
|