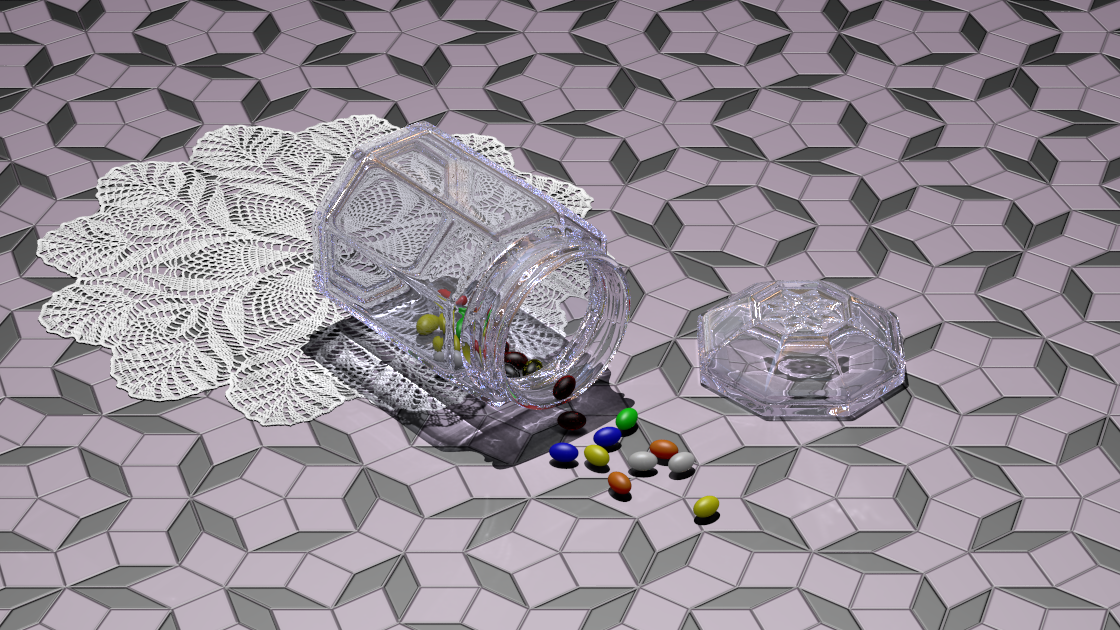
|
|
|
|
|
|
| |
| |
|
|
|
|
| |
| |
|
|
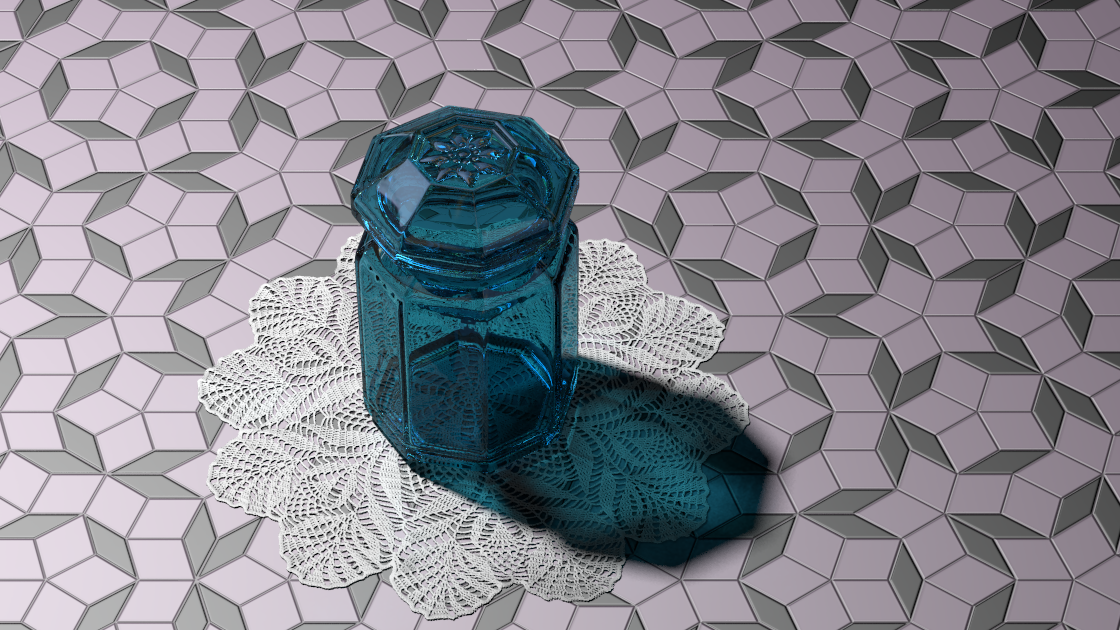
I'm testing a user contributed fix related to
http://bugs.povray.org/task/287 and thought the image was cool enough to
share. It's a work in progress so I'm not entirely sure where it will
end up.

Oh and I had opportunity for an unexpected extra test. We had a storm
roll through and lost power for a few minutes. My 1st response was CRAP
eight hours down the drain, but the I remembered +C option. Since the
scene has photons I just loaded the already generated photon map instead
of regenerating the map, and then enabled continue trace and she
finished up the last ten minutes of the render without a hitch!

Jim
---
PS: the fix probably won't make it into 3.7.0 release because of code
freeze.
Post a reply to this message
Attachments:
Download 'work.png' (927 KB)
Preview of image 'work.png'
|
|
| |
| |
|
|
|
|
| |
| |
|
|
I love it. Not in the least, the harmony of colours.

Thomas
Post a reply to this message
|
|
| |
| |
|
|
|
|
| |
| |
|
|
>James Holsenback  on date 01/07/2013 20.33 wrote:
> I'm testing a user contributed fix related to
> http://bugs.povray.org/task/287 and thought the image was cool enough to
> share. It's a work in progress so I'm not entirely sure where it will
> end up.
Surely the jar is very good, it seems /real/ (and thanks to the +C option!).
Paolo
Post a reply to this message
|
|
| |
| |
|
|
|
|
| |
| |
|
|
On 07/02/2013 06:52 AM, Paolo Gibellini wrote:
>  >James Holsenback  on date 01/07/2013 20.33 wrote:
>> I'm testing a user contributed fix related to
>> http://bugs.povray.org/task/287 and thought the image was cool enough to
>> share. It's a work in progress so I'm not entirely sure where it will
>> end up.
> Surely the jar is very good, it seems /real/ (and thanks to the +C
> option!).
> Paolo
>
>
Well I can't take credit for the jar:
http://www.blender-models.com/model-downloads/objects/id/decorative-oct-glass-jar-ver-3/

I think I'm going to try to separate the lid from the rest of the jar,
and place it on the ground plane, with a few other objects
Post a reply to this message
|
|
| |
| |
|
|
|
|
| |
| |
|
|
On 07/02/2013 02:57 AM, Thomas de Groot wrote:
> I love it. Not in the least, the harmony of colours.
>
> Thomas
>
the glass is srgb <0.6875,0.8750,0.8984> the smaller tiles *0.1 ...
they're slightly reflective and picking up nice hue from the hdr map.
amazingly only lit by single area_light
Post a reply to this message
|
|
| |
| |
|
|
|
|
| |
| |
|
|
Le 13-07-01 14:33, James Holsenback a écrit :
> I'm testing a user contributed fix related to
> http://bugs.povray.org/task/287 and thought the image was cool enough to
> share. It's a work in progress so I'm not entirely sure where it will
> end up.
>
> Oh and I had opportunity for an unexpected extra test. We had a storm
> roll through and lost power for a few minutes. My 1st response was CRAP
> eight hours down the drain, but the I remembered +C option. Since the
> scene has photons I just loaded the already generated photon map instead
> of regenerating the map, and then enabled continue trace and she
> finished up the last ten minutes of the render without a hitch!
>
> Jim
> ---
> PS: the fix probably won't make it into 3.7.0 release because of code
> freeze.

Very good.

By the way, it's /feature/ freeze. I think that there is still place for
some bug and glitches fixes.
Post a reply to this message
|
|
| |
| |
|
|
|
|
| |
| |
|
|
James Holsenback <nom### [at] none com> wrote:
> On 07/02/2013 06:52 AM, Paolo Gibellini wrote:
> > >James Holsenback on date 01/07/2013 20.33 wrote:
> >> I'm testing a user contributed fix related to
> >> http://bugs.povray.org/task/287 and thought the image was cool enough to
> >> share. It's a work in progress so I'm not entirely sure where it will
> >> end up.
> > Surely the jar is very good, it seems /real/ (and thanks to the +C
> > option!).
> > Paolo
> >
> >
> Well I can't take credit for the jar:
>
http://www.blender-models.com/model-downloads/objects/id/decorative-oct-glass-jar-ver-3/
>
> I think I'm going to try to separate the lid from the rest of the jar,
> and place it on the ground plane, with a few other objects
That may improve your still fine image. I would like to see the result.
Best regards,
Michael com> wrote:
> On 07/02/2013 06:52 AM, Paolo Gibellini wrote:
> > >James Holsenback on date 01/07/2013 20.33 wrote:
> >> I'm testing a user contributed fix related to
> >> http://bugs.povray.org/task/287 and thought the image was cool enough to
> >> share. It's a work in progress so I'm not entirely sure where it will
> >> end up.
> > Surely the jar is very good, it seems /real/ (and thanks to the +C
> > option!).
> > Paolo
> >
> >
> Well I can't take credit for the jar:
>
http://www.blender-models.com/model-downloads/objects/id/decorative-oct-glass-jar-ver-3/
>
> I think I'm going to try to separate the lid from the rest of the jar,
> and place it on the ground plane, with a few other objects
That may improve your still fine image. I would like to see the result.
Best regards,
Michael
Post a reply to this message
|
|
| |
| |
|
|
|
|
| |
| |
|
|
James Holsenback <nom### [at] nonecom> wrote:
> Oh and I had opportunity for an unexpected extra test. We had a storm
> roll through and lost power for a few minutes. My 1st response was CRAP
> eight hours down the drain, but the I remembered +C option.

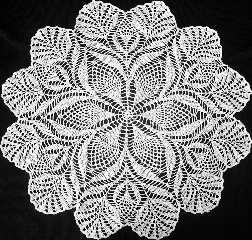
Nice doyley, how exactly do you make such an object? The glass jar looks good as
well of course.

The +C option is IMO one of the most important features in POV, especially with
some of my renders that run for several days. Has saved me smashing my
PC/desk/anything else nearby on many an occasion ;-)

Sean
Post a reply to this message
|
|
| |
| |
|
|
|
|
| |
| |
|
|
On 07/02/2013 06:41 PM, s.day wrote:
> James Holsenback <nom### [at] nonecom> wrote:
>> Oh and I had opportunity for an unexpected extra test. We had a storm
>> roll through and lost power for a few minutes. My 1st response was CRAP
>> eight hours down the drain, but the I remembered +C option.
>
> Nice doyley, how exactly do you make such an object? The glass jar looks good as
> well of course.

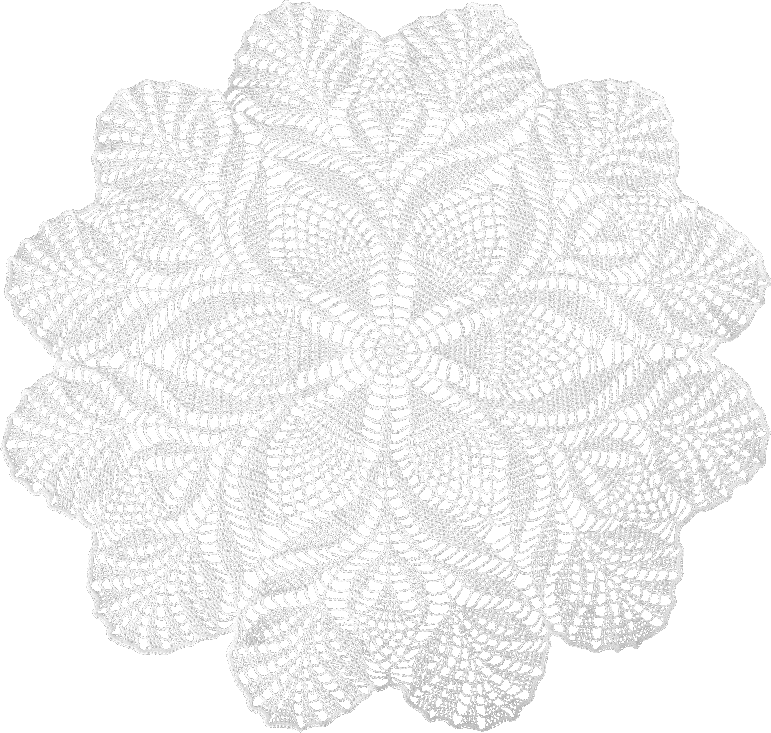
It's been in my toolbox for sometime now, and I've used it several
times. It found an image of the doily on a black background. In GIMP I
did select by color and was able to get enough of the image to cut then
paste into a new image that I placed on a transparent background then ...

#declare DoilyPattern =
pigment {
	image_map {
		png "doily.png"
		once
		}
	}

#declare Doily =
box { <0,0,0> <1,1,0.001>
	texture {
		pigment { DoilyPattern }
		finish { diffuse 0.5 emission 0.01}
		}
	translate <-0.5,-0.5,0>
	rotate x*90
	translate y*0.005
	}

object { Doily scale <5,1,5>

the last translate in y direction helped with the appearance of
thickness as it casts a shadow underneath.

I've attached the image ... hope you can find it useful in one of your
scenes

>
> The +C option is IMO one of the most important features in POV, especially with
> some of my renders that run for several days. Has saved me smashing my
> PC/desk/anything else nearby on many an occasion ;-)

indeed
Post a reply to this message
Attachments:
Download 'doily.png' (626 KB)
Preview of image 'doily.png'
|
|
| |
| |
|
|
|
|
| |
| |
|
|
On 07/02/2013 04:10 PM, Alain wrote:
> Le 13-07-01 14:33, James Holsenback a écrit :
>> I'm testing a user contributed fix related to
>> http://bugs.povray.org/task/287 and thought the image was cool enough to
>> share. It's a work in progress so I'm not entirely sure where it will
>> end up.
>>
>> Oh and I had opportunity for an unexpected extra test. We had a storm
>> roll through and lost power for a few minutes. My 1st response was CRAP
>> eight hours down the drain, but the I remembered +C option. Since the
>> scene has photons I just loaded the already generated photon map instead
>> of regenerating the map, and then enabled continue trace and she
>> finished up the last ten minutes of the render without a hitch!
>>
>> Jim
>> ---
>> PS: the fix probably won't make it into 3.7.0 release because of code
>> freeze.
>
> Very good.
>
> By the way, it's /feature/ freeze. I think that there is still place for
> some bug and glitches fixes.

Maybe we're talking semantics here. After I cleaned up the users code
,honoring the style already in the source ... "When in Rome do as the
Romans do ... correct? I was asked to hold off submitting the "fix" ...
in other words this wasn't a feature addition. So I'm sticking with
"code" freeze.
Post a reply to this message
|
|
| |
| |
|
|
|
|
| |
| |
|
|
On 07/02/2013 05:11 PM, MichaelJF wrote:
> James Holsenback <nom### [at] nonecom> wrote:
>> On 07/02/2013 06:52 AM, Paolo Gibellini wrote:
>>>   >James Holsenback  on date 01/07/2013 20.33 wrote:
>>>> I'm testing a user contributed fix related to
>>>> http://bugs.povray.org/task/287 and thought the image was cool enough to
>>>> share. It's a work in progress so I'm not entirely sure where it will
>>>> end up.
>>> Surely the jar is very good, it seems /real/ (and thanks to the +C
>>> option!).
>>> Paolo
>>>
>>>
>> Well I can't take credit for the jar:
>>
http://www.blender-models.com/model-downloads/objects/id/decorative-oct-glass-jar-ver-3/
>>
>> I think I'm going to try to separate the lid from the rest of the jar,
>> and place it on the ground plane, with a few other objects
>
> That may improve your still fine image. I would like to see the result.
>
> Best regards,
> Michael
>
>
I'd like to work something in that I can use SSLT ... something organic
like a fruit, vegetable, flower to offset the symmetry and hard angles
of the jar and ground plane.
Post a reply to this message
|
|
| |
| |
|
|
|
|
| |
| |
|
|
Nice image, James!

James Holsenback <nom### [at] nonecom> wrote:
> I think I'm going to try to separate the lid from the rest of the jar,
> and place it on the ground plane, with a few other objects

Just in case you didn't already know, in Blender it is easy to separate
disconnected geometry from meshes:

1) In edit mode, select one vertex of the jar's lid and press Ctrl+L to
automatically select all connected vertices.
2) Press P to separate it from the mesh. This will create a new object.

Of course, this will only work if the lid is truly a separate object...
otherwise you have quite the job ahead of you :)

Sam
Post a reply to this message
|
|
| |
| |
|
|
|
|
| |
| |
|
|
On 07/03/2013 06:35 PM, Samuel Benge wrote:
> Nice image, James!
>
> James Holsenback <nom### [at] nonecom> wrote:
>> I think I'm going to try to separate the lid from the rest of the jar,
>> and place it on the ground plane, with a few other objects
>
> Just in case you didn't already know, in Blender it is easy to separate
> disconnected geometry from meshes:
>
> 1) In edit mode, select one vertex of the jar's lid and press Ctrl+L to
> automatically select all connected vertices.
> 2) Press P to separate it from the mesh. This will create a new object.
>
> Of course, this will only work if the lid is truly a separate object...
> otherwise you have quite the job ahead of you :)
>
> Sam
>

Thanks twice ... I successfully separated the object into container,
lid, and top decoration.
Post a reply to this message
|
|
| |
| |
|
|
|
|
| |
| |
|
|
James Holsenback <nom### [at] nonecom> wrote:
> Thanks twice ... I successfully separated the object into container,
> lid, and top decoration.

NP. Are you planning to make a boolean union of the lid and top decoration? I've
found that Blender's boolean modifier can be dodgy at times, especially if the
base mesh hasn't been triangulated.
Post a reply to this message
|
|
| |
| |
|
|
|
|
| |
| |
|
|
James Holsenback <nom### [at] nonecom> wrote:
> It's been in my toolbox for sometime now..

Thanks for providing the code/image. That was the only way I could think of
making such an object but did not think it would work as well as your example
does. The raising it slightly to produce the shadow works really well as I would
never have guessed it was an image map.

Sean
Post a reply to this message
|
|
| |
| |
|
|
|
|
| |
| |
|
|
On 07/03/2013 08:04 PM, Samuel Benge wrote:
> James Holsenback <nom### [at] nonecom> wrote:
>> Thanks twice ... I successfully separated the object into container,
>> lid, and top decoration.
>
> NP. Are you planning to make a boolean union of the lid and top decoration? I've
> found that Blender's boolean modifier can be dodgy at times, especially if the
> base mesh hasn't been triangulated.
>
>
Haven't even noticed the union modifier ... I /was/ going to just use
Join in object mode. I'll have a look!
Post a reply to this message
|
|
| |
| |
|
|
|
|
| |
| |
|
|
James Holsenback <nom### [at] nonecom> wrote:
> On 07/03/2013 08:04 PM, Samuel Benge wrote:
> > James Holsenback <nom### [at] nonecom> wrote:
> >> Thanks twice ... I successfully separated the object into container,
> >> lid, and top decoration.
> >
> > NP. Are you planning to make a boolean union of the lid and top decoration? I've
> > found that Blender's boolean modifier can be dodgy at times, especially if the
> > base mesh hasn't been triangulated.
> >
> Haven't even noticed the union modifier ... I /was/ going to just use
> Join in object mode. I'll have a look!

Blender's funny like that: certain things are only available as modifiers. I was
scratching my head for the longest time one day trying to figure out how to find
a happy medium between flat shading and smooth... you know, to break the smooth
shading along only the sharp edges of a mesh. The one solution was found where?
The modifiers tab, of course (Add Modifier->Generate->Edge Split) ;P

It's a very confusing program when just jumping in, but it's really not as
poorly designed as it seems at first glance. I've been especially impressed by
its modeling capabilities. And by using modifiers, you can keep your mesh design
as simple as possible until it's time to export it.
Post a reply to this message
|
|
| |
| |
|
|
|
|
| |
| |
|
|
On 07/02/2013 08:51 AM, James Holsenback wrote:
> On 07/02/2013 06:52 AM, Paolo Gibellini wrote:
>>  >James Holsenback  on date 01/07/2013 20.33 wrote:
>>> I'm testing a user contributed fix related to
>>> http://bugs.povray.org/task/287 and thought the image was cool enough to
>>> share. It's a work in progress so I'm not entirely sure where it will
>>> end up.
>> Surely the jar is very good, it seems /real/ (and thanks to the +C
>> option!).
>> Paolo
>>
>>
> Well I can't take credit for the jar:
>
http://www.blender-models.com/model-downloads/objects/id/decorative-oct-glass-jar-ver-3/
>
>
> I think I'm going to try to separate the lid from the rest of the jar,
> and place it on the ground plane, with a few other objects

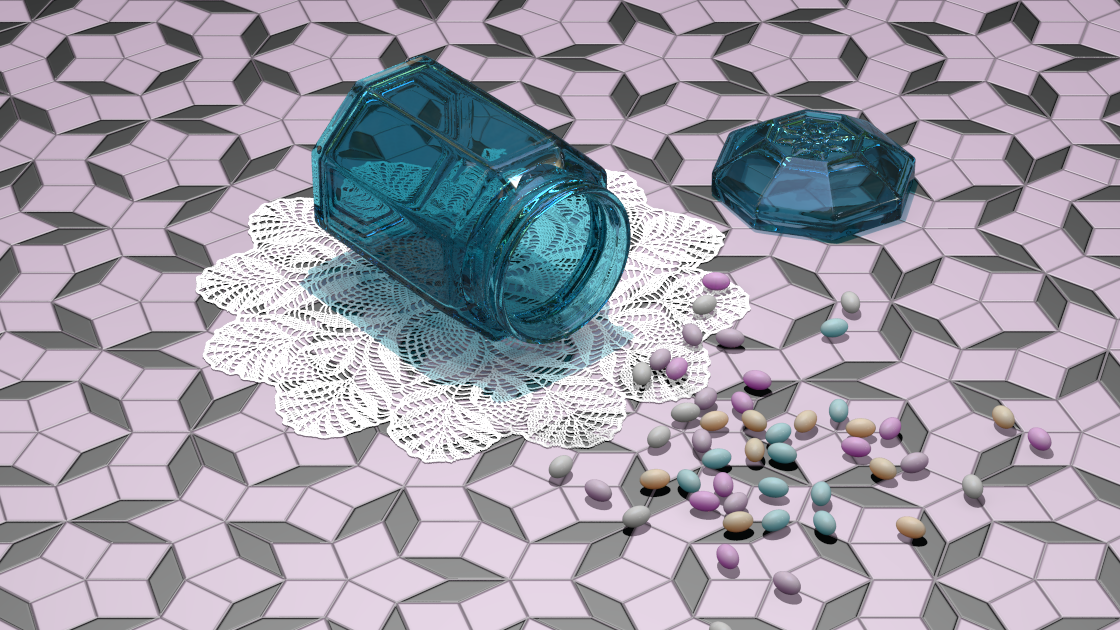
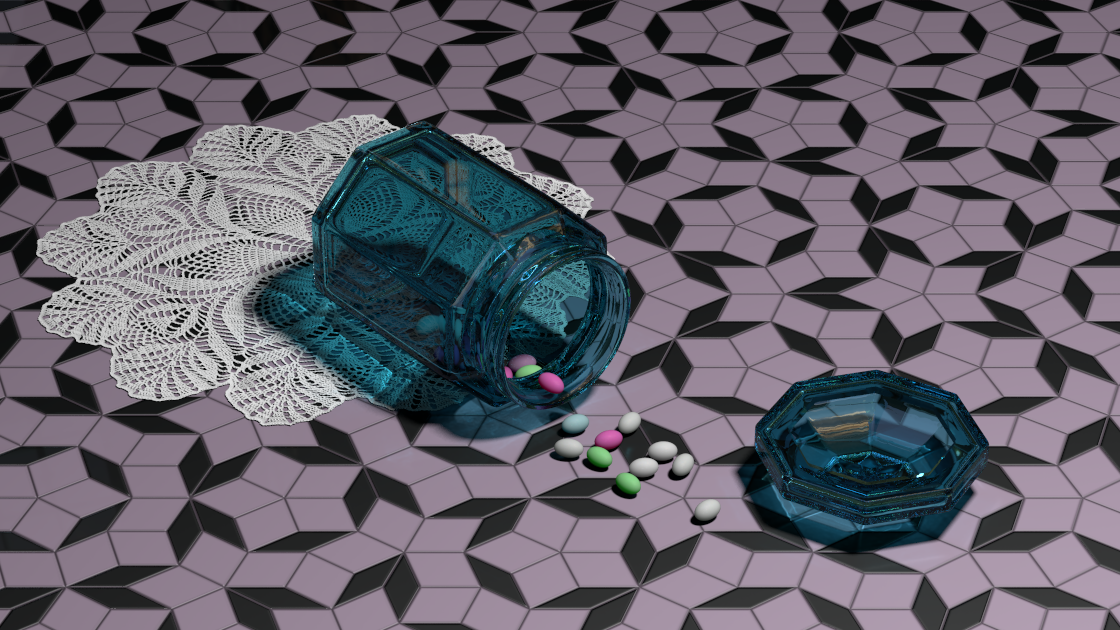
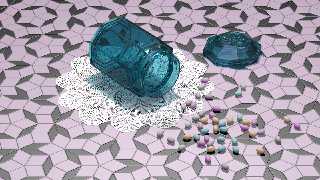
well i managed to get the lid separated from the jar ... and the
additional objects started out as jelly beans, but traditional jb colors
just didn't seem to go with the rest of the objects, i went to pastels
colors. now i think they look like jordan almonds. i like the
subsurface, so i think i'll probably end up making the candies more
almond shaped.
Post a reply to this message
Attachments:
Download 'work.png' (841 KB)
Preview of image 'work.png'
|
|
| |
| |
|
|
|
|
| |
| |
|
|
Le 13-07-20 08:47, James Holsenback a écrit :
> On 07/02/2013 08:51 AM, James Holsenback wrote:
>> On 07/02/2013 06:52 AM, Paolo Gibellini wrote:
>>>  >James Holsenback  on date 01/07/2013 20.33 wrote:
>>>> I'm testing a user contributed fix related to
>>>> http://bugs.povray.org/task/287 and thought the image was cool
>>>> enough to
>>>> share. It's a work in progress so I'm not entirely sure where it will
>>>> end up.
>>> Surely the jar is very good, it seems /real/ (and thanks to the +C
>>> option!).
>>> Paolo
>>>
>>>
>> Well I can't take credit for the jar:
>>
http://www.blender-models.com/model-downloads/objects/id/decorative-oct-glass-jar-ver-3/
>>
>>
>>
>> I think I'm going to try to separate the lid from the rest of the jar,
>> and place it on the ground plane, with a few other objects
>
> well i managed to get the lid separated from the jar ... and the
> additional objects started out as jelly beans, but traditional jb colors
> just didn't seem to go with the rest of the objects, i went to pastels
> colors. now i think they look like jordan almonds. i like the
> subsurface, so i think i'll probably end up making the candies more
> almond shaped.

I'd like to see the gelly beans version.

A question:
Why does the grout between the tiles protude above them?
Post a reply to this message
|
|
| |
| |
|
|
|
|
| |
| |
|
|
Am 20.07.2013 14:47, schrieb James Holsenback:

> well i managed to get the lid separated from the jar ... and the
> additional objects started out as jelly beans, but traditional jb colors
> just didn't seem to go with the rest of the objects, i went to pastels
> colors. now i think they look like jordan almonds. i like the
> subsurface, so i think i'll probably end up making the candies more
> almond shaped.

Nice one; but it looks quite artificially placed; maybe move the doily a
deal to the top left, to make it look more like the jar had toppled over?

And then, of course, the candies call for the Bullet Physics Playground...
Post a reply to this message
|
|
| |
| |
|
|
|
|
| |
| |
|
|
On 07/20/2013 12:45 PM, Alain wrote:
> Le 13-07-20 08:47, James Holsenback a écrit :
>> On 07/02/2013 08:51 AM, James Holsenback wrote:
>>> On 07/02/2013 06:52 AM, Paolo Gibellini wrote:
>>>>  >James Holsenback  on date 01/07/2013 20.33 wrote:
>>>>> I'm testing a user contributed fix related to
>>>>> http://bugs.povray.org/task/287 and thought the image was cool
>>>>> enough to
>>>>> share. It's a work in progress so I'm not entirely sure where it will
>>>>> end up.
>>>> Surely the jar is very good, it seems /real/ (and thanks to the +C
>>>> option!).
>>>> Paolo
>>>>
>>>>
>>> Well I can't take credit for the jar:
>>>
http://www.blender-models.com/model-downloads/objects/id/decorative-oct-glass-jar-ver-3/
>>>
>>>
>>>
>>>
>>> I think I'm going to try to separate the lid from the rest of the jar,
>>> and place it on the ground plane, with a few other objects
>>
>> well i managed to get the lid separated from the jar ... and the
>> additional objects started out as jelly beans, but traditional jb colors
>> just didn't seem to go with the rest of the objects, i went to pastels
>> colors. now i think they look like jordan almonds. i like the
>> subsurface, so i think i'll probably end up making the candies more
>> almond shaped.
>
> I'd like to see the gelly beans version.
>
> A question:
> Why does the grout between the tiles protude above them?


the grout a normal (tiling pattern slope map) ... this version used
radiosity and i'm considering using a fill light instead. the shadows
look kind of flat-ish around some of the candies as well. maybe that's
contributing to what you're seeing.
Post a reply to this message
|
|
| |
| |
|
|
|
|
| |
| |
|
|
On 07/20/2013 01:18 PM, clipka wrote:
> Am 20.07.2013 14:47, schrieb James Holsenback:
>
>> well i managed to get the lid separated from the jar ... and the
>> additional objects started out as jelly beans, but traditional jb colors
>> just didn't seem to go with the rest of the objects, i went to pastels
>> colors. now i think they look like jordan almonds. i like the
>> subsurface, so i think i'll probably end up making the candies more
>> almond shaped.
>
> Nice one; but it looks quite artificially placed; maybe move the doily a
> deal to the top left, to make it look more like the jar had toppled over?

lol ... yes my in-house critic mentioned that as well

>
> And then, of course, the candies call for the Bullet Physics Playground...
>

yes that's what i used and i wasn't 100% happy. i was hasty with how
they were clustered together, before dropping them. i also need to come
up with a better color distribution method ... currently it's a pretty
basic odd/even
Post a reply to this message
|
|
| |
| |
|
|
|
|
| |
| |
|
|
On 07/20/2013 01:31 PM, James Holsenback wrote:
> the grout a normal (tiling pattern slope map) ... this version used
> radiosity and i'm considering using a fill light instead. the shadows
> look kind of flat-ish around some of the candies as well. maybe that's
> contributing to what you're seeing.

doh ... think i found the problem. i used rad_def.inc:

Rad_Settings(Radiosity_Normal, off, off)
Post a reply to this message
|
|
| |
| |
|
|
|
|
| |
| |
|
|
On 07/20/2013 12:45 PM, Alain wrote:
> I'd like to see the gelly beans version.

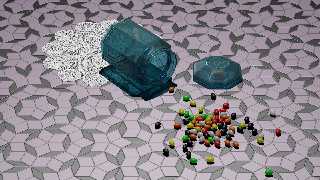
If I decide to go with jelly beans, I think the jar needs to be clear.
It's a toggle, so I can go back to jordan almonds easy enough. I messed
with the physics a bit and found that math.random (6) returns an integer
from 1 to 6 which helped distribute the colors better. I'm not all that
crazy about the pattern, what I think I should really do is fill a
container with the beans and tip it over.
Post a reply to this message
Attachments:
Download 'work.png' (834 KB)
Preview of image 'work.png'
|
|
| |
| |
|
|
|
|
| |
| |
|
|
El 22/07/13 22:34, James Holsenback escribió:
> what I think I should really do is fill a
> container with the beans and tip it over.

   IIRC, for the pills pot image
(http://www.ignorancia.org/uploads/images/take-your-meds/wips/prescription-05.jpg)
my solution was to let the pills fall just in front of the pot, which
was already tipped over and empty: a few pills entered into the pot, so
it ended looking as if it was tipped over while filled with pills.

--
Jaime
Post a reply to this message
|
|
| |
| |
|
|
|
|
| |
| |
|
|
On 07/22/2013 05:55 PM, Jaime Vives Piqueres wrote:
> El 22/07/13 22:34, James Holsenback escribió:
>> what I think I should really do is fill a
>> container with the beans and tip it over.
>
>    IIRC, for the pills pot image
> (http://www.ignorancia.org/uploads/images/take-your-meds/wips/prescription-05.jpg)
> my solution was to let the pills fall just in front of the pot, which
> was already tipped over and empty: a few pills entered into the pot, so
> it ended looking as if it was tipped over while filled with pills.
>
> --
> Jaime
>
>
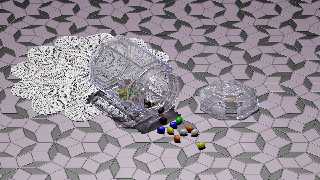
Good idea ... I like this distribution much better! I'm not sure what
happened to the sslt on a couple of the candies. Maybe I should not have
done a separate photon run, then picked up he sslt later.
Post a reply to this message
Attachments:
Download 'work.png' (920 KB)
Preview of image 'work.png'
|
|
| |
| |
|
|
|
|
| |
| |
|
|
Le 13-07-24 11:02, James Holsenback a écrit :
> On 07/22/2013 05:55 PM, Jaime Vives Piqueres wrote:
>> El 22/07/13 22:34, James Holsenback escribió:
>>> what I think I should really do is fill a
>>> container with the beans and tip it over.
>>
>>    IIRC, for the pills pot image
>> (http://www.ignorancia.org/uploads/images/take-your-meds/wips/prescription-05.jpg)
>>
>> my solution was to let the pills fall just in front of the pot, which
>> was already tipped over and empty: a few pills entered into the pot, so
>> it ended looking as if it was tipped over while filled with pills.
>>
>> --
>> Jaime
>>
>>
> Good idea ... I like this distribution much better! I'm not sure what
> happened to the sslt on a couple of the candies. Maybe I should not have
> done a separate photon run, then picked up he sslt later.

Nice.

To enhence the impression that the jar was toppled over, I'd place the
lid upside down and relocate it in front of the jar's oppening.

It still look as if the grout is casting shadows on the tiles. Have you
tried negating your bormals or bump papping?


Alain
Post a reply to this message
|
|
| |
| |
|
|
|
|
| |
| |
|
|
On 07/24/2013 08:15 PM, Alain wrote:
> Le 13-07-24 11:02, James Holsenback a écrit :
>> On 07/22/2013 05:55 PM, Jaime Vives Piqueres wrote:
>>> El 22/07/13 22:34, James Holsenback escribió:
>>>> what I think I should really do is fill a
>>>> container with the beans and tip it over.
>>>
>>>    IIRC, for the pills pot image
>>> (http://www.ignorancia.org/uploads/images/take-your-meds/wips/prescription-05.jpg)
>>>
>>>
>>> my solution was to let the pills fall just in front of the pot, which
>>> was already tipped over and empty: a few pills entered into the pot, so
>>> it ended looking as if it was tipped over while filled with pills.
>>>
>>> --
>>> Jaime
>>>
>>>
>> Good idea ... I like this distribution much better! I'm not sure what
>> happened to the sslt on a couple of the candies. Maybe I should not have
>> done a separate photon run, then picked up he sslt later.
>
> Nice.
>
> To enhence the impression that the jar was toppled over, I'd place the
> lid upside down and relocate it in front of the jar's oppening.

Yep ... I was considering that, but have resisted since I like the
detail on the top of the lid. Maybe photons will show some of that on
the ground plane ... OK you convinced me!

>
> It still look as if the grout is casting shadows on the tiles. Have you
> tried negating your bormals or bump papping?

OK /now/ I get what you were talking about. I think it's a color_map
issue. I /was/ trying to do some transition shading. I'll have to double
my settings.
Post a reply to this message
|
|
| |
| |
|
|
|
|
| |
| |
|
|
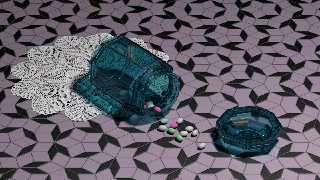
On 07/24/2013 08:15 PM, Alain wrote:
> To enhence the impression that the jar was toppled over, I'd place the
> lid upside down and relocate it in front of the jar's oppening.

Thanks for the ideas etc ... I think I'm getting close
Post a reply to this message
Attachments:
Download 'work.png' (843 KB)
Preview of image 'work.png'
|
|
| |
| |
|
|
|
|
| |
| |
|
|
On 26-7-2013 13:12, James Holsenback wrote:
> Thanks for the ideas etc ... I think I'm getting close
>

Absolutely.

Thomas
Post a reply to this message
|
|
| |
| |
|
|
|
|
| |
| |
|
|
Le 13-07-26 07:12, James Holsenback a écrit :
> On 07/24/2013 08:15 PM, Alain wrote:
>> To enhence the impression that the jar was toppled over, I'd place the
>> lid upside down and relocate it in front of the jar's oppening.
>
> Thanks for the ideas etc ... I think I'm getting close
>

I totaly agree :)
Now, add a few translucent jelly beans mixed with those mints...


Alain
Post a reply to this message
|
|
| |
| |
|
|
|
|
| |
| |
|
|
On 07/01/2013 02:33 PM, James Holsenback wrote:
> <snip> and thought the image was cool enough to
> share. It's a work in progress so I'm not entirely sure where it will
> end up.

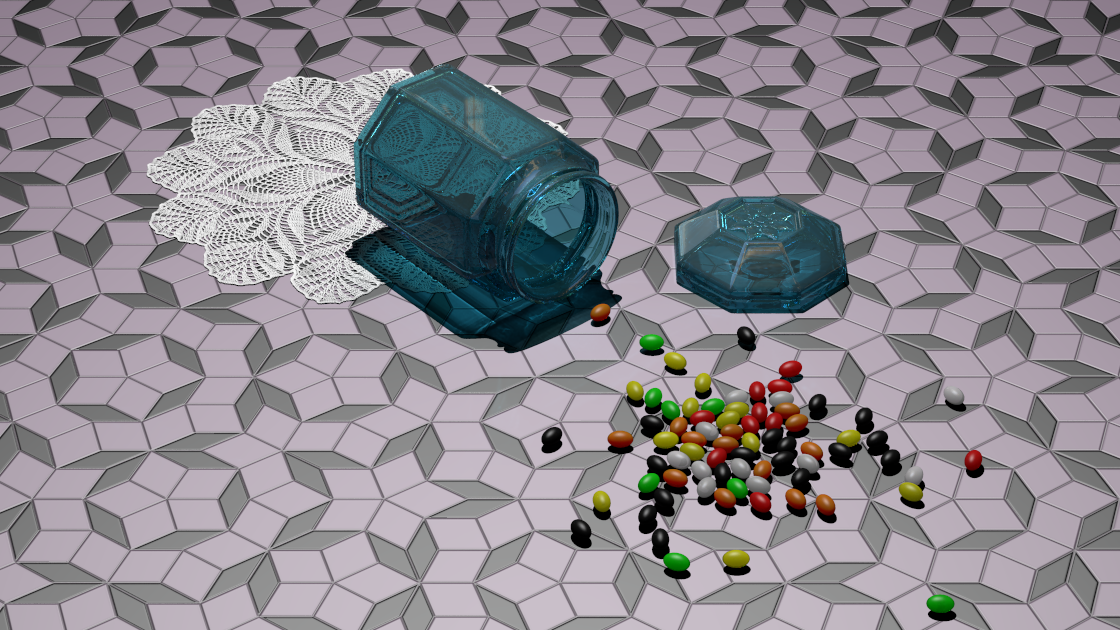
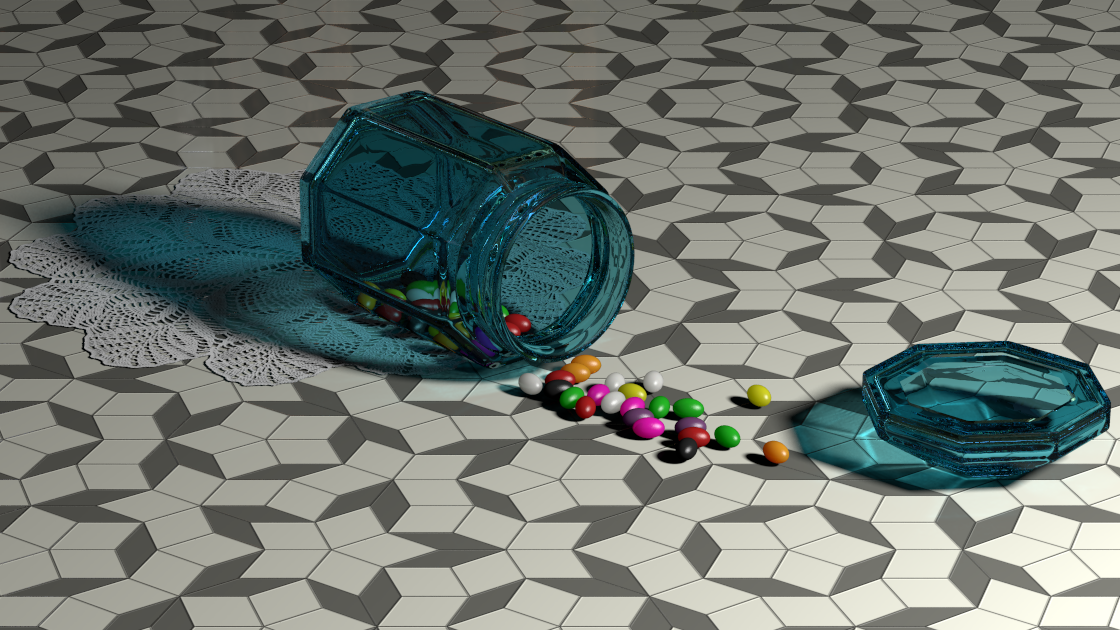
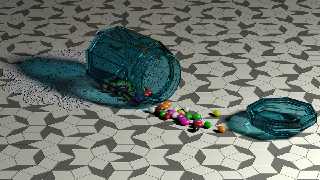
Well I'm calling this one final (except for the image size) ... photons,
area_light and subsurface (jelly beans) took 27hr 40min 45 sec. I was
using the system off and on so probably not a fair benchmark.

Thanks y'all for the feedback, I'm happy how it turned out!
Post a reply to this message
Attachments:
Download 'work.png' (771 KB)
Preview of image 'work.png'
|
|
| |
| |
|
|
|
|
| |
| |
|
|
On 02/08/2013 9:36 PM, James Holsenback wrote:
> Well I'm calling this one final (except for the image size) ... photons,
> area_light and subsurface (jelly beans) took 27hr 40min 45 sec. I was
> using the system off and on so probably not a fair benchmark.
>
> Thanks y'all for the feedback, I'm happy how it turned out!

That is very, very good. But could you do something about the jelly
beans all being perfectly balanced, in  the same plane?

--
Regards
     Stephen
Post a reply to this message
|
|
| |
| |
|
|
|
|
| |
| |
|
|
On 08/02/2013 05:32 PM, Stephen wrote:
> On 02/08/2013 9:36 PM, James Holsenback wrote:
>> Well I'm calling this one final (except for the image size) ... photons,
>> area_light and subsurface (jelly beans) took 27hr 40min 45 sec. I was
>> using the system off and on so probably not a fair benchmark.
>>
>> Thanks y'all for the feedback, I'm happy how it turned out!
>
> That is very, very good. But could you do something about the jelly
> beans all being perfectly balanced, in  the same plane?
>

I dropped them vertical (points up and down) and that's how they settled
... they even oscillated back and forth before they settling. I had to
play around with mass and friction settings to keep them from scattering
all over the place. I suppose I could change the mass of /some/ of them
and maybe get a few to pile on top of the others, but I'm not sure the
shape (basically round) would behave that way naturally.
Post a reply to this message
|
|
| |
| |
|
|
|
|
| |
| |
|
|
On 03/08/2013 12:15 PM, James Holsenback wrote:
> I dropped them vertical (points up and down) and that's how they settled
> ... they even oscillated back and forth before they settling. I had to
> play around with mass and friction settings to keep them from scattering
> all over the place. I suppose I could change the mass of /some/ of them
> and maybe get a few to pile on top of the others, but I'm not sure the
> shape (basically round) would behave that way naturally.

I've not tried bullet-physics-playground, yet. It is definitely on my to
do list. I agree about the shape, can you offset the centre of gravity,
inside the bean?

--
Regards
     Stephen
Post a reply to this message
|
|
| |
| |
|
|
|
|
| |