|
|
|
|
|
|
| |
| |
|
|
|
|
| |
| |
|
|
Hello everyone!
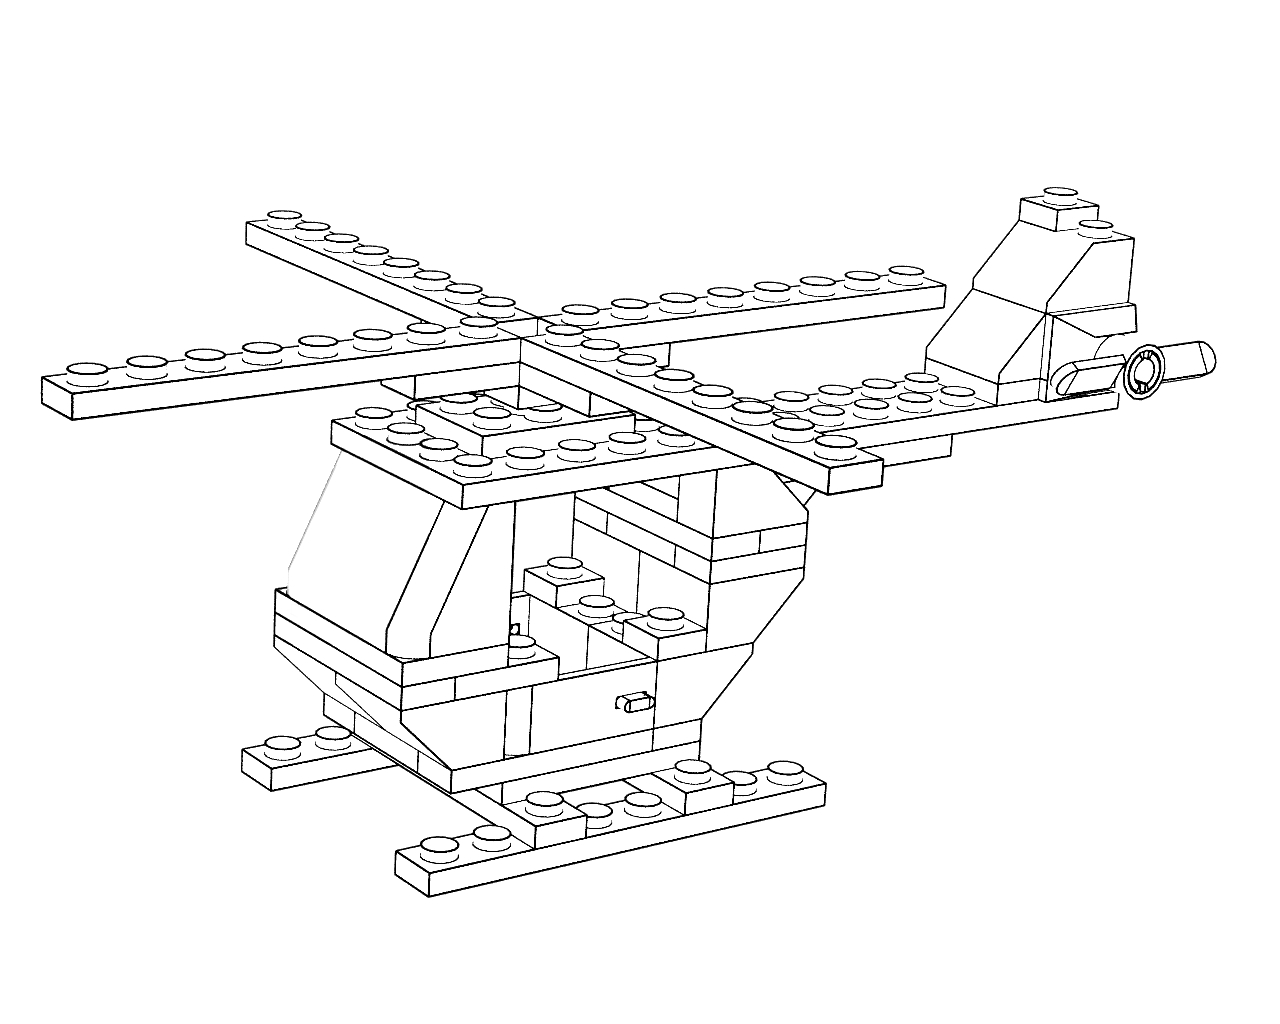
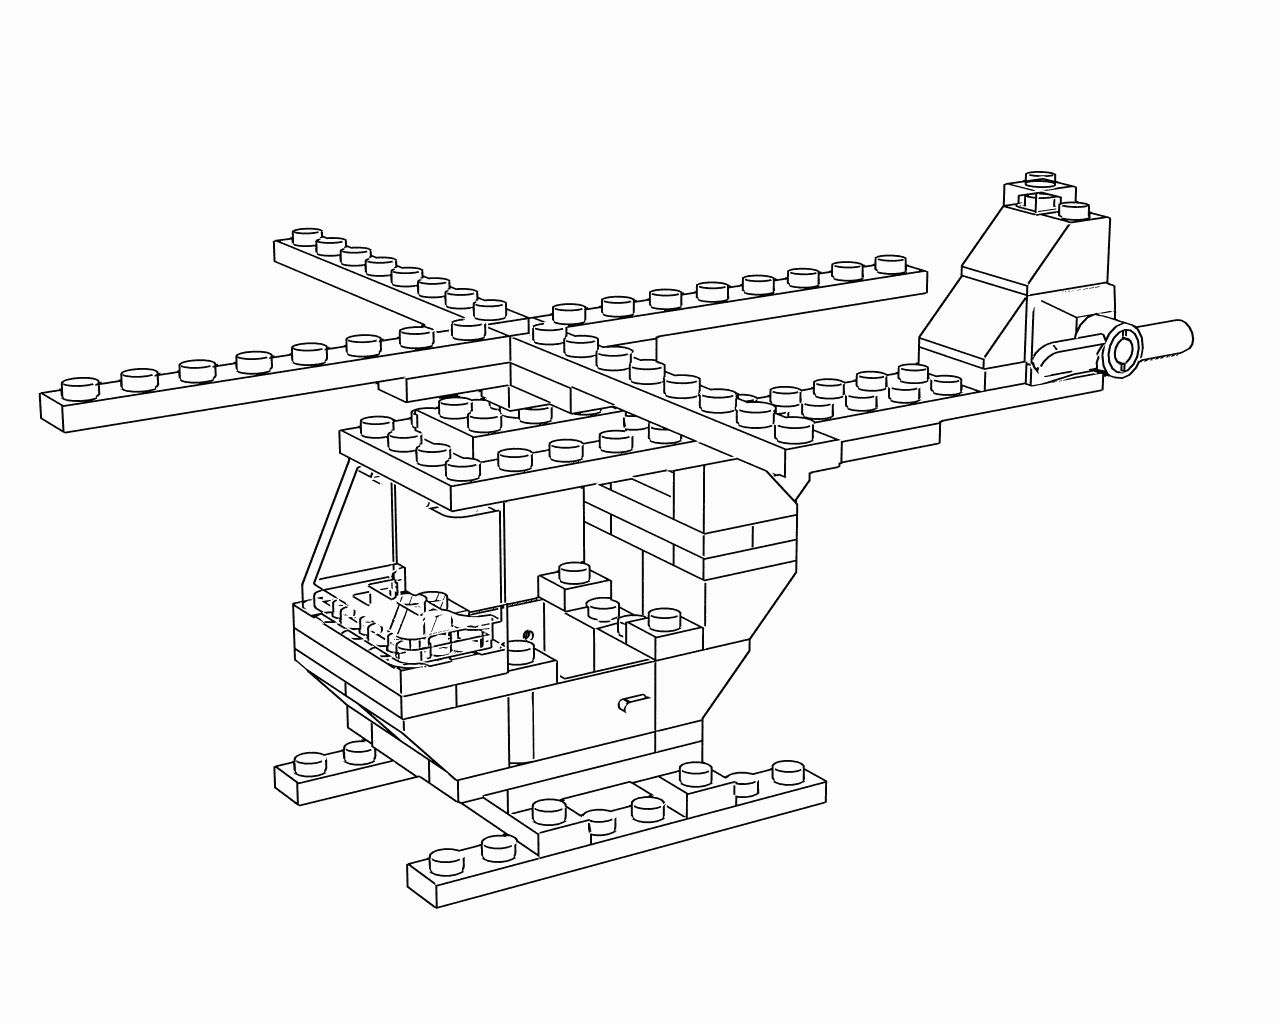
I've created another Lego colouring page based on the Police Helicopter
set 645.
This image was created using a combination of MLCAD, LdrDat2Dxf (by Rolf
Redford), PoseRay, POV-Ray 3.6 and the PovEdge macro (by Thibaut
Jonckheere).
I created the black and white image by setting all the objects to white,
and then used the "outdoor radiosity" option from PoseRay. I had to add
a couple of extra light sources to saturate the image with light. I had
some problems trying to maintain the transparency of the windscreen, but
happy with it for now (I'm not sure how the PovEdge macro copes with
transparent objects - perhaps I need to do some more experiments).
Does anyone have any other tricks for creating these kind of images
(i.e. rendering shape outlines of 3d objects)?
You can download printable PDF's and other 3D model formats, including
POV-Ray scene files at the following links.
http://www.pearse.co.uk/lego/colouring/helicopter/
http://www.pearse.co.uk/lego/models/helicopter/
Bye for now
Reuben
reu### [at] pearse couk couk
Post a reply to this message
Attachments:
Download 'helicopter_large.jpg' (227 KB)
Preview of image 'helicopter_large.jpg'
|
|
| |
| |
|
|
|
|
| |
| |
|
|
>Reuben Pearse  on date 17/06/2010 01:01 wrote:
> Hello everyone!
>
> I've created another Lego colouring page based on the Police Helicopter
> set 645.
>
> This image was created using a combination of MLCAD, LdrDat2Dxf (by Rolf
> Redford), PoseRay, POV-Ray 3.6 and the PovEdge macro (by Thibaut
> Jonckheere).
>
> I created the black and white image by setting all the objects to white,
> and then used the "outdoor radiosity" option from PoseRay. I had to add
> a couple of extra light sources to saturate the image with light. I had
> some problems trying to maintain the transparency of the windscreen, but
> happy with it for now (I'm not sure how the PovEdge macro copes with
> transparent objects - perhaps I need to do some more experiments).
>
> Does anyone have any other tricks for creating these kind of images
> (i.e. rendering shape outlines of 3d objects)?
>
> You can download printable PDF's and other 3D model formats, including
> POV-Ray scene files at the following links.
>
> http://www.pearse.co.uk/lego/colouring/helicopter/
> http://www.pearse.co.uk/lego/models/helicopter/
>
> Bye for now
>
> Reuben
> reu### [at] pearsecouk
>
>
The effect is very nice, it looks like a sketch.
Paolo
Post a reply to this message
|
|
| |
| |
|
|
|
|
| |
| |
|
|
Reuben Pearse <reu### [at] pearsecouk> wrote:
> Hello everyone!
>
> I've created another Lego colouring page based on the Police Helicopter
> set 645.

It looks good Reuben!

> Does anyone have any other tricks for creating these kind of images
> (i.e. rendering shape outlines of 3d objects)?

I have an edge pattern macro, but it appears to be bundled with other files.
Basically, it takes an object for input, makes an object pattern out of it, and
blurs the pattern in 3D space. Some color_map tweaking would make the edges
sharp. I'm not sure how well it would work in this case. I can make a standalone
file available if you wish.

Really, the edge-finding in your image is almost complete. I think what you need
now is some way to apply an angle of incidence pigment over what's already there
to create edges on the sides of the pegs and window.

Sam
Post a reply to this message
|
|
| |
| |
|
|
|
|
| |
| |
|
|
Samuel Benge wrote:
> I have an edge pattern macro, but it appears to be bundled with other files.
> Basically, it takes an object for input, makes an object pattern out of it, and
> blurs the pattern in 3D space. Some color_map tweaking would make the edges
> sharp. I'm not sure how well it would work in this case. I can make a standalone
> file available if you wish.

I did post the file a while back:
http://news.povray.org/povray.text.scene-files/thread/%3C4a924661%40news.povray.org%3E/

I tried it with your Lego model's geometry include file, and it doesn't
work for some reason. I suspect the mesh isn't completely closed. My
edge pattern doesn't always work well with meshes anyway. Your best bet,
I think, is to combine the edge-finding method your are using now with
the angle of incidence pattern to fill in the remaining edges.

Sam
Post a reply to this message
|
|
| |
| |
|
|
|
|
| |
| |
|
|
stbenge wrote:
> Your best bet,
> I think, is to combine the edge-finding method your are using now with
> the angle of incidence pattern to fill in the remaining edges.

OK, it doesn't work. It seemed fine in theory, but in practice more than
just the desired edges are marked black. I should have expected it :/
Post a reply to this message
|
|
| |
| |
|
|
|
|
| |
| |
|
|
stbenge wrote:
> stbenge wrote:
>> Your best bet, I think, is to combine the edge-finding method your are
>> using now with the angle of incidence pattern to fill in the remaining
>> edges.
>
> OK, it doesn't work. It seemed fine in theory, but in practice more than
> just the desired edges are marked black. I should have expected it :/

Thanks for trying your macro.

You may want to try it with a slightly different mesh2 file. The one you
downloaded from my website was created slightly differently to the one I
used for the colouring page (the code you downloaded has a mesh2 that
was created via PoseRay from a Lightwave model)

I will find the POV code I used for the colouring picture and perhaps
you could try your macro with this instead (it seems that mesh2 files
created from DXF files via PoseRay work best with the PovEdge macro).

Reuben
Post a reply to this message
|
|
| |
| |
|
|
|
|
| |
| |
|
|
Reuben Pearse wrote:
> Thanks for trying your macro.

No problem.

> I will find the POV code I used for the colouring picture and perhaps
> you could try your macro with this instead (it seems that mesh2 files
> created from DXF files via PoseRay work best with the PovEdge macro).

Sure, if you find it, I'll try it again.

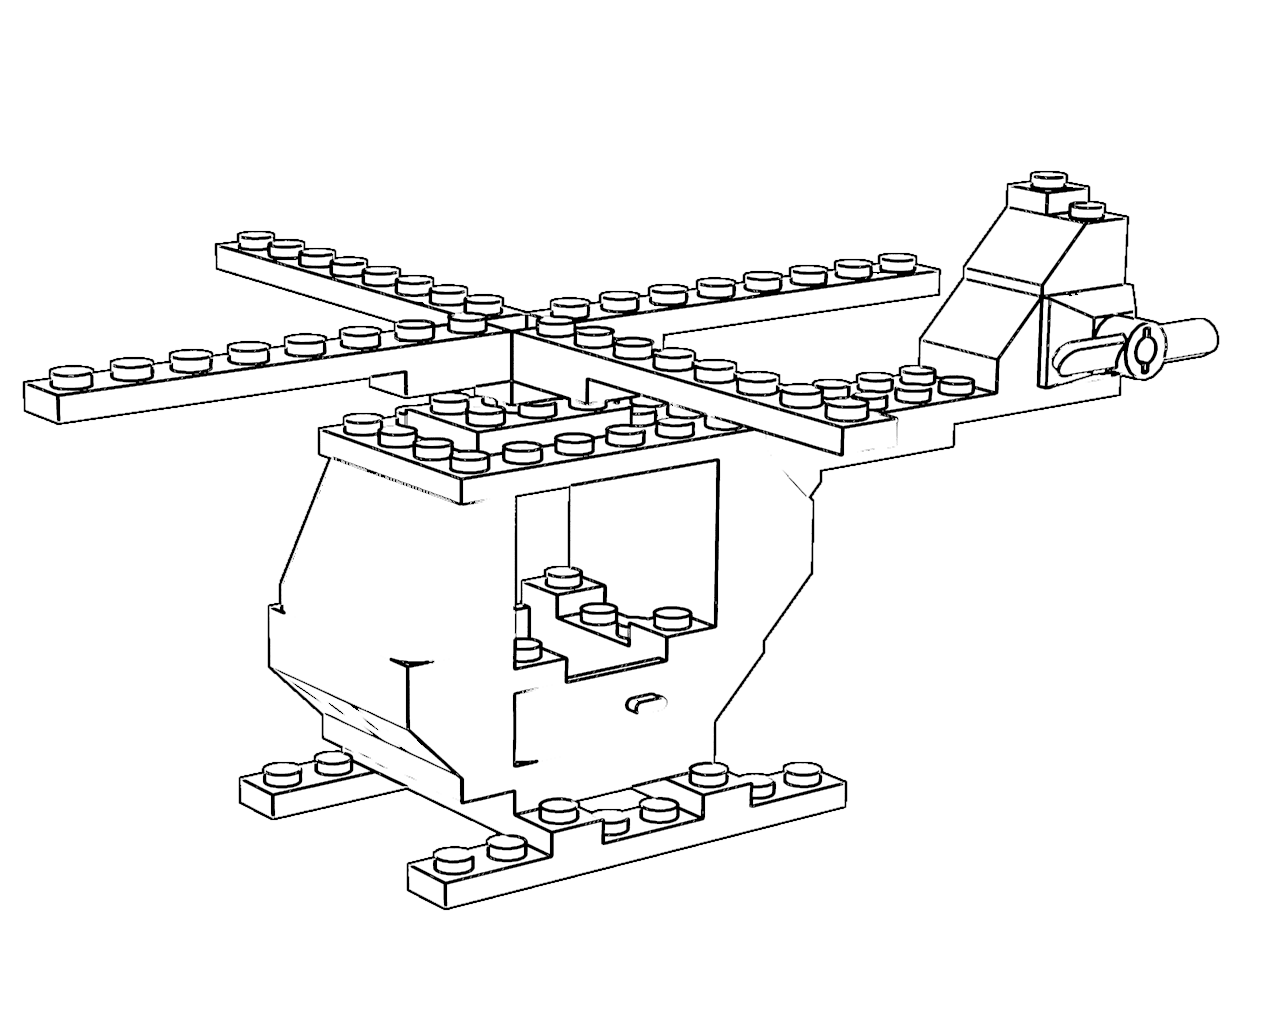
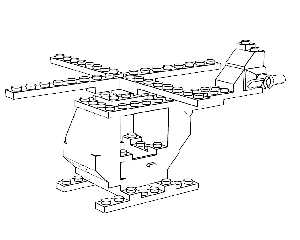
The attached image shows the result of an edge-finding function I just
slapped together. To make it work, I first rendered the helicopter with
three (R,G,B, X,Y,Z) slope pigments. The image was subtracted from a
blurred, averaged version of itself to find the edges. There are still a
lot of details missing. If there were spaces between the bricks, or if
the bricks were beveled, it might look better. As it is, it's not very
useful for a coloring page :(

Sam
Post a reply to this message
Attachments:
Download 'postedges5_03.png' (147 KB)
Preview of image 'postedges5_03.png'
|
|
| |
| |
|
|
|
|
| |
| |
|
|
stbenge wrote:
> Reuben Pearse wrote:
>> Thanks for trying your macro.
>
> No problem.
>
>> I will find the POV code I used for the colouring picture and perhaps
>> you could try your macro with this instead (it seems that mesh2 files
>> created from DXF files via PoseRay work best with the PovEdge macro).
>
> Sure, if you find it, I'll try it again.
>
> The attached image shows the result of an edge-finding function I just
> slapped together. To make it work, I first rendered the helicopter with
> three (R,G,B, X,Y,Z) slope pigments. The image was subtracted from a
> blurred, averaged version of itself to find the edges. There are still a
> lot of details missing. If there were spaces between the bricks, or if
> the bricks were beveled, it might look better. As it is, it's not very
> useful for a coloring page :(
>
> Sam
>
> ------------------------------------------------------------------------
>
That looks great! Your macro seems to do a better job on certain parts
of the image such as:
1) The line at the top of the propeller blade
2) The inside of the propeller blade
3) The handle on the door

..but I'm guessing that this may be do with the angle at which the
camera is viewing the object?

I've now uploaded the POV source files that I used to create the
helicopter colouring page. See link below:
http://www.pearse.co.uk/lego/colouring/helicopter

I think for certain types of shape, your macro may render a better
result. I created a colouring page of a Star Wars Battle Droid using the
  same technique, but the PovEdge macro picked up to many edges on the
battle droids head. This can be seen on the following link:

http://www.pearse.co.uk/lego/battle_droid.html

If I upload the source of the battle droid image would you mind trying
your technique with that model?

Reuben
Post a reply to this message
|
|
| |
| |
|
|
|
|
| |
| |
|
|
Reuben Pearse wrote:
> stbenge wrote:
>> The attached image shows the result of an edge-finding function I just
>> slapped together.
>>
> That looks great! Your macro seems to do a better job on certain parts
> of the image such as:
> 1) The line at the top of the propeller blade
> 2) The inside of the propeller blade
> 3) The handle on the door
>
> ..but I'm guessing that this may be do with the angle at which the
> camera is viewing the object?

Well, because it's a post-processing effect, anywhere there's a sharp
difference between one color and another is where the method will place
a line. It's a completely visual process and does not care whether an
object is a mesh or not, so you don't gain access to any special mesh
information.

> I've now uploaded the POV source files that I used to create the
> helicopter colouring page. See link below:
> http://www.pearse.co.uk/lego/colouring/helicopter

OK, I'll give it a try. I'll also try the original .obj file as well,
since I woke up with an idea in mind. How are you at manipulating
meshes? Can you, say, take a mesh, select polygons, and then apply
different colors to them? I ask because blocks can be colored randomly
to create the necessary color difference for my method to work. The
lines between bricks should then become visible. I'll give it a go later
on and post something if I make any headway.

Also, last night I came up with a one-step process using MegaPOV which
renders pretty quickly, all things considered. I'm using the LGEO Lego
parts library to test with (slower than a mesh), and those blocks are
beveled. But if my coloring technique for meshes works out, there won't
be any need to use LGEO. Getting away with only a single render pass
using MegaPOV would lighten the overall process.

> I think for certain types of shape, your macro may render a better
> result. I created a colouring page of a Star Wars Battle Droid using the
>  same technique, but the PovEdge macro picked up to many edges on the
> battle droids head. This can be seen on the following link:
>
> http://www.pearse.co.uk/lego/battle_droid.html

Ah yes, the outside edges of some rounded surfaces are hardly visible,
and some convex edges are much too apparent.

> If I upload the source of the battle droid image would you mind trying
> your technique with that model?

Sure, but it might be better to have an .obj mesh, depending on what
kind of progress I make today.

Hopefully in the end you'll find a process that works for you! Maybe
some other people around here will chime in with some ideas :)
Post a reply to this message
|
|
| |
| |
|
|
|
|
| |
| |
|
|
stbenge wrote:
> Also, last night I came up with a one-step process using MegaPOV which
> renders pretty quickly, all things considered. I'm using the LGEO Lego
> parts library to test with (slower than a mesh), and those blocks are
> beveled. But if my coloring technique for meshes works out, there won't
> be any need to use LGEO. Getting away with only a single render pass
> using MegaPOV would lighten the overall process.

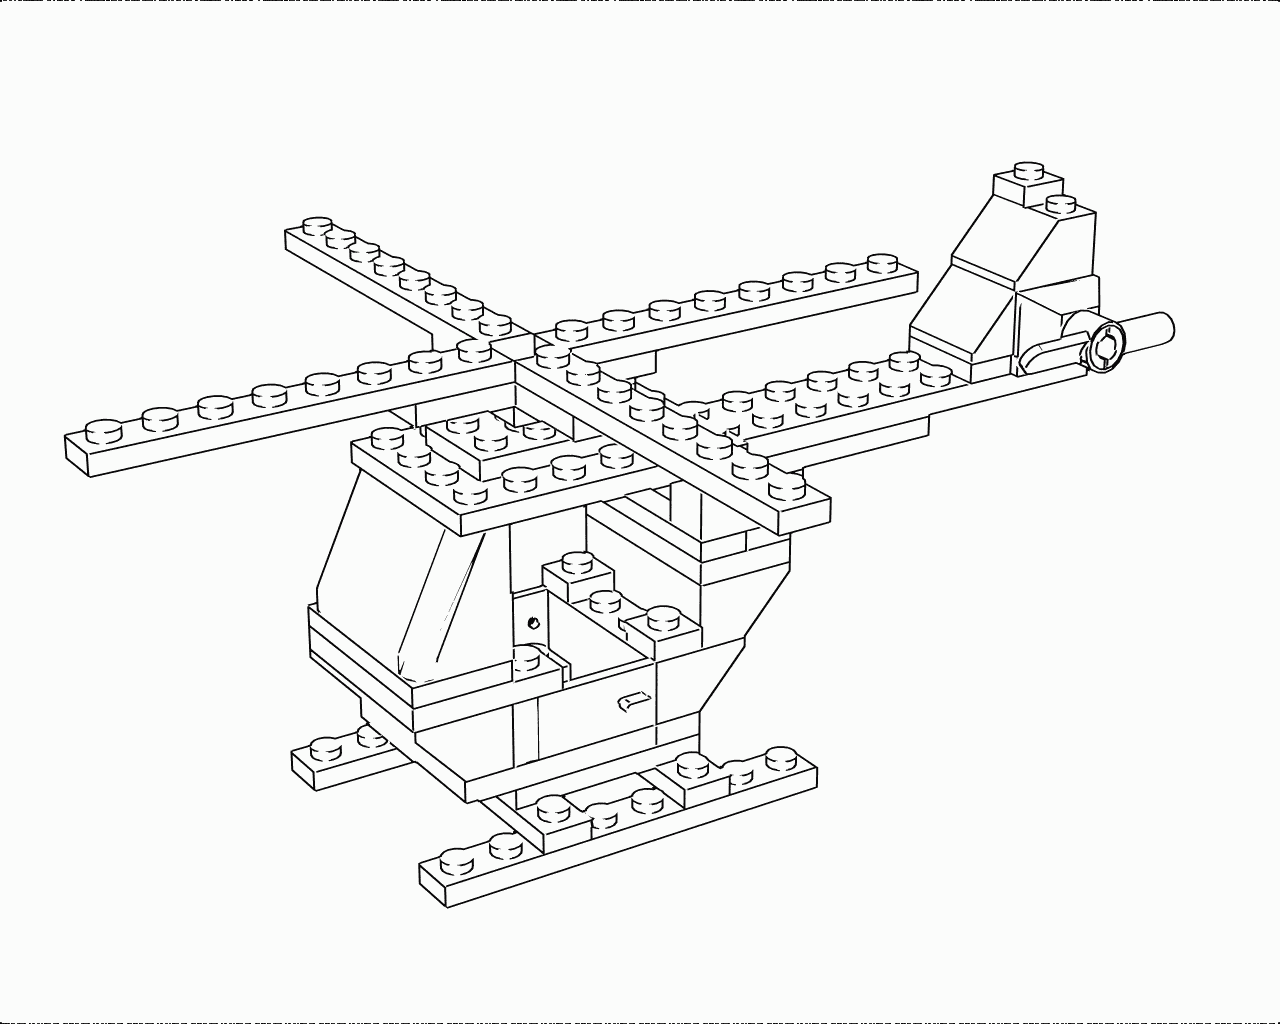
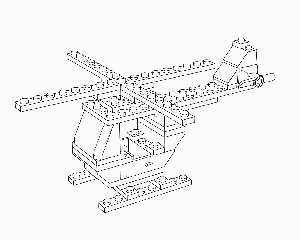
Attached is an image showing my progress so far. I randomly changed some
brick colors to highlight the spaces between bricks. It was rendered in
MegaPOV in a single pass and took 5 minutes, 41 seconds to render with
one core. You can see how the pegs break up here and there. Some of the
lines also seem to extend over others in funny places. It seems that
there's always a trade-off when finding edges. The missing line on the
propeller was my fault; I forgot to change the brick color there. The
missing lines under the front of the cab were caused by a lack of
definition in that area.

I'll post an image to help explain how I needed to color the bricks
differently.
Post a reply to this message
Attachments:
Download 'edgefinder5_41.png' (34 KB)
Preview of image 'edgefinder5_41.png'
|
|
| |
| |
|
|
|
|
| |
| |
|
|
stbenge wrote:
> I'll post an image to help explain how I needed to color the bricks
> differently.

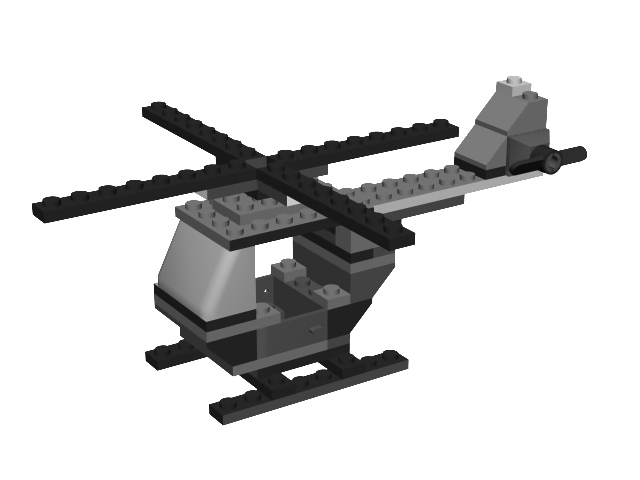
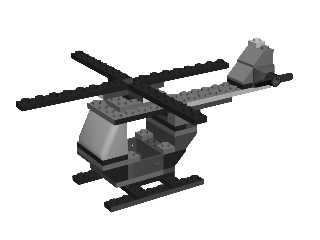
And here's what the function uses for input. Anywhere two bricks of the
same color meet, I had to change the color of one. I didn't change the
entire brick color, since it wasn't needed.

Maybe if you use this method, you could make an extra model in which
bricks of the same color never touch each other? Or is there an option
somewhere which would let you add spaces between bricks? That might be
better, since it's kind of a pain to change brick colors by selecting
polygons and then having to export the mesh again, thus contending with
improper normals being generated. But even just assigning bricks
different colors in the Lego program you use would be better than
selecting polygons and changing colors.
Post a reply to this message
Attachments:
Download 'edgefindercolors.jpg' (37 KB)
Preview of image 'edgefindercolors.jpg'
|
|
| |
| |
|
|
|
|
| |
| |
|
|
stbenge wrote:
> Attached is an image showing my progress so far.

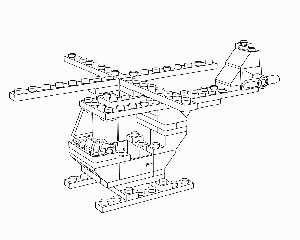
Oops, I left a bunch of stuff out of that one. Here's another version
that shows more of the edges. I changed the camera position slightly and
the light_source, and now the pegs looks even taller than they did. this
method is very touchy. It might as well be a MEGA Bloks model. Heck, if
it were any worse, it would start to resemble something you would make
with American Bricks.
Post a reply to this message
Attachments:
Download 'edgefinder8_10.png' (36 KB)
Preview of image 'edgefinder8_10.png'
|
|
| |
| |
|
|
From: Thibaut Jonckheere
Subject: Re: Lego Helicopter 645 - Colouring Page
Date: 18 Jun 2010 17:23:02
Message: <4c1be3b6@news.povray.org>
|
|
|
| |
| |
|
|
Hello,

I have not been very active recently, but I'm happy to see that PovEdge
is used ! And happy too that other people are developping alternative
techniques (go on Sam :-) !)

Transparent objects should be ok with PovEdge : just give a fully
transparent texture to the windshield (like rgbt 1), and you should be
able to see the edges of the objects behind it (I have done that many
times for the windshield and windows of cars).

For the problem with the droid head (some message further in the
thread), did you try reducing the threshold for the crease edges
(parameter EdThresh) ? Btw on your picture, the silhouette edges seems
that have a color lighter than black, is this on purpose ?


Thibaut


Reuben Pearse a écrit :
> Hello everyone!
>
> I've created another Lego colouring page based on the Police Helicopter
> set 645.
>
> This image was created using a combination of MLCAD, LdrDat2Dxf (by Rolf
> Redford), PoseRay, POV-Ray 3.6 and the PovEdge macro (by Thibaut
> Jonckheere).
>
> I created the black and white image by setting all the objects to white,
> and then used the "outdoor radiosity" option from PoseRay. I had to add
> a couple of extra light sources to saturate the image with light. I had
> some problems trying to maintain the transparency of the windscreen, but
> happy with it for now (I'm not sure how the PovEdge macro copes with
> transparent objects - perhaps I need to do some more experiments).
>
> Does anyone have any other tricks for creating these kind of images
> (i.e. rendering shape outlines of 3d objects)?
>
> You can download printable PDF's and other 3D model formats, including
> POV-Ray scene files at the following links.
>
> http://www.pearse.co.uk/lego/colouring/helicopter/
> http://www.pearse.co.uk/lego/models/helicopter/
>
> Bye for now
>
> Reuben
> reu### [at] pearsecouk
>
>
>
> ------------------------------------------------------------------------
>
Post a reply to this message
|
|
| |
| |
|
|
From: Thibaut Jonckheere
Subject: Re: Lego Helicopter 645 - Colouring Page
Date: 18 Jun 2010 17:26:31
Message: <4c1be487@news.povray.org>
|
|
|
| |
| |
|
|
PS : to reduce aliasing (visible on some parts of your helicopter), one
simple effective technique (in addition to parameters like +a0.0 +am2
+r3 ...) is to render the picture on a larger size, and then rescale
with some image manipulation tool. Usually, render time is not a problem
with this kind of picture, so it is possible to render very large images.


Thibaut


Thibaut Jonckheere a écrit :
>
> Hello,
>
> I have not been very active recently, but I'm happy to see that PovEdge
> is used ! And happy too that other people are developping alternative
> techniques (go on Sam :-) !)
>
> Transparent objects should be ok with PovEdge : just give a fully
> transparent texture to the windshield (like rgbt 1), and you should be
> able to see the edges of the objects behind it (I have done that many
> times for the windshield and windows of cars).
>
> For the problem with the droid head (some message further in the
> thread), did you try reducing the threshold for the crease edges
> (parameter EdThresh) ? Btw on your picture, the silhouette edges seems
> that have a color lighter than black, is this on purpose ?
>
>
> Thibaut
>
>
>
>
> Reuben Pearse a écrit :
>> Hello everyone!
>>
>> I've created another Lego colouring page based on the Police
>> Helicopter set 645.
>>
>> This image was created using a combination of MLCAD, LdrDat2Dxf (by
>> Rolf Redford), PoseRay, POV-Ray 3.6 and the PovEdge macro (by Thibaut
>> Jonckheere).
>>
>> I created the black and white image by setting all the objects to
>> white, and then used the "outdoor radiosity" option from PoseRay. I
>> had to add a couple of extra light sources to saturate the image with
>> light. I had some problems trying to maintain the transparency of the
>> windscreen, but happy with it for now (I'm not sure how the PovEdge
>> macro copes with transparent objects - perhaps I need to do some more
>> experiments).
>>
>> Does anyone have any other tricks for creating these kind of images
>> (i.e. rendering shape outlines of 3d objects)?
>>
>> You can download printable PDF's and other 3D model formats, including
>> POV-Ray scene files at the following links.
>>
>> http://www.pearse.co.uk/lego/colouring/helicopter/
>> http://www.pearse.co.uk/lego/models/helicopter/
>>
>> Bye for now
>>
>> Reuben
>> reu### [at] pearsecouk
>>
>>
>>
>> ------------------------------------------------------------------------
>>
Post a reply to this message
|
|
| |
| |
|
|
|
|
| |
| |
|
|
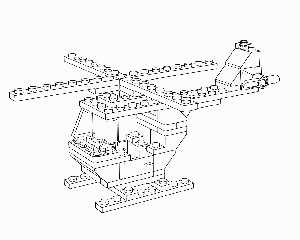
And yet another version with the light's position changed slightly. I
think I'll quit for now. It's been fun :) I dropped the MegaPOV file for
finding edges over at p.t.scene-files in case you're interested:
http://news.povray.org/povray.text.scene-files/thread/%3C4c1beb00%40news.povray.org%3E/

I'm not sure it will work for your purposes, since there are still many
errors present. If I could discover a way to keep the lines from
drifting in weird ways, it could be more useful. There is still one more
idea I have left to try, but it's a long shot.

I took a gander at your helicopter-colouring files, and I'm not sure I
can make that method work with mine. Also, I got my edge pattern to work
with an obj file of the helicopter, but really ugly effects crop up.
Post a reply to this message
Attachments:
Download 'edgefinder8_01.png' (36 KB)
Preview of image 'edgefinder8_01.png'
|
|
| |
| |
|
|
|
|
| |
| |
|
|
Thibaut Jonckheere wrote:
>
> Hello,
>
> I have not been very active recently, but I'm happy to see that PovEdge
> is used ! And happy too that other people are developping alternative
> techniques (go on Sam :-) !)
>

Hi Thibaut,

It's great to see you posting again. Thanks for contributing to the
discussion.

I've enjoyed using your PovEdge macros, but there are probably lots of
options and settings that I haven't explored or understood :-)

Would it be possible to amend the macro so that it somehow visually
labelled each edge that was drawn with a number? You could then
optionally instruct the macro not to draw certain edges by passing it a
list of edges numbers. As well as giving greater control over the
render, it could also provide a way of creating "dot to dot" type
colouring pictures (see example links below).

http://www.lego.com/ToyStory/en-us/Downloads/Dot-to-Dot.aspx

Let me know your thoughts on this.

Reuben
reu### [at] pearsecouk
Post a reply to this message
|
|
| |
| |
|
|
From: Thibaut Jonckheere
Subject: Re: Lego Helicopter 645 - Colouring Page
Date: 24 Jun 2010 03:08:26
Message: <4c23046a@news.povray.org>
|
|
|
| |
| |
|
|
Reuben Pearse a écrit :

>
> Would it be possible to amend the macro so that it somehow visually
> labelled each edge that was drawn with a number? You could then
> optionally instruct the macro not to draw certain edges by passing it a
> list of edges numbers. As well as giving greater control over the
> render, it could also provide a way of creating "dot to dot" type
> colouring pictures (see example links below).
>
> http://www.lego.com/ToyStory/en-us/Downloads/Dot-to-Dot.aspx
>
> Let me know your thoughts on this.

Hi Reuben,

In short :

- drawing 'dots' in place of 'edges' (which means, for Povray, sphere
rather than cylinder) is a simple modification to the macro
EdgeMesh.inc, which I can implement if you want to play with that. Note
that the result you get will depend a lot of the definition of the mesh
(for a very fine mesh, with lots of vertices/faces/..., the spheres will
be so close that you won't see the difference with the cylinders; if the
mesh has fewer vertices, then it might show as a "dot to dot" picture)

- visually labelling the edges seems very difficult (at lest to get a
decent result), as the numbers involved could easily be large, and also
the placement of the numbers is by no means easy (3D objects for the
numbers, or post-process 2d numbers ?, ...) .

-modifying povedge to get, in one click, a "dot by dot" picture with the
numbers for the dots is also not possible because the edges are not
ordered along the contours (I mean that, if you follow the silhouette of
an object, the internal numbering of these edges by povedge can be
anything, and is not 1,2,3,4... ). So I think that it is possible to
produce a "dot to dot" picture, by you'll need to add the numbers by
yourself after rendering the picture in Povray.


Thibaut


PS : I had a quick look at your helicopter model. It seems that there
are some artefacts in the silhouette contour (which is why, I guess, you
put the width of this contour to nearly 0, to hide it). These artefacts
are related to problems with the normals in the model itself (typically,
if one normal is wrongly oriented with respect to its neighbours, it
will create one spurious silhouette edge). I tried to mend that on the
.obj model with Poseray ("calculate normals" in the Groups tab), but
without success.  How did you create the model, and it there a way to
check the normal of it before exporting it to .obj format ?


> Reuben
> reu### [at] pearsecouk
Post a reply to this message
|
|
| |
| |
|
|
|
|
| |
| |
|
|
Thibaut Jonckheere wrote:
> Reuben Pearse a écrit :
>
>>
>> Would it be possible to amend the macro so that it somehow visually
>> labelled each edge that was drawn with a number? You could then
>> optionally instruct the macro not to draw certain edges by passing it
>> a list of edges numbers. As well as giving greater control over the
>> render, it could also provide a way of creating "dot to dot" type
>> colouring pictures (see example links below).
>>
>> http://www.lego.com/ToyStory/en-us/Downloads/Dot-to-Dot.aspx
>>
>> Let me know your thoughts on this.
>
> Hi Reuben,
>
> In short :
>
> - drawing 'dots' in place of 'edges' (which means, for Povray, sphere
> rather than cylinder) is a simple modification to the macro
> EdgeMesh.inc, which I can implement if you want to play with that. Note
> that the result you get will depend a lot of the definition of the mesh
> (for a very fine mesh, with lots of vertices/faces/..., the spheres will
> be so close that you won't see the difference with the cylinders; if the
> mesh has fewer vertices, then it might show as a "dot to dot" picture)

It would be great if you could amend your macro to draw 'dots' in place
of 'edges'. I could then experiment with different meshes to try and
create a "dot to dot" image.

Thanks

Reuben

>
> - visually labelling the edges seems very difficult (at lest to get a
> decent result), as the numbers involved could easily be large, and also
> the placement of the numbers is by no means easy (3D objects for the
> numbers, or post-process 2d numbers ?, ...) .
>
> -modifying povedge to get, in one click, a "dot by dot" picture with the
> numbers for the dots is also not possible because the edges are not
> ordered along the contours (I mean that, if you follow the silhouette of
> an object, the internal numbering of these edges by povedge can be
> anything, and is not 1,2,3,4... ). So I think that it is possible to
> produce a "dot to dot" picture, by you'll need to add the numbers by
> yourself after rendering the picture in Povray.
>
>
> Thibaut
>
>
> PS : I had a quick look at your helicopter model. It seems that there
> are some artefacts in the silhouette contour (which is why, I guess, you
> put the width of this contour to nearly 0, to hide it). These artefacts
> are related to problems with the normals in the model itself (typically,
> if one normal is wrongly oriented with respect to its neighbours, it
> will create one spurious silhouette edge). I tried to mend that on the
> .obj model with Poseray ("calculate normals" in the Groups tab), but
> without success.  How did you create the model, and it there a way to
> check the normal of it before exporting it to .obj format ?
>
>
>
>
>> Reuben
>> reu### [at] pearsecouk
Post a reply to this message
|
|
| |
| |
|
|
|
|
| |
|
|