|
|
|
|
|
|
| |
| |
|
|
|
|
| |
| |
|
|
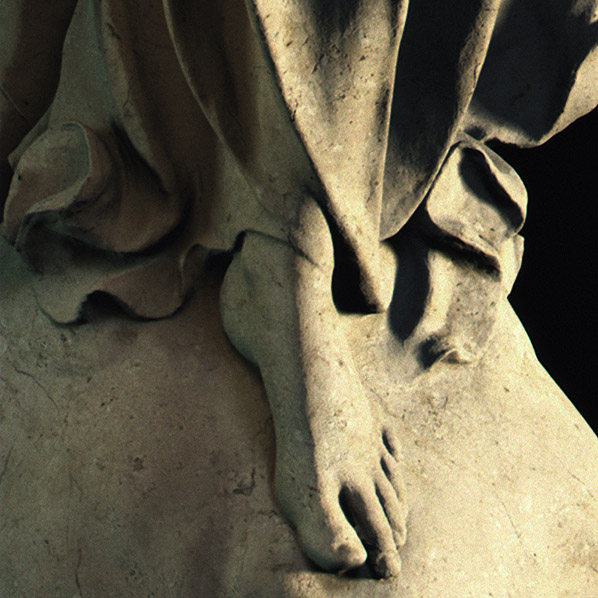
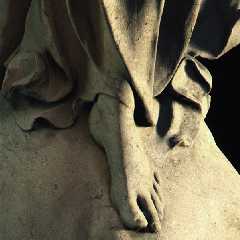
Lighting.
Post a reply to this message
Attachments:
Download 'lights.jpg' (105 KB)
Preview of image 'lights.jpg'
|
|
| |
| |
|
|
|
|
| |
| |
|
|
Hi,

What kind of object and lighting is it? Could you post more information
please?

Thanks,
Rene
--
Rene Schwietzke
r.schwietzke<at>reneschwietzke.de
http://www.rene-schwietzke.de/
Post a reply to this message
|
|
| |
| |
|
|
|
|
| |
| |
|
|
AWESOME!
Post a reply to this message
|
|
| |
| |
|
|
|
|
| |
| |
|
|
"Greg M. Johnson" wrote:
>
> AWESOME!

ROLLEX!
Post a reply to this message
|
|
| |
| |
|
|
|
|
| |
| |
|
|
Very nice! I would love to hear more about the making of this image.
Post a reply to this message
|
|
| |
| |
|
|
|
|
| |
| |
|
|
"Ken" <tyl### [at] pacbell net> wrote in message
news:3E5B820C.F7F142F6@pacbell.net...
>
>
> "Greg M. Johnson" wrote:
> >
> > AWESOME!
>
> ROLLEX!
Aw, I was going to say that... net> wrote in message
news:3E5B820C.F7F142F6@pacbell.net...
>
>
> "Greg M. Johnson" wrote:
> >
> > AWESOME!
>
> ROLLEX!
Aw, I was going to say that...
Post a reply to this message
|
|
| |
| |
|
|
|
|
| |
| |
|
|
what was povray used for?

Graphicus <not@.valid> wrote in message news:3E5B47C4.5D601D8C@.valid...
>
> Lighting.
Post a reply to this message
|
|
| |
| |
|
|
|
|
| |
| |
|
|
Ross Litscher <lit### [at] osuedu> escribió en el mensaje de noticias
3e5bba65$1@news.povray.org...
> what was povray used for?

To write lightning?

Txemi Jendrix
http://www.txemijendrix.com
Post a reply to this message
|
|
| |
| |
|
|
|
|
| |
| |
|
|
Graphicus wrote:
> Lighting.

AWSUM ROLEX!!!!1
Post a reply to this message
|
|
| |
| |
|
|
|
|
| |
| |
|
|
Ok, I hate you.

What's the texture on that?

--
--Tim Cook
http://home.bellsouth.net/p/PWP-empyrean

-----BEGIN GEEK CODE BLOCK-----
Version: 3.12
GFA dpu- s: a?-- C++(++++) U P? L E--- W++(+++)>$
N++ o? K- w(+) O? M-(--) V? PS+(+++) PE(--) Y(--)
PGP-(--) t* 5++>+++++ X+ R* tv+ b++(+++) DI
D++(---) G(++) e*>++ h+ !r--- !y--
------END GEEK CODE BLOCK------
Post a reply to this message
|
|
| |
| |
|
|
|
|
| |
| |
|
|
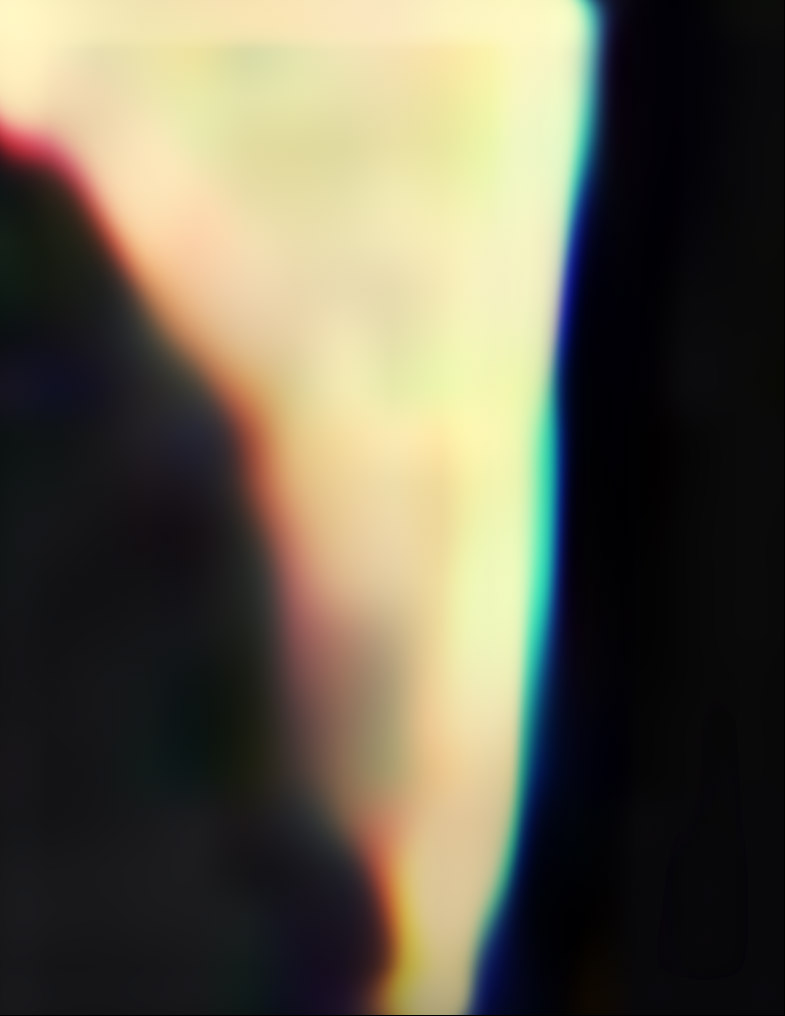
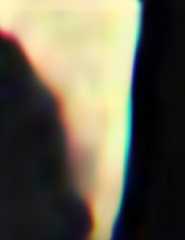
I don't know, maybe I'm just too suspicious..... but I'm wondering how did
you get those color shifts? See attachment for a blowup of a small part of
your image that shows what I'm talking about.
Post a reply to this message
Attachments:
Download 'light_blowup.jpg' (43 KB)
Preview of image 'light_blowup.jpg'
|
|
| |
| |
|
|
|
|
| |
| |
|
|
"Timothy R. Cook" <z993126bellsouth.net> wrote in message
news:3e5bfb28$1@news.povray.org...
> Ok, I hate you.
>
> What's the texture on that?
>

texture{Kodak}

Hmm, no further comment from Graphicus. In fairness, the post is called "Testing
1..2.3" - maybe just a test post?
Post a reply to this message
|
|
| |
| |
|
|
|
|
| |
| |
|
|
"Apache" <apa### [at] yahoocom> schrieb im Newsbeitrag
news:3e5cd63b@news.povray.org...
> I don't know, maybe I'm just too suspicious..... but I'm wondering how did
> you get those color shifts? See attachment for a blowup of a small part of
> your image that shows what I'm talking about.
>

Those 'color shifts' look like the usual artefacts you did produced by yourself
by resampling the image in RGB mode. I do not see any when blowing the thing
up in P'shops L*a*b mode!

BTW thats one of the reasons I do not work with the gimp.

-Ive
Post a reply to this message
|
|
| |
| |
|
|
|
|
| |
| |
|
|
I can see those artifacts even without blowing up anything. I'm using
Outlook Express and can see the image inline in the post. I blew up the
image just to show it. I just did the same thing in Photoshop in Lab mode
and I can still see the color shifting. *If* there are any artifacts it
would be the jpeg compression artifacts, but I have never experienced this
kind of complementing red-green color effects. I'm still very suspicious
that this is not a POV-Ray image, although it is really pretty! And wow.....
if it really *is* done with POV-Ray, I'm absolutely stunned because it looks
so real...!
Post a reply to this message
|
|
| |
| |
|
|
|
|
| |
| |
|
|
Well, maybe I'm getting color blind, my monitor is getting old or whatever,
but where the heck do you see those color shifts? I see definitely none.
But I completely agree with your suspicion.

-Ive
Post a reply to this message
|
|
| |
| |
|
|
|
|
| |
| |
|
|
I see them as well with Picture publisher8 and ACDsee, though less
saturated.
Marc
"Ive" <ive### [at] lilysoftcom> a écrit dans le message de news:
3e5d54fb$1@news.povray.org...
> Well, maybe I'm getting color blind, my monitor is getting old or
whatever,
> but where the heck do you see those color shifts? I see definitely none.
> But I completely agree with your suspicion.
>
> -Ive
>
>
Post a reply to this message
|
|
| |
| |
|
|
|
|
| |
| |
|
|
"Apache" <apa### [at] yahoocom> wrote in message
news:3e5cd63b@news.povray.org...
> I don't know, maybe I'm just too suspicious..... but I'm wondering
how did
> you get those color shifts? See attachment for a blowup of a small
part of
> your image that shows what I'm talking about.

I don't see anything like that, just large pixels when I enlarge it.
Jpeg artifacts are not too bad either.

I'm using OE5.5 viewing inline, but saved pic is still OK viewed in
PSP or Irfanview.

Alf
Post a reply to this message
|
|
| |
| |
|
|
|
|
| |
| |
|
|
> I see them as well with Picture publisher8 and ACDsee, though less
> saturated.

Hey you guys make me crazy. I was already in fear to be color blind
but sorry, there are defenetely no color artefacts. If you see something
in the original image you really should adjust your crappy monitor because
its red, green and blue cathod ray tubes are no longer in focus (some
monitors have a little screw on the back side to adjust this convergence
error).
And if you blow up the thing by using a resampling filter, those color
shifts are typical artefacts produced by crappy software.

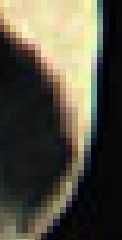
Attached is the blown up version WITHOUT resampling filter, so where
are your blue pixels?

-Ive
Post a reply to this message
Attachments:
Download 'lights-blowup.png' (4 KB)
Preview of image 'lights-blowup.png'
|
|
| |
| |
|
|
|
|
| |
| |
|
|
Ive wrote:
> Attached is the blown up version WITHOUT resampling filter, so where
> are your blue pixels?

I see red on the left, blue on the right.

--
--Tim Cook
http://home.bellsouth.net/p/PWP-empyrean

-----BEGIN GEEK CODE BLOCK-----
Version: 3.12
GFA dpu- s: a?-- C++(++++) U P? L E--- W++(+++)>$
N++ o? K- w(+) O? M-(--) V? PS+(+++) PE(--) Y(--)
PGP-(--) t* 5++>+++++ X+ R* tv+ b++(+++) DI
D++(---) G(++) e*>++ h+ !r--- !y--
------END GEEK CODE BLOCK------
Post a reply to this message
|
|
| |
| |
|
|
|
|
| |
| |
|
|
Hi, it's really me hidind behind that alias. This was a lighting test
but I also wanted to see how photographers and CG hobbyists see it. On a
photography BBS the earlier version got comments like: nice, looks fine,
needs more contrast and sharpness etc. I applied those and other
suggestions to this version.

The scene is just one mesh and 4 4x4 area lights. No radiosity. The
texture is an image map which is also used as bump map with curves
adjustment. Looks boring when rendered directly (30 minutes). Ater 30
minutes in Gimp + Photoshop it looks much nicer. It's a variation of the
rendering by layers method with 2-pass film transfer curve fake.
Professional compositing software probably has this kind of functionality
built-in.

I guess the result is close enough to photorealistic if you have to
dig up a microscope to look for the "cheats" :)


_____________
Kari Kivisalo
Post a reply to this message
|
|
| |
| |
|
|
|
|
| |
| |
|
|
"Timothy R. Cook" <z993126bellsouth.net> a écrit dans le message de news:
3e5e365b$1@news.povray.org...
> Ive wrote:
> > Attached is the blown up version WITHOUT resampling filter, so where
> > are your blue pixels?
>
> I see red on the left, blue on the right.
I see red on the left, green/blue on the right exactly as with PP8 and
ACDsee

Marc
Post a reply to this message
|
|
| |
| |
|
|
|
|
| |
| |
|
|
same here. And I'm VERY sure my monitor is perfectly all right. I have
changes settings all the way around, different color "temperatures" and what
else my CTX "Ultra Screen" holy monitor (hahahahah) supports. I have *never*
had any color issues on this electron cannon...... And if something is
wrong, I should have other issues too. And the color shifts are left-right
oriented and scale with the image, so it's defenatly in the pixel colors....
let me tell you some rgb values: the left (reddish) has #ad786a (or cmyk
30%, 55%, 55% and 7%) and the right (greenish) part has #6f9878 (or cmyk
60%, 25%, 61% and 4%).

Hey, Graphicus, what's going on here? Did you render something with POV-Ray
and postprocessed it some way just to freak us out? :P
Just three ways to get to this picture: no POV-Ray involved whatsoever,
POV-Ray rendering with postprocessing, pure POV-Ray material. If it's the
third one, could you please tell us how you did that color shifting!?

Regards,
Apache
Post a reply to this message
|
|
| |
| |
|
|
|
|
| |
| |
|
|
Hey man! This image rocks! You had me going here hahahahahah I'm a bit of a
POV purist/freak but the result is absolutely stunning and believe me it is
photorealistic that's why I was very suspicious.... :)
And now how/where dit you get that mesh?
Post a reply to this message
|
|
| |
| |
|
|
|
|
| |
| |
|
|
"Kari Kivisalo" <pro### [at] luxlabcom> wrote in message
news:3E5E4895.209CC057@luxlab.com...
>
> Hi, it's really me hidind behind that alias.
...
> _____________
> Kari Kivisalo

Congratulations!  Any image that looks real enough to fool so many of _us_,
is amazing.  I looked at it long and hard, and simply couldn't find anything
in it that made it look "rendered" rather than photographed.

Amazing!
--
Slash
Post a reply to this message
|
|
| |
| |
|
|
|
|
| |
| |
|
|
Those "cheats" made me believe it was more like a photograph than a POV-Ray
thing hehheheheh.
Post a reply to this message
|
|
| |
| |
|
|
|
|
| |
| |
|
|
On Thu, 27 Feb 2003 19:19:17 +0200, Kari Kivisalo <pro### [at] luxlabcom> wrote:
> it's really me

very stone foot you have ;-)

ABX
Post a reply to this message
|
|
| |
| |
|
|
|
|
| |
| |
|
|
Kari Kivisalo wrote:
>
> The scene is just one mesh and 4 4x4 area lights. No radiosity. The
> texture is an image map which is also used as bump map with curves
> adjustment.

Interesting.  Does it use uv-mapping?  It is really not visible that it is
just a 2D texture and with that geometry this is probably quite difficult.

How did you place the area lights?  It is quite astonishing that it looks
very good without radiosity.

Christoph

--
POV-Ray tutorials, include files, Sim-POV,
HCR-Edit and more: http://www.tu-bs.de/~y0013390/
Last updated 31 Dec. 2002 _____./\/^>_*_<^\/\.______
Post a reply to this message
|
|
| |
| |
|
|
|
|
| |
| |
|
|
?? do you have tickets often?
Post a reply to this message
|
|
| |
| |
|
|
|
|
| |
| |
|
|
Ive wrote:
>
> Attached is the blown up version WITHOUT resampling filter, so where
> are your blue pixels?

Along the right. And there are red pixels along the left. Just like
people keep saying.

Sorry Ive, but it's you, not us. Time to (a) see the eye doctor or (b)
get a new monitor.

-Xplo
Post a reply to this message
|
|
| |
| |
|
|
|
|
| |
| |
|
|
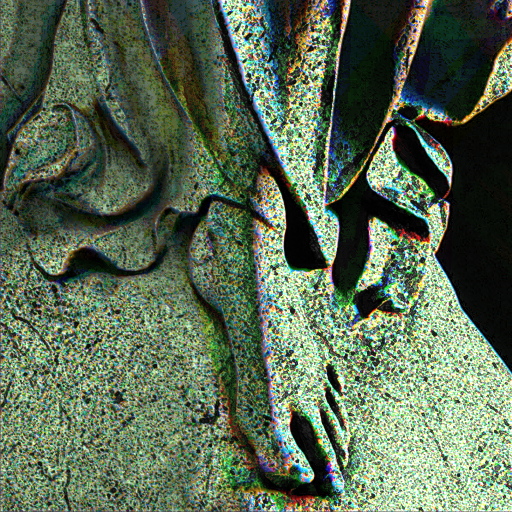
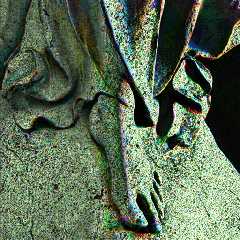
I will try height field and lights with this image.
It's rsult is very good,I think.

Y.Tanabe
Kobe,Japan

//code start

// Mega Persistence of Vision Ray Tracer 0.7 Scene Description File
#version unofficial MegaPov 0.7;

global_settings
{
 assumed_gamma 1.8
}

camera
{
   orthographic
   location  <0,0,-5>
 up   <0,5,0>
 right  <5,0,0> * image_width / image_height
   direction  <0,0,1>
   look_at  <0,0,0>
}

sky_sphere {pigment {color rgb <0.25,0.25,0.25>}}

light_source {<0,0,-50> color rgb <1,1,1> parallel point_at <0,0,0>}
light_source {<-50,50,-50> color rgb <1,0,0> * 2.82 parallel point_at <0,0,0>}
light_source {<-50,-50,-50> color rgb <0,0,1> * 2.82 parallel point_at <0,0,0>}
light_source {<50,50,-50> color rgb <0,0,1> * 2.82 parallel point_at <0,0,0>}
light_source {<50,-50,-50> color rgb <1,0,0> * 2.82 parallel point_at <0,0,0>}
light_source {<0,50,-50> color rgb <0,1,0> * 1.414 parallel point_at <0,0,0>}
light_source {<0,-50,-50> color rgb <0,1,0> * 1.414 parallel point_at <0,0,0>}
light_source {<50,0,-50> color rgb <0,1,0> * 1.414 parallel point_at <0,0,0>}
light_source {<-50,0,-50> color rgb <0,1,0> * 1.414 parallel point_at <0,0,0>}

//This determines the final size of the height field.
//It is used used to scale and translate tthe HF so it is centered at the origin
(<0,0,0>).
#declare square_size  = 5;

//This reads in the height field data
#debug "\nStart height field parsing....\n"

#declare hf =
height_field
{
 png "lights.png"
   smooth
  pigment
    {
     gradient y
     color_map
      {
       [0.0 rgb 0]
       [0.0625 rgb 0.0625]
       [0.125 rgb 0.125]
       [0.1875 rgb 0.1875]
        [0.25 rgb 0.25]
        [0.3125 rgb 0.3125]
        [0.375 rgb 0.375]
        [0.4375 rgb 0.4375]
        [0.5 rgb 0.5]
        [0.5625 rgb 0.5625]
        [0.625 rgb 0.625]
        [0.6875 rgb 0.6875]
        [0.75 rgb 0.75]
        [0.8125 rgb 0.8125]
        [0.875 rgb 0.875]
        [0.9375 rgb 0.9375]
        [1.0 rgb <1,1,1>]
      }
    }
 scale <square_size,1,square_size>
 translate <-square_size/2,0,-square_size/2>
}

#debug "\nFinish height field parsing\n"

//create Mesh
#declare interval = square_size / 80; // the higher the number,the finer the grid
patter
#declare CX =  -square_size/2+interval/2;   // do not alter
#declare CZ = -square_size/2+interval/2;    //do not alter
#declare cyl_width = 0.005;                 //width of the cylinder components of the
grid
#declare cyl_tex = texture{pigment {color rgb <1,1,1> }} // texture of the grid itself

#debug "\nStarting grid formation\n"

#declare grid =
union
{
 #while(CX < square_size/2-interval/2)
  #debug concat ( "CX = ",str (CX,3,3)," of ",str(square_size/2,3,3),"\n")
  #while(CZ < square_size/2-interval/2)
   #declare YValue = trace(hf,<CX,20,CZ>,-y);
   #declare YValueX1 = trace(hf,<CX+interval,20,CZ>,-y);
   #declare YValueZ1 = trace(hf,<CX,20,CZ+interval>,-y);
   #if(YValue.x = 0 & YValue.y = 0 & YValue.z = 0)
   //do nothing
   #else
    cylinder {<CX,YValue.y,CZ>,<CX+interval,YValueX1.y,CZ>,cyl_width texture
{cyl_tex}}
    cylinder {<CX,YValue.y,CZ>,<CX,YValueZ1.y,CZ+interval>,cyl_width texture
{cyl_tex}}
   #end
   #declare CZ = CZ + interval;
  #end
  #declare CZ = -square_size/2+interval/2;
  #declare CX = CX + interval;
 #end

 // cap off +X axis
 #declare CX1 =  square_size/2-interval/2;
 #declare CZ1 = -square_size/2+interval/2;
 #while(CZ1 <= square_size/2-interval/2)
  #declare YValue = trace(hf,<CX1,20,CZ1>,-y);
  #declare YValueX1 = trace(hf,<CX1+interval,20,CZ1>,-y);
  #declare YValueZ1 = trace(hf,<CX1,20,CZ1+interval>,-y);
  cylinder {<CX1,YValue.y,CZ1>,<CX1,YValueZ1.y,CZ1+interval>,cyl_width texture
{cyl_tex}}
  #declare CZ1 = CZ1 + interval;
 #end

 // cap off +z axis
 #declare CX2 =  -square_size/2+interval/2;
 #declare CZ2 = square_size/2-interval/2;

 #while(CX2 <= square_size/2-interval/2)
  #declare YValue = trace (hf,<CX2,20,CZ2>,-y);
  #declare YValueX1 = trace (hf,<CX2+interval,20,CZ2>,-y);
  #declare YValueZ1 = trace (hf,<CX2,20,CZ2+interval>,-y);
  cylinder {<CX2,YValue.y,CZ2>,<CX2+interval,YValueX1.y,CZ2>,cyl_width texture
{cyl_tex}}
  #declare CX2 = CX2 + interval;
 #end
}

// objects
union
{
 //object {grid translate <0,cyl_width,0>}
 object {hf}
 rotate x*-90
}

//end code
Post a reply to this message
Attachments:
Download 'lighthf.jpg' (311 KB)
Preview of image 'lighthf.jpg'
|
|
| |
| |
|
|
|
|
| |
| |
|
|
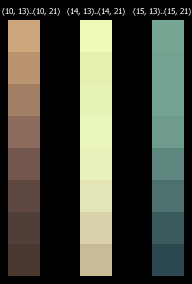
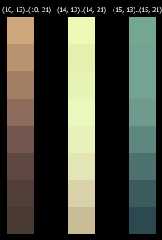
On Thu, 27 Feb 2003 16:18:21 +0100, Ive wrote:

> Attached is the blown up version WITHOUT resampling filter, so where
> are your blue pixels?

Right there! lol, sorry I couldn't resist!

I've attached an image which should make the colour tinting around the
edges more visible for you. The colours are taken directly from the image
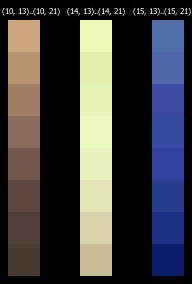
you attached and the coordinates correspond to those in your image.
(counting each block as one pixel)
Post a reply to this message
Attachments:
Download 'colour-tint.gif' (5 KB)
Preview of image 'colour-tint.gif'
|
|
| |
| |
|
|
|
|
| |
| |
|
|
> > Attached is the blown up version WITHOUT resampling filter, so where
> > are your blue pixels?
>
> Right there! lol, sorry I couldn't resist!
>
> I've attached an image which should make the colour tinting around the
> edges more visible for you. The colours are taken directly from the image
> you attached and the coordinates correspond to those in your image.
> (counting each block as one pixel)

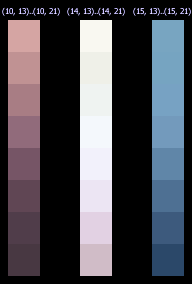
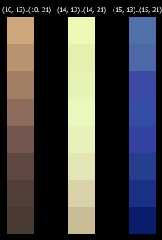
So you call the colors at the right blue? Really? Sorry also couldn't resist.
I have quickly taken some color probes at the same places from the image
shown by Apache, I was referring to. Thats what I do call blue and does
in fact not exist in the original image because these blue shifts are produced
by the resampling filter. And thats what I did try to say.

-Ive
Post a reply to this message
Attachments:
Download 'colour-tint2.gif' (5 KB)
Preview of image 'colour-tint2.gif'
|
|
| |
| |
|
|
|
|
| |
| |
|
|
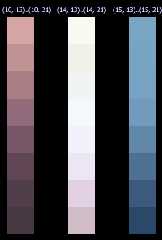
On Sat, 1 Mar 2003 02:52:03 +0100, Ive wrote:

> Thats what I do call blue and does
> in fact not exist in the original image because these blue shifts are produced
> by the resampling filter. And thats what I did try to say.
>
> -Ive

It's visible to me that there was a blue *shift* in the original image, but
since the main colour in the image was yellow, the resulting edge colour
was closer to green. I've attached another image where the main colour was
corrected to make the main colour white and you can visibly see the left
column is red and the right column is blue. The only filter applied is a
RGB multiply filter with gamma taken into account. And I do think you're
right in one way about the first enlargement filter. It makes the right
edge appear more blue but the shift *towards* blue was already present in
the image. I've never known of any resample filter that treated different
colour channels differently and I think that this one is no different.
Post a reply to this message
Attachments:
Download 'colour-tint-white.gif' (5 KB)
Preview of image 'colour-tint-white.gif'
|
|
| |
| |
|
|
|
|
| |
| |
|
|
blue? guess who started with this "blue" word.... I never used the word blue
IIRC.
Post a reply to this message
|
|
| |
| |
|
|
|
|
| |
| |
|
|
Christoph Hormann wrote:
>
> Interesting.  Does it use uv-mapping?  It is really not visible that it is
> just a 2D texture and with that geometry this is probably quite difficult.

I used slope pattern to select x, y, or z projection of the texture.


> How did you place the area lights?  It is quite astonishing that it looks
> very good without radiosity.

I used net reflectance of 0.3 for the stone which means radiosity
would not make much difference without other objects in the scene.
This was the approximate initial lighting which I fine tuned in
post-process.


sphere{
  <0,0.77,0>,0.77
  pigment{rgb 1} finish{diffuse 0.3 ambient 0.01}
}

plane{y,0 pigment{checker rgb 1,rgb 0.5 scale 0.8}
finish{diffuse 0.6 ambient 0.01}}

camera{
  location<0,10.8,-23>
  up y right x
  direction 12*z
  look_at<0,0.77,0>
}

light_source{
  <0,0,-23>
  rgb<0.7,1,0.9>*0.8
  area_light 8*x,8*y,4,4 adaptive 0 jitter
  rotate 5*x
  rotate 90*y
}


light_source{
  <0,0,-3>
  rgb<1,0.7,0.4>*0.8
  area_light 0.8*x,0.8*y,4,4 adaptive 0 jitter
  rotate 70*x
  rotate 30*y
}

light_source{
  <0,0,-23>
  rgb<1,0.9,0.7>*2.5
  area_light 4*x,4*y,4,4 adaptive 0 jitter
  rotate 10*x
  rotate -80*y
}

light_source{
  <0,0,-23>
  rgb<0.5,0.7,1>*0.5
  area_light 4*x,4*y,4,4 adaptive 0 jitter
  rotate 60*x
  rotate -30*y
}


_____________
Kari Kivisalo
Post a reply to this message
|
|
| |
| |
|
|
|
|
| |
| |
|
|
Apache wrote:
>
> And now how/where dit you get that mesh?

I got a a couple of years ago from one of the free 3d model sites.
It uses about 170MB RAM and has 1M triangles.


_____________
Kari Kivisalo
Post a reply to this message
|
|
| |
| |
|
|
|
|
| |