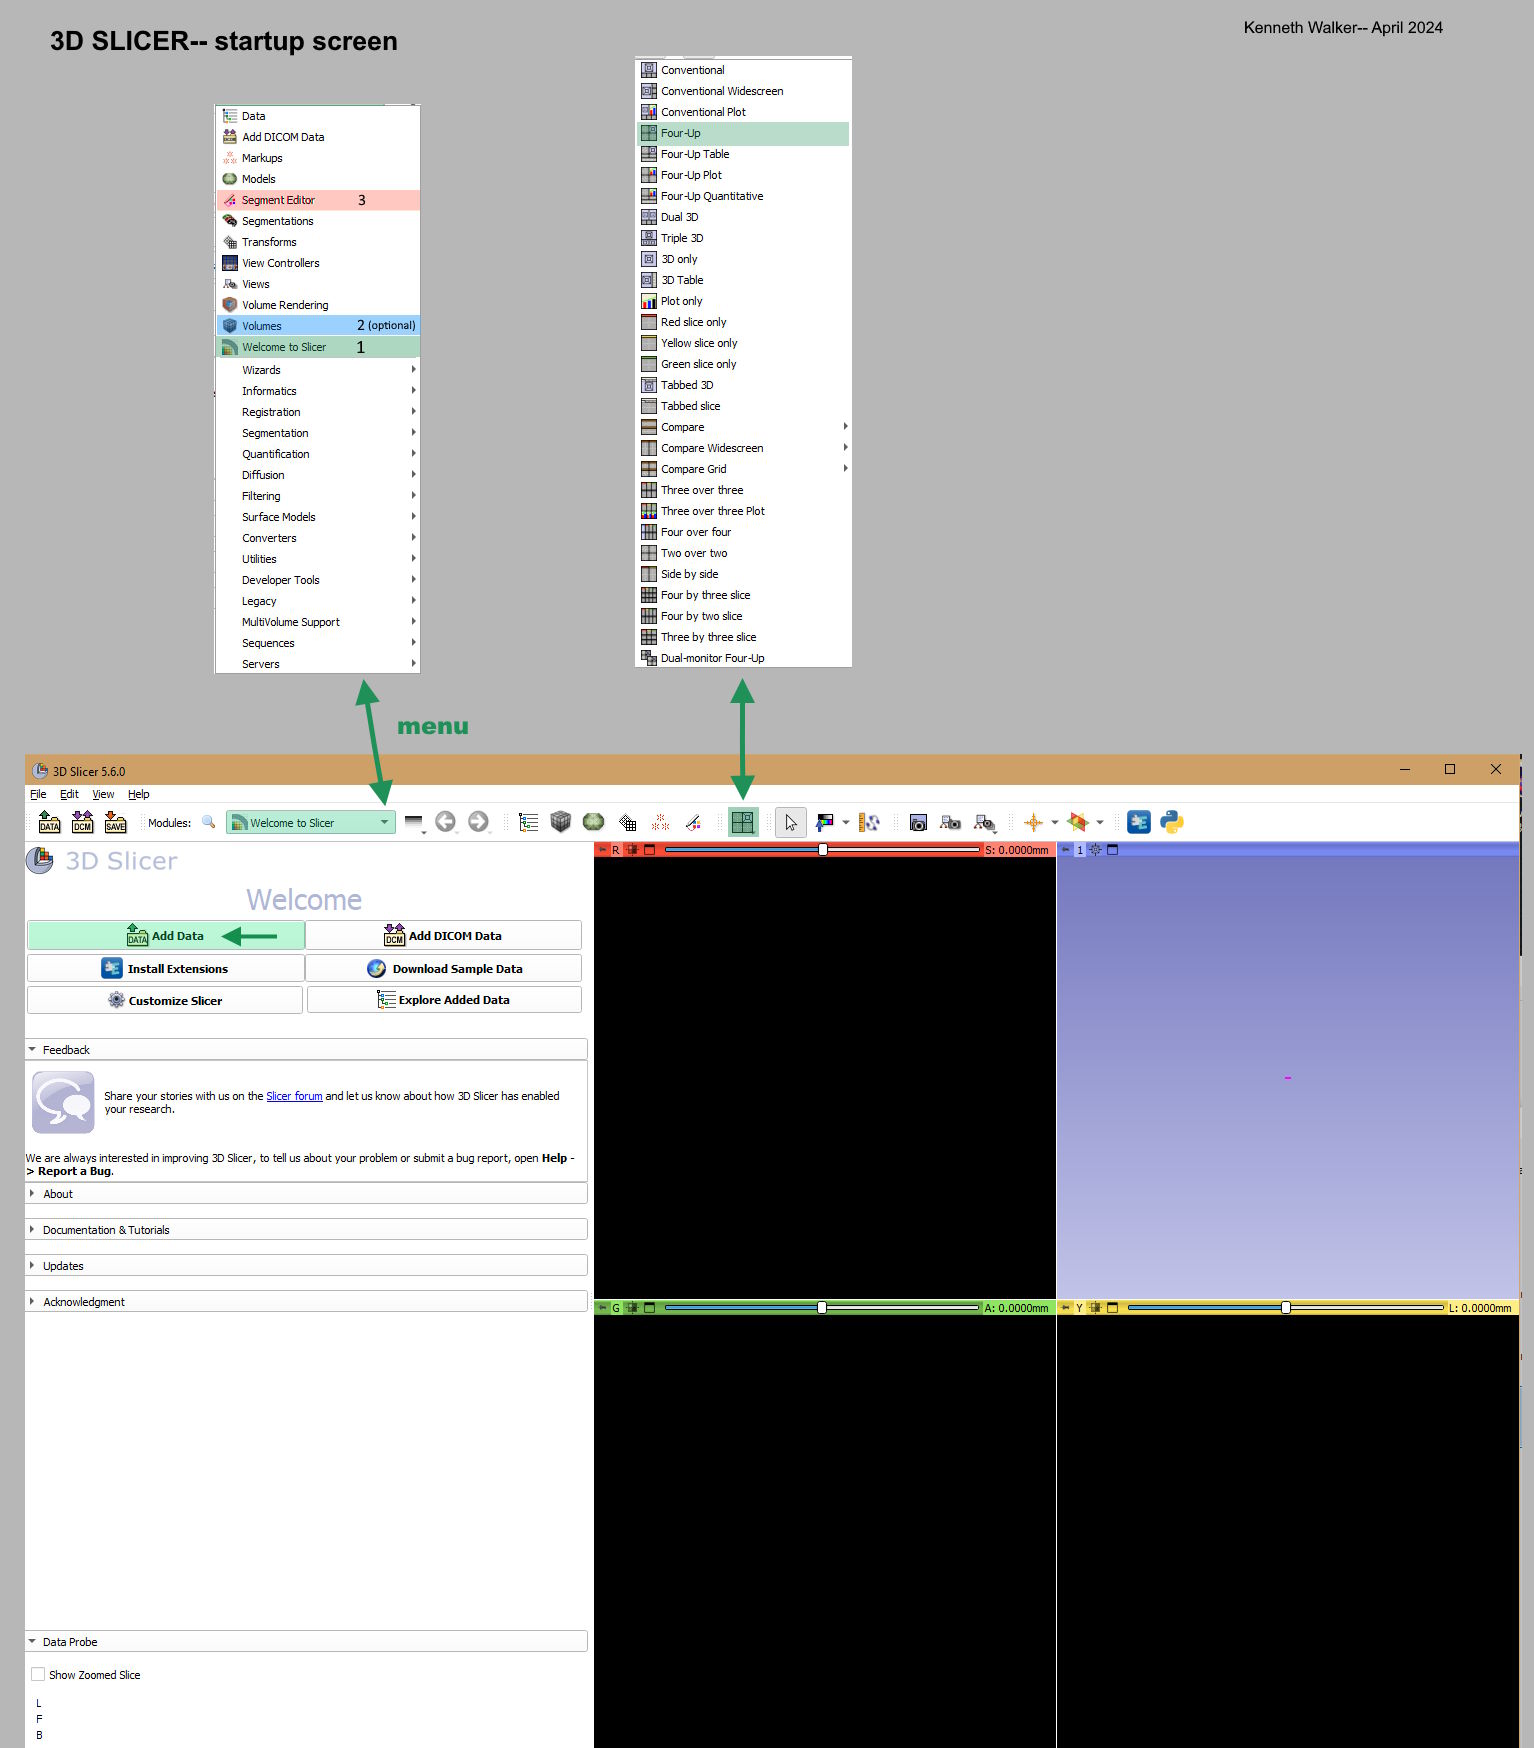
3D SLICER automatically starts up in its 'Welcome to Slicer' view; the attached
image is the start-up screen, with my annotations (as it appears in Windows 10.)
It's a large app, so give it time to load. You should see four blank view-panes
to the right. If not, go to the top row of icons and choose the 'Four-up'
working view from a pull-down menu.
The large 'Add Data' button on this opening page will be used to import your
previously-rendered image slices.
Only THREE of the app's core 'modules' will need to be used for the entire
process, and in a simple way:
'Welcome to Slicer' (the first module)
'Volumes' (which is optional)
'Segment Editor'
(The 'Welcome to Slicer' icon at the top has a menu; we will use that later to
choose the other modules.)
In this screenshot and those to follow, only the details with my annotations are
important; the rest of the app's features can be ignored.
Post a reply to this message
Attachments:
Download '3d slicer startup view.jpg' (215 KB)
Preview of image '3d slicer startup view.jpg'
|