|
|
|
|
|
|
| |
| |
|
|
|
|
| |
| |
|
|
On 2-10-2018 21:08, Kenneth wrote:
> "Bald Eagle" <cre### [at] netscape net> wrote:
>>> BTW, it's not clear to me why he specified radians rather than degrees, as
>>> a camera angle is specified in degrees(?), or something similar.
>>>>
>>
>>
>> The angle IS in degrees, but tan () acts on radians.
>> That's why it needs to get converted to radians first, before performing the
>> tan() function.
>
> Oh, of course; thanks. The 'radians' keyword (or alternately 'degrees') is a
> CONVERTER.
>
> I forgot :-[
>
I have never known ;-)
--
Thomas net> wrote:
>>> BTW, it's not clear to me why he specified radians rather than degrees, as
>>> a camera angle is specified in degrees(?), or something similar.
>>>>
>>
>>
>> The angle IS in degrees, but tan () acts on radians.
>> That's why it needs to get converted to radians first, before performing the
>> tan() function.
>
> Oh, of course; thanks. The 'radians' keyword (or alternately 'degrees') is a
> CONVERTER.
>
> I forgot :-[
>
I have never known ;-)
--
Thomas
Post a reply to this message
|
|
| |
| |
|
|
|
|
| |
| |
|
|
On 2-10-2018 21:10, Bald Eagle wrote:
> "Kenneth" <kdw### [at] gmailcom> wrote:
>
>> Do you mean that Clipka's observation is already 'included' in that TEXT OBJECT
>> matrix in some way? Although I surely don't grasp that, it's quite interesting.
>
> That was my initial thought, based on the briefest of glances.
>
>> And the matrix is used ONLY for the text objects, not for the arrow placement
>> (unless all the ingredients in the matrix are also used in another form for the
>> arrow?) Sorry if I'm not making clear sense; the whole concept is quite fuzzy to
>> me at the moment.
>
> After scrutinizing the code more closely, the unions and indentations had me
> confused, and perhaps you're right about that.
>
>> BTW, apologies for not yet commenting on your code analysis; I'm slowly
>> digesting it all ;-)
>
> Take your time - and check your email. ;)
>
This all is way beyond my skills I humbly admit. Just a little addendum
though if I may: the matrix is not part of the original position finder
by Norbert. It was conceived (and rightly so!) by Kenneth, as an
improvement to the original.
--
Thomas
Post a reply to this message
|
|
| |
| |
|
|
|
|
| |
| |
|
|
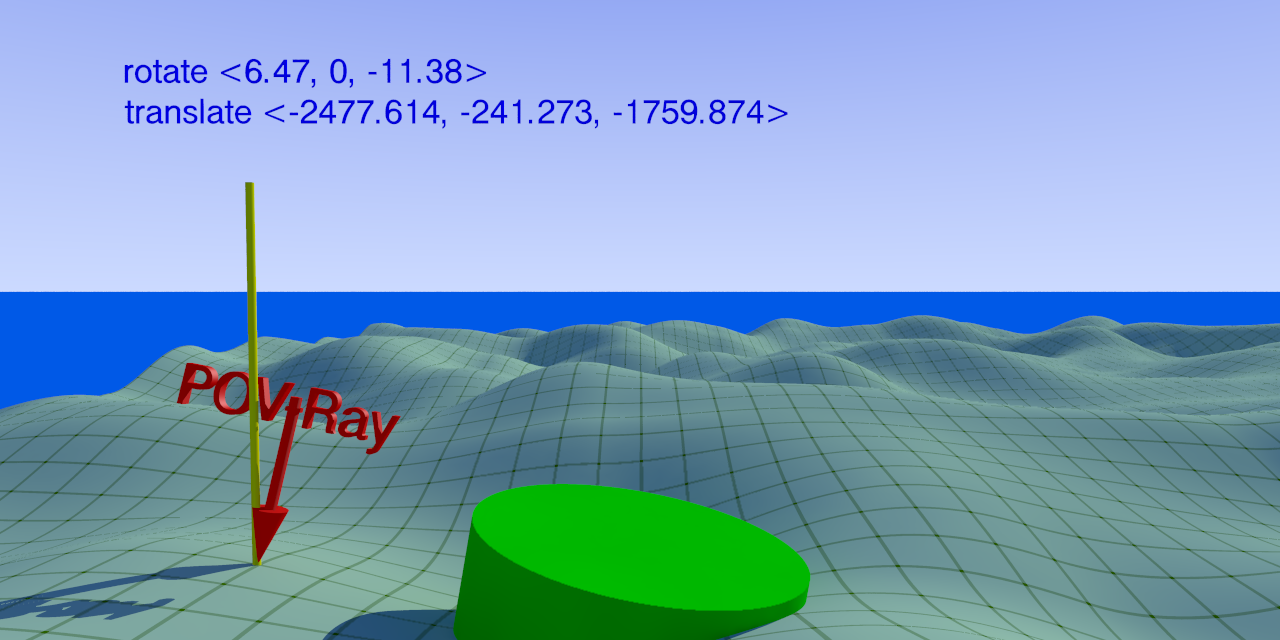
So, I manage to get the arrow on the rod by tweaking:
#local dir_y = vaxis_rotate (lookat-cam_loc, vcross (cam_d, cam_up),
(0.483-screen_y_position*0.01)*cam_ang/image_width*image_height);
#local dir_xy = vaxis_rotate (dir_y, cam_up,
(0.535-screen_x_position*0.01)*cam_mirror*cam_ang);
replacing the 0.5 value by respectively 0.483 in dir_y and 0.535 in dir_xy.
Of course, this is entirely by just dumb trial and error, and I highly
doubt if it is significant. I wonder now if it holds for other scenes...
tests to do...
--
Thomas
Post a reply to this message
Attachments:
Download 'islaytest.png' (360 KB)
Preview of image 'islaytest.png'
|
|
| |
| |
|
|
|
|
| |
| |
|
|
Thomas de Groot <tho### [at] degrootorg> wrote:
> So, I manage to get the arrow on the rod by tweaking:
>
> #local dir_y = vaxis_rotate (lookat-cam_loc, vcross (cam_d, cam_up),
> (0.483-screen_y_position*0.01)*cam_ang/image_width*image_height);
> #local dir_xy = vaxis_rotate (dir_y, cam_up,
> (0.535-screen_x_position*0.01)*cam_mirror*cam_ang);
>
> replacing the 0.5 value by respectively 0.483 in dir_y and 0.535 in dir_xy.
>
> Of course, this is entirely by just dumb trial and error, and I highly
> doubt if it is significant. I wonder now if it holds for other scenes...
> tests to do...
>
Yeah, I've found that tweaking *something* (one of several different things
actually) can put the arrow where it's supposed to be. But I suspect that your
values would need to change, when using a different camera angle? My own 'tweak
tests' have shown that the code as-is has the ideal overall values in its
arrow-placement equations-- but only at the most extreme telephoto/zoom camera
angle. As that angle value climbs toward 90 (more and more wide-angle), the
arrow position just gets progressively worse... and my own value-compensation
tweaks have to get larger, to correct it. Very frustrating so far.
BTW, what CamAng did you use for this test? 80?
On a brighter note:
I've discovered a simple fix for ALL of the traced 'normal' problems that I've
been dealing with!
To wit: After spending WAY too much time trying to come up with workarounds, I
replaced Norbert's
rotate <rx,0,rz>
with
Point_At_Trans(Norm) // a macro
from "functions.inc"
That's it!
Well, not quite: Even though the ARROW'S 'normal' orientation now looks great
all the time, the found rotation (in the #debugged output and on-screen) is no
longer correct-- because rotate <rx,0,rz> no longer agrees with whatever
Point_At_Trans is doing behind-the-scenes.
I haven't yet found a way to get at Point_At_Tran's hidden inner values, to USE
for the rotation. Looking at its code (and at the other macros that it requires
in order to work), there's... a MATRIX. :-( I refuse to be beaten, though! Out
of desperation, I'm now *trying* to work out a way to turn a normal directly
into a set of rotations-- at least in two axes--that I can use to bypass
Point_At_Trans AND rotate <rx,0,rz> altogether.
Post a reply to this message
|
|
| |
| |
|
|
|
|
| |
| |
|
|
I think if you look at:
http://www.povray.org/documentation/view/3.7.1/246/
you'll see several things.
1. The +/- 0.5 range for x and y
2. camera angle is determined by changing the length of the direction vector.
3. I think this relates to the error you see, and it's decrease with smaller
camera angles.
Here's my crappy reasoning-by-analogy in the absence of the code in front of me,
and on short notice:
When you swivel a line through pivot point, a small change at the end results in
a large change in the other end when the pivot point is close ( small direction
vector / wide angle)
When you pull the camera way back, you have to make very large changes in the
position to have the same effect - or put the other way - any changes at the
other end are very small (your errors) for the same amount of change.
Think about that in terms of any trace() results and calculations based on those
- they're like angles, and like levers they can magnify (by integers or
fractions) the results.
I don't think you're/we're going to get very far fiddling with code or working
backwards from the existing macro.
Write some code to model a default camera scene, and then play with point
locations and their projection onto the z=1 plane.
Then you can work from there.
What you do (and understand) in a forward, stepwise manner, you can follow
stepwise, backwards to see what calculations you need to to go from screen
coordinates to 3D vector coordinates.
Post a reply to this message
|
|
| |
| |
|
|
|
|
| |
| |
|
|
_See_ what I mean here:
http://news.povray.org/povray.binaries.images/message/%3Cweb.587ce70b1652a4dcc437ac910%40news.povray.org%3E/#%3Cweb.587
ce70b1652a4dcc437ac910%40news.povray.org%3E
Post a reply to this message
|
|
| |
| |
|
|
|
|
| |
| |
|
|
OK, so here's a rudimentary object position / surface normal finding scene I
wrote from scratch, which shows the back-and-forth conversion of screen position
coordinates and 3D scene object coordinates.
Wrote 2 "shotgun" macros to pepper the target object with trace() calls to see
about the "underside" issue.
Play around with it, let me know questions, comments, improvements as always.
########################################################################
#version version;
#global_settings {assumed_gamma 1.0}
#include "colors.inc"
light_source {
<0.5, 0.5, -1>
color White
fade_distance 20
fade_power 2
}
#declare Default_location = <0, 0, 0>; // 2.3.1.1.1 Location and Look_At
#declare Default_direction = <0, 0, 1>; // 2.3.1.1.4 The Direction Vector
#declare Default_right = <1.33, 0, 0>; // 2.3.1.1.6 Aspect Ratio
#declare Default_up = <0, 1, 0>; // 2.3.1.1.6 Aspect Ratio
#declare Default_sky = <0, 1, 0>; // 2.3.1.1.2 The Sky Vector
// When you specify the angle, POV-Ray adjusts the length of the direction
vector accordingly.
// The formula used is direction_length = 0.5 * right_length / tan(angle / 2)
// where right_length is the length of the right vector.
// You should therefore specify the direction and right vectors before the angle
keyword.
#declare Default_angle = 0;
// direction_length = 0.5 * right_length / tan(angle / 2)
// The look_at modifier should almost always be the last item in the camera
statement.
// If other camera items are placed after the look_at vector then the camera may
not continue to look at the specified point.
#declare Default_look_at = <0, 0, 1>; // 2.3.1.1.1 Location and Look_At
#declare Aspect = image_width/image_height;
#declare A = <Aspect, 1, 1>;
camera {
location Default_location
direction Default_direction
//right Default_right
right x*image_width/image_height
up Default_up
look_at Default_look_at
}
#declare TopRight = <0.5, 0.5, 1>;
#declare Far = 12; // the far plane of a defined view frustum
// The diagonal distance from the Image Plane to a Far view frustum corner is
greater than the straight distance
//
#declare DiagonalLength = vlength (<(Far/2)*Aspect, (Far/2), Far> - TopRight);
// Frame the canvas
#declare Corner = array [4] {<-0.5, 0.5, 1>, <0.5, 0.5, 1>, <0.5, -0.5, 1>,
<-0.5, -0.5, 1>}
#declare Frustum = union {
#for (N, 0, 3)
sphere {Corner [N] * A 0.01 pigment {Gray10}}
sphere {Corner [N] * A * DiagonalLength 0.01 * DiagonalLength * 1.1 pigment
{Green}}
// Here you can see that I just multply the sphere center's vector by a scalar:
the DiagonalLength
// To give the rear sphere the same _apparent_ size (MOA), the radius is
multiplied by the distance
// (Twice as far away needs to be twice as big to appear the same size)
// Since you wouldn't be able to see one sphere behind the other, the radius is
increased by a factor of 1.1
#end
}
object {Frustum}
#macro Get3DPosition (Xpos, Ypos, Target, Mark)
#declare Xpos = (Xpos - 0.5) * Aspect;
#declare Ypos = -1*(Ypos - 0.5);
#declare NormalVector = <0, 0, 0>;
#declare From = <0, 0, 0>;
#declare TraceThrough = <Xpos, Ypos, 1> - From;
#declare PositionIn3D = trace (Target, From, TraceThrough, NormalVector);
#if (vlength (NormalVector) != 0)
cylinder {PositionIn3D, PositionIn3D+NormalVector, 0.01 pigment {Green}}
#end
// Indicate trace point
#if (Mark)
sphere {<Xpos, Ypos, 1> 0.005 pigment {Green}}
#end // end if Mark
#end // end macro
#macro Convert2ScreenPos (Pos3D)
#declare ScreenPosX = (Pos3D.x / Pos3D.z)/Aspect+0.5;
#declare ScreenPosY = -1*((Pos3D.y / Pos3D.z)-0.5);
#declare ScreenPos = <ScreenPosX, ScreenPosY>;
ScreenPos
#end
// define an object
#declare Radius = 0.25;
#declare Object = sphere {<3, 5, 12> Radius pigment {Red}}
object {Object}
Get3DPosition (0.696, 0.094, Object, yes)
// Find the center of the object
#declare Min = min_extent (Object);
#declare Max = max_extent (Object);
#declare Center = Min + (Max-Min)/2;
#macro CircularShotgun (Target)
#for (Angle, 0, 2*pi, 2*pi/12)
#for (Rad, 0.9, 0.1, -0.1)
#declare Offset = Angle + (2*pi/12 * Rad);
#declare SP = Convert2ScreenPos (Center+<Rad*Radius*cos(Offset),
Rad*Radius*sin(Offset), 0>);
#declare SPX = SP.x;
#declare SPY = SP.y;
Get3DPosition (SPX, SPY, Target, yes)
#end
#end
#end // end macro CircularShotgun
#macro BBShotgun (Target)
#declare MinT = min_extent (Target);
#declare MaxT = max_extent (Target);
#declare Xrange = (MaxT.x - MinT.x);
#declare Yrange = (MaxT.y - MinT.y);
#debug concat(str (MinT.x, 0, 5), "\n")
#debug concat(str (MaxT.x, 0, 5), "\n")
#debug concat(str (Xrange, 0, 5), "\n")
#for (Xvals, MinT.x, MaxT.x, Xrange/10)
#for (Yvals, MinT.y, MaxT.y, Yrange/10)
#debug concat(str (Xvals, 0, 5), "\n")
#declare SP = Convert2ScreenPos (<Xvals, Yvals, Center.z>);
#declare SPX = SP.x;
#declare SPY = SP.y;
Get3DPosition (SPX, SPY, Target, no)
#end
#end
#end // end macro BBShotgun
//CircularShotgun (Object)
BBShotgun (Object)
// end file
Post a reply to this message
|
|
| |
| |
|
|
|
|
| |
| |
|
|
"Bald Eagle" <cre### [at] netscapenet> wrote:
> I think if you look at:
>
> http://www.povray.org/documentation/view/3.7.1/246/
>
> you'll see several things...
Oh my GOD, that drawing is all WRONG!! If the 'position' is inside my eyeball,
and my eyeball shoots a ray toward my computer screen, it's at an ANGLE, and
then when the ray enters the screen and goes inside my computer, it's still at
an ANGLE, and, oh my GOD, nothing works right, and, and...
:-P
My feeble attempt at humor for today. "You know you've been raytracing too long
when..."
>
>
> I don't think you're/we're going to get very far fiddling with code or working
> backwards from the existing macro.
Funny factoid: As I continue working with the code and making little incremental
advances (while removing bits and pieces that are no longer needed), I see that
I'm already inching closer and closer to re-making the code from scratch. But
currently in a *slow* hit-and-miss fashion :-/ I shall ponder on your sage
advice and conceptual suggestions ;-)
Another tidbit: Up until now, I've spent the VAST majority of time trying to
work out that stubborn 'normal' business from trace(...)-- but the real point of
the code is finding a POSITION (the returned translation.) The normal-based
rotations are more like pretty window-dressing-- albeit very nice window
dressing. I need to concentrate on the POSITIONING accuracy for awhile.
Post a reply to this message
|
|
| |
| |
|
|
|
|
| |
| |
|
|
On 3-10-2018 15:17, Kenneth wrote:
> Thomas de Groot <tho### [at] degrootorg> wrote:
>> So, I manage to get the arrow on the rod by tweaking:
>>
>> #local dir_y = vaxis_rotate (lookat-cam_loc, vcross (cam_d, cam_up),
>> (0.483-screen_y_position*0.01)*cam_ang/image_width*image_height);
>> #local dir_xy = vaxis_rotate (dir_y, cam_up,
>> (0.535-screen_x_position*0.01)*cam_mirror*cam_ang);
>>
>> replacing the 0.5 value by respectively 0.483 in dir_y and 0.535 in dir_xy.
>>
>> Of course, this is entirely by just dumb trial and error, and I highly
>> doubt if it is significant. I wonder now if it holds for other scenes...
>> tests to do...
>>
>
> Yeah, I've found that tweaking *something* (one of several different things
> actually) can put the arrow where it's supposed to be. But I suspect that your
> values would need to change, when using a different camera angle? My own 'tweak
> tests' have shown that the code as-is has the ideal overall values in its
> arrow-placement equations-- but only at the most extreme telephoto/zoom camera
> angle. As that angle value climbs toward 90 (more and more wide-angle), the
> arrow position just gets progressively worse... and my own value-compensation
> tweaks have to get larger, to correct it. Very frustrating so far.
>
> BTW, what CamAng did you use for this test? 80?
Yes, 80. You know, I was just beating the bush and whistling a merry
tune, waiting for anything (a miracle?) to happen ;-) Totally crap of
course.
>
> On a brighter note:
> I've discovered a simple fix for ALL of the traced 'normal' problems that I've
> been dealing with!
>
> To wit: After spending WAY too much time trying to come up with workarounds, I
> replaced Norbert's
> rotate <rx,0,rz>
> with
> Point_At_Trans(Norm) // a macro
> from "functions.inc"
>
> That's it!
Indeed. I forgot about that one. See below for further thoughts.
>
> Well, not quite: Even though the ARROW'S 'normal' orientation now looks great
> all the time, the found rotation (in the #debugged output and on-screen) is no
> longer correct-- because rotate <rx,0,rz> no longer agrees with whatever
> Point_At_Trans is doing behind-the-scenes.
One may wonder what we really need. I personally believe we do not need
the rotation values resulting from the rx and rz calculations at all. We
use this macro (1) primarily to get an accurate 3D position on a given
surface; (2) possibly, we also need an orientation to the surface, thus
we need the normal. With Point_At_Trans(Norm) we can then orient our
object accurately on the surface.
>
> I haven't yet found a way to get at Point_At_Tran's hidden inner values, to USE
> for the rotation. Looking at its code (and at the other macros that it requires
> in order to work), there's... a MATRIX. :-( I refuse to be beaten, though! Out
> of desperation, I'm now *trying* to work out a way to turn a normal directly
> into a set of rotations-- at least in two axes--that I can use to bypass
> Point_At_Trans AND rotate <rx,0,rz> altogether.
I think: forget about this. No need for this.
--
Thomas
Post a reply to this message
|
|
| |
| |
|
|
|
|
| |
| |
|
|
On 3-10-2018 16:12, Bald Eagle wrote:
> I think if you look at:
>
> http://www.povray.org/documentation/view/3.7.1/246/
>
> you'll see several things.
>
> 1. The +/- 0.5 range for x and y
Yes, of course. I new it was fundamental (but always push at the
fundamentals ;-) ). Had to be reminded.
>
> 2. camera angle is determined by changing the length of the direction vector.
Indeed. It is the way in which Gilles Tran's visibility test macro is
made operational in a given scene.
>
> 3. I think this relates to the error you see, and it's decrease with smaller
> camera angles.
probably yes.
>
> Here's my crappy reasoning-by-analogy in the absence of the code in front of me,
> and on short notice:
>
> When you swivel a line through pivot point, a small change at the end results in
> a large change in the other end when the pivot point is close ( small direction
> vector / wide angle)
>
> When you pull the camera way back, you have to make very large changes in the
> position to have the same effect - or put the other way - any changes at the
> other end are very small (your errors) for the same amount of change.
>
> Think about that in terms of any trace() results and calculations based on those
> - they're like angles, and like levers they can magnify (by integers or
> fractions) the results.
That seems reasonable indeed. I agree.
>
>
>
> I don't think you're/we're going to get very far fiddling with code or working
> backwards from the existing macro.
>
> Write some code to model a default camera scene, and then play with point
> locations and their projection onto the z=1 plane.
>
> Then you can work from there.
>
> What you do (and understand) in a forward, stepwise manner, you can follow
> stepwise, backwards to see what calculations you need to to go from screen
> coordinates to 3D vector coordinates.
>
>
>
>
>
--
Thomas
Post a reply to this message
|
|
| |
| |
|
|
|
|
| |
|
|