|
 |
My camera include file grows steadily. The are now more than
2000 lines of code in it, which makes more than 50 macros.
I have always found it cumbersome to position and orient
cameras so that they show the parts of my scenes that I want
to show.
To make this process easier, I first made a macro that can
show cameras as objects in scenes. Then I made macros to
move cameras and objects along, and around, the axes of
cameras. This all helped, but I thought something was missing
in this "toolbox": It was still difficult to predict what a
camera would actually see. (Or to decide what is in it's
field of view.)
Yesterday I got the idea that maybe a "camera texture" could
be useful. So then I sat down and made a macro that can
produce pigments which changes colors where the camera's
field of view is.
This macro can also show patterns of "helping lines" that
represents certain angles. These lines can be useful if
one want to estimate how much to pan, tilt or roll a camera
in order to get point in the scene into a certain position
of the camera's screen.
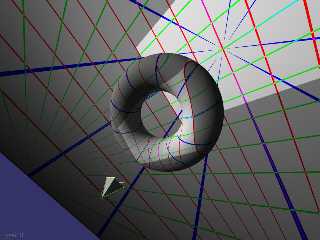
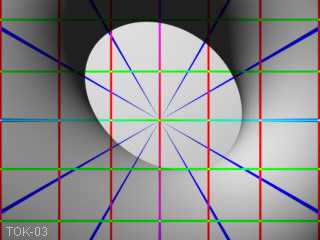
Below are two images that shows this macro (and some others)
in use. The big image shows a camera as an object. There are
two other objects that have a "camera pigment" from this
camera applied to them; a torus and a plane. The small image
shows the same scene viewed through this camera.
Below is the code that I used to make the big image.
Tor Olav
// ===== 1 ======= 2 ======= 3 ======= 4 ======= 5 ======= 6 ======= 7
#version 3.5;
#include "Camera11.inc"
// ===== 1 ======= 2 ======= 3 ======= 4 ======= 5 ======= 6 ======= 7
#declare Camera1 = DefaultCamera()
SetCameraLocation(Camera1, <-1, -5, -3>)
ChangeCameraLookAt(Camera1, <0, -5, 0>)
ChangeCameraAngle(Camera1, 60)
TiltCameraBackward(Camera1, 24)
PanCameraLeft(Camera1, 10)
RollCameraLeft(Camera1, 20)
torus {
5, 2.05
rotate 90*x
translate 5*z
CameraAnglePigment(Camera1, 10, 10, 30)
}
plane {
-z, 0
OrientToCamera_Trans(Camera1, no)
TranslateForward_Trans(Camera1, 1000)
CameraAnglePigment(Camera1, 10, 10, 30)
}
// ===== 1 ======= 2 ======= 3 ======= 4 ======= 5 ======= 6 ======= 7
#declare Camera2 = DefaultCamera()
SetCameraLocation(Camera2, <5, 1, -8>)
ChangeCameraLookAt(Camera2, <2, 0, 0>)
ChangeCameraAngle(Camera2, 110)
ShowCamera(Camera1, no, 0.02)
//PerspCamera(Camera1)
PerspCamera(Camera2)
// ===== 1 ======= 2 ======= 3 ======= 4 ======= 5 ======= 6 ======= 7
light_source { <-4, 2, -3>*100 color rgb <1, 1, 1> shadowless }
background { color rgb <0.2, 0.2, 0.4> }
// ===== 1 ======= 2 ======= 3 ======= 4 ======= 5 ======= 6 ======= 7
To make the small image I just changed three lines:
//ShowCamera(Camera1, no, 0.02)
//PerspCamera(Camera1)
PerspCamera(Camera2)
Post a reply to this message
Attachments:
Download 'CameraTexture04.jpg' (101 KB)
Download 'CameraTexture05.jpg' (29 KB)
Preview of image 'CameraTexture04.jpg'

Preview of image 'CameraTexture05.jpg'

|
 |


![]()