 |
 |
|
 |
|
 |
|  |
|  |
|
 |
|
 |
|  |
|  |
|
 |
It takes all kinds, and I'm very much a realism fanatic. I've spent a few days
working on how to model paint, at this point just wall/trim paint to be more
realistic and have come up with some good finishes that work for high gloss,
semi gloss, and satin paints.
I then created some code for creating a paint layer around an object defined by
an isosurface function, as well as some macros for adding brush stroke textures
and changing the thickness of the paint around the object based on arbitrary
patterns.
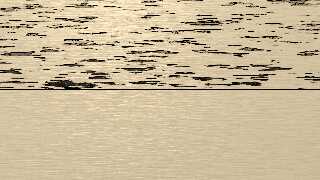
In the image below, I used some older code for modeling objects made of textured
wood to create two beams. The bottom beam has the paint layer added on with a
constant thickness and a moderate brush stroke. The top layer uses the same
texture and brush stroke, but modifies the paint thickness by subtracting out
chips as if the paint were flaking off.
What's nice, so far, is that this HD image with good anti-aliasing took only 5
minutes to render.
-- Chris R.
Post a reply to this message
Attachments:
Download 'painted_wood-hd-hq-20230315.png' (2318 KB)
Preview of image 'painted_wood-hd-hq-20230315.png'

|
 |
|  |
|  |
|
 |
|
 |
|  |
|  |
|
 |
"Chris R" <car### [at] comcast net> wrote:
The top layer uses the same
> texture and brush stroke, but modifies the paint thickness by subtracting out
> chips as if the paint were flaking off.
>
> What's nice, so far, is that this HD image with good anti-aliasing took only 5
> minutes to render.
Damn. That's a really realistic texture.
Having spend quite a bit of time scraping, wire-brushing, power-washing, and
repainting lots of New England structures, I've seen a lot of peeling, bubbling,
and rotting painted wood - and the effect you're achieving is really impressive!
Come up with a method for retaining but displacing those chips, so that they're
still attached, and get some knots to bleed through, and once you light that up
with an HDRI, it'll be damn near photorealistic.
Nice work.
- BE net> wrote:
The top layer uses the same
> texture and brush stroke, but modifies the paint thickness by subtracting out
> chips as if the paint were flaking off.
>
> What's nice, so far, is that this HD image with good anti-aliasing took only 5
> minutes to render.
Damn. That's a really realistic texture.
Having spend quite a bit of time scraping, wire-brushing, power-washing, and
repainting lots of New England structures, I've seen a lot of peeling, bubbling,
and rotting painted wood - and the effect you're achieving is really impressive!
Come up with a method for retaining but displacing those chips, so that they're
still attached, and get some knots to bleed through, and once you light that up
with an HDRI, it'll be damn near photorealistic.
Nice work.
- BE
Post a reply to this message
|
 |
|  |
|  |
|
 |
|
 |
|  |
|  |
|
 |
"Bald Eagle" <cre### [at] netscape net> wrote:
> "Chris R" <car### [at] comcast net> wrote:
> "Chris R" <car### [at] comcast net> wrote:
> The top layer uses the same
> > texture and brush stroke, but modifies the paint thickness by subtracting out
> > chips as if the paint were flaking off.
> >
> > What's nice, so far, is that this HD image with good anti-aliasing took only 5
> > minutes to render.
>
> Damn. That's a really realistic texture.
> Having spend quite a bit of time scraping, wire-brushing, power-washing, and
> repainting lots of New England structures, I've seen a lot of peeling, bubbling,
> and rotting painted wood - and the effect you're achieving is really impressive!
>
> Come up with a method for retaining but displacing those chips, so that they're
> still attached, and get some knots to bleed through, and once you light that up
> with an HDRI, it'll be damn near photorealistic.
>
> Nice work.
>
> - BE
Thanks. I'm thinking about how to incorporate knots that would be visible
through the paint...
-- Chris R. net> wrote:
> The top layer uses the same
> > texture and brush stroke, but modifies the paint thickness by subtracting out
> > chips as if the paint were flaking off.
> >
> > What's nice, so far, is that this HD image with good anti-aliasing took only 5
> > minutes to render.
>
> Damn. That's a really realistic texture.
> Having spend quite a bit of time scraping, wire-brushing, power-washing, and
> repainting lots of New England structures, I've seen a lot of peeling, bubbling,
> and rotting painted wood - and the effect you're achieving is really impressive!
>
> Come up with a method for retaining but displacing those chips, so that they're
> still attached, and get some knots to bleed through, and once you light that up
> with an HDRI, it'll be damn near photorealistic.
>
> Nice work.
>
> - BE
Thanks. I'm thinking about how to incorporate knots that would be visible
through the paint...
-- Chris R.
Post a reply to this message
|
 |
|  |
|  |
|
 |
|
 |
|  |
|  |
|
 |
"Chris R" <car### [at] comcast net> wrote:
> It takes all kinds, and I'm very much a realism fanatic.
Me too, I love looking at 'fantasy/unreal' images but maybe due to a lack of
imagination I tend to concentrate on photorealism in my own images ;-)
The texture looks great, I do like a good close up as well and often model
things at a level of detail that gets lost when you put them into a scene and
the object is smaller, but I think having the detail there adds to the realism
even if you can't see it very well.
Isosurface, HD image and 5 minutes.. Not something I have heard in 1 sentence
before ;-)
Sean net> wrote:
> It takes all kinds, and I'm very much a realism fanatic.
Me too, I love looking at 'fantasy/unreal' images but maybe due to a lack of
imagination I tend to concentrate on photorealism in my own images ;-)
The texture looks great, I do like a good close up as well and often model
things at a level of detail that gets lost when you put them into a scene and
the object is smaller, but I think having the detail there adds to the realism
even if you can't see it very well.
Isosurface, HD image and 5 minutes.. Not something I have heard in 1 sentence
before ;-)
Sean
Post a reply to this message
|
 |
|  |
|  |
|
 |
|
 |
|  |
|  |
|
 |
"Chris R" <car### [at] comcast net> wrote:
> Thanks. I'm thinking about how to incorporate knots that would be visible
> through the paint...
You could use a pattern or image_map to sample from and modify your paint layer
according to that - have a function modulate the color or the difference of the
paint layer.
Apply filter or transparency to the top layer according to the intensity of the
knot - maybe with a pattern mask or proximity pattern of some sort to keep the
real-look.
Use an average {} pigment pattern to work it in, along with the normal.
That's all I've got so far before morning coffee ;) net> wrote:
> Thanks. I'm thinking about how to incorporate knots that would be visible
> through the paint...
You could use a pattern or image_map to sample from and modify your paint layer
according to that - have a function modulate the color or the difference of the
paint layer.
Apply filter or transparency to the top layer according to the intensity of the
knot - maybe with a pattern mask or proximity pattern of some sort to keep the
real-look.
Use an average {} pigment pattern to work it in, along with the normal.
That's all I've got so far before morning coffee ;)
Post a reply to this message
|
 |
|  |
|  |
|
 |
|
 |
|  |
|  |
|
 |
"Bald Eagle" <cre### [at] netscape net> wrote:
> "Chris R" <car### [at] comcast net> wrote:
> "Chris R" <car### [at] comcast net> wrote:
>
> > Thanks. I'm thinking about how to incorporate knots that would be visible
> > through the paint...
>
> You could use a pattern or image_map to sample from and modify your paint layer
> according to that - have a function modulate the color or the difference of the
> paint layer.
> Apply filter or transparency to the top layer according to the intensity of the
> knot - maybe with a pattern mask or proximity pattern of some sort to keep the
> real-look.
> Use an average {} pigment pattern to work it in, along with the normal.
>
> That's all I've got so far before morning coffee ;)
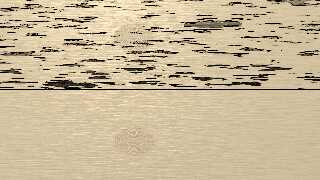
So here's a one-day attempt at getting visible knots and knot bleed, plus one of
the flakes of paint is now hanging on by a thread to the painted surface. (Look
just up and to the right of the center of the top board).
The knot has both a physical implementation that causes it to push out from the
surface of the wood a bit, and a textural implementation that implements the
color bleed from the knot into the paint itself. Right now the color bleed
matches the physical texture of the knot exactly, modulo some warp turbulence to
spread the color.
-- Chris R. net> wrote:
>
> > Thanks. I'm thinking about how to incorporate knots that would be visible
> > through the paint...
>
> You could use a pattern or image_map to sample from and modify your paint layer
> according to that - have a function modulate the color or the difference of the
> paint layer.
> Apply filter or transparency to the top layer according to the intensity of the
> knot - maybe with a pattern mask or proximity pattern of some sort to keep the
> real-look.
> Use an average {} pigment pattern to work it in, along with the normal.
>
> That's all I've got so far before morning coffee ;)
So here's a one-day attempt at getting visible knots and knot bleed, plus one of
the flakes of paint is now hanging on by a thread to the painted surface. (Look
just up and to the right of the center of the top board).
The knot has both a physical implementation that causes it to push out from the
surface of the wood a bit, and a textural implementation that implements the
color bleed from the knot into the paint itself. Right now the color bleed
matches the physical texture of the knot exactly, modulo some warp turbulence to
spread the color.
-- Chris R.
Post a reply to this message
Attachments:
Download 'painted_wood-wflakes-hd-hq-20230316.png' (2338 KB)
Preview of image 'painted_wood-wflakes-hd-hq-20230316.png'

|
 |
|  |
|  |
|
 |
|
 |
|  |
|
 |


![]()