 |
 |
|
 |
|
 |
|  |
|  |
|
 |
|
 |
|  |
|  |
|
 |
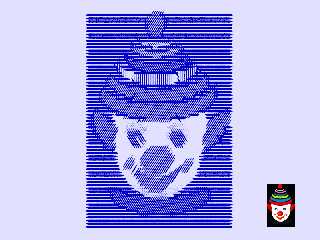
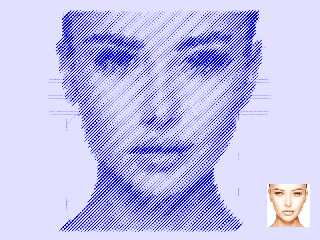
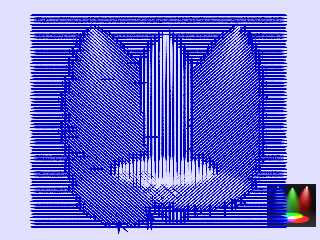
Trying to emulate mechanical shading.
m@
Post a reply to this message
Attachments:
Download 'test clown 01.png' (109 KB)
Download 'test face 01.png' (142 KB)
Download 'test spotlights 01.png' (165 KB)
Preview of image 'test clown 01.png'
Preview of image 'test face 01.png'
Preview of image 'test spotlights 01.png'
|
 |
|  |
|  |
|
 |
|
 |
|  |
|  |
|
 |
in news:60bee245@news.povray.org m@b wrote:
> Trying to emulate mechanical shading.
>
> m@
>
Very nice.
Ingo
Post a reply to this message
|
 |
|  |
|  |
|
 |
|
 |
|  |
|  |
|
 |
"m@b" <sai### [at] googlemail com> wrote:
> Trying to emulate mechanical shading.
>
> m@
Nice!
How does it work? com> wrote:
> Trying to emulate mechanical shading.
>
> m@
Nice!
How does it work?
Post a reply to this message
|
 |
|  |
|  |
|
 |
|
 |
|  |
|  |
|
 |
On 08/06/2021 4:24 pm, Mr wrote:
> "m@b" <sai### [at] googlemail com> wrote:
>> Trying to emulate mechanical shading.
>>
>> m@
>
> Nice!
> How does it work?
>
The image is put into a function:
#declare MyTesti = function
{ pigment
{ image_map
{ "My image.png" map_type 0
once
}
// scale <1,1,1>
}
}
(I am not sure where this function came from - I used it many years ago
in another project.)
These 4 functionas contain the information for each colour:
#declare TestR = function {MyTesti(x,y,z).red} // Extract colours
#declare TestG = function {MyTesti(x,y,z).green}
#declare TestB = function {MyTesti(x,y,z).blue}
#declare TestK = function {MyTesti(x,y,z).grey}
Each point on the image is interrogated and a sphere is drawn.
The sphere is scaled by a constant in X and by brightness in Y.
The sphere is rotated depending on the predominant colour: R, G, B or
neutral. (Rotation must be a multiple of 45 degrees or the spheres don't
join up to make a line.)
The sphere is scaled to match the aspect of the input image.
I can post the code, but it needs to be cleaned up first.
m@ com> wrote:
>> Trying to emulate mechanical shading.
>>
>> m@
>
> Nice!
> How does it work?
>
The image is put into a function:
#declare MyTesti = function
{ pigment
{ image_map
{ "My image.png" map_type 0
once
}
// scale <1,1,1>
}
}
(I am not sure where this function came from - I used it many years ago
in another project.)
These 4 functionas contain the information for each colour:
#declare TestR = function {MyTesti(x,y,z).red} // Extract colours
#declare TestG = function {MyTesti(x,y,z).green}
#declare TestB = function {MyTesti(x,y,z).blue}
#declare TestK = function {MyTesti(x,y,z).grey}
Each point on the image is interrogated and a sphere is drawn.
The sphere is scaled by a constant in X and by brightness in Y.
The sphere is rotated depending on the predominant colour: R, G, B or
neutral. (Rotation must be a multiple of 45 degrees or the spheres don't
join up to make a line.)
The sphere is scaled to match the aspect of the input image.
I can post the code, but it needs to be cleaned up first.
m@
Post a reply to this message
|
 |
|  |
|  |
|
 |
|
 |
|  |
|  |
|
 |
m@b wrote on 08/06/2021 11:32:
> On 08/06/2021 4:24 pm, Mr wrote:
>> "m@b" <sai### [at] googlemail com> wrote:
>>> Trying to emulate mechanical shading.
>>>
>>> m@
>>
>> Nice!
>> How does it work?
>>
>
> The image is put into a function:
>
> #declare MyTesti = function
> { pigment
> }
>
> (I am not sure where this function came from - I used it many years ago
> in another project.)
>
> These 4 functionas contain the information for each colour:
>
> #declare TestG = function {MyTesti(x,y,z).green}
> #declare TestB = function {MyTesti(x,y,z).blue}
> #declare TestK = function {MyTesti(x,y,z).grey}
>
> Each point on the image is interrogated and a sphere is drawn.
> The sphere is scaled by a constant in X and by brightness in Y.
> The sphere is rotated depending on the predominant colour: R, G, B or
> neutral. (Rotation must be a multiple of 45 degrees or the spheres don't
> join up to make a line.)
> The sphere is scaled to match the aspect of the input image.
>
> I can post the code, but it needs to be cleaned up first.
>
> m@
>
>
>
The results are very promising, looking in the code would be
interesting, thank you,
Paolo com> wrote:
>>> Trying to emulate mechanical shading.
>>>
>>> m@
>>
>> Nice!
>> How does it work?
>>
>
> The image is put into a function:
>
> #declare MyTesti = function
> { pigment
> }
>
> (I am not sure where this function came from - I used it many years ago
> in another project.)
>
> These 4 functionas contain the information for each colour:
>
> #declare TestG = function {MyTesti(x,y,z).green}
> #declare TestB = function {MyTesti(x,y,z).blue}
> #declare TestK = function {MyTesti(x,y,z).grey}
>
> Each point on the image is interrogated and a sphere is drawn.
> The sphere is scaled by a constant in X and by brightness in Y.
> The sphere is rotated depending on the predominant colour: R, G, B or
> neutral. (Rotation must be a multiple of 45 degrees or the spheres don't
> join up to make a line.)
> The sphere is scaled to match the aspect of the input image.
>
> I can post the code, but it needs to be cleaned up first.
>
> m@
>
>
>
The results are very promising, looking in the code would be
interesting, thank you,
Paolo
Post a reply to this message
|
 |
|  |
|  |
|
 |
|
 |
|  |
|  |
|
 |
Here is the script:
// author: Matthew Bradwell
// date: 2021
//--------------------------------------------------------------------------
#version 3.7;
global_settings{ assumed_gamma 1.0 }
#default{ finish{ ambient 0.1 diffuse 0.9 }}
// camera ------------------------------------------------------------------
camera {perspective
angle 28
location <0,5,-30>
look_at <0,5,0>
right x*image_width/image_height}
#background{rgb<0.5,0.5,1>*1.5}
//---------------------------------------------------------------------------
//---------------------------- objects in scene ----------------------------
//---------------------------------------------------------------------------
// Input fie name and dimensions
//#declare In_Image = "Face 1a.jpg"; #declare In_Height = 1575;
#declare In_Width = 1587;
#declare In_Image = "RGBColors 3.jpg"; #declare In_Height = 811;
#declare In_Width = 925;
#declare In_Ratio = In_Width/In_Height;
// Reference image bottom right
box{<0,0,0>,<1,1,0.01> pigment{image_map {In_Image map_type 0}} scale
<In_Ratio,1,1>*2 translate<5,0,-1> finish{emission 1}}
#declare MyTesti = function // In order to get the HF_ macros to read
{ pigment // imported pictures they have to be
{ image_map // declared this way.
{ In_Image map_type 0 // <----
once
}
}
}
#declare TestR = function {MyTesti(x,y,z).red} // Extract colours
#declare TestG = function {MyTesti(x,y,z).green}
#declare TestB = function {MyTesti(x,y,z).blue}
#declare TestK = function {MyTesti(x,y,z).grey}
#declare Resolution = 0.015; // Spacing between the lines,
remember image maps are 1 x 1
#declare Gain = 1.3; // Line thickness
#declare Bias = 0.07; // To increase the output if very
light areas are not drawing
#declare Grey_threshold = 0.003; // Greyness is detected if R, G & B
are equal, this sets the acceptance level
#for(X, 0, 1, Resolution)
// Scan the functions
#for(Y, 0, 1, Resolution)
#declare Brightness = Bias+(Gain*(1-TestK(X,Y,0)));
#declare GreyTest = 0.001 + abs(TestK(X,Y,0) -
abs((TestR(X,Y,0)+TestG(X,Y,0)-TestB(X,Y,0))));
#if(GreyTest < Grey_threshold)
// Decide the line angle
#declare Angle = 0;
// Grey (Incuding black and white)
#else
#if(TestR(X,Y,0) > TestG(X,Y,0) & TestR(X,Y,0) > TestB(X,Y,0))
#declare Angle = 45; #declare Brightness =
Brightness*0.8; // Red
#else
#if(TestG(X,Y,0) > TestB(X,Y,0))
#declare Angle = 90;
// Green
#else
#declare Angle = -45; #declare Brightness =
Brightness*0.8; // Blue
#end
#end
#end
// Draw the line segment
sphere{<0,0,0>,0.04 pigment{rgb <0,0,0.5>}
scale<8,Brightness,0.1> rotate<0,0,Angle> translate<X-0.5,Y,0>*10
finish{emission 1} scale<In_Ratio,1,1>}
#end
#end
Post a reply to this message
|
 |
|  |
|  |
|
 |
|
 |
|  |
|  |
|
 |
Hi(gh)!
On 09.06.21 11:09, m@b wrote:
> // Reference image bottom right
> box{<0,0,0>,<1,1,0.01> pigment{image_map {In_Image map_type 0}} scale
<In_Ratio,1,1>*2 translate<5,0,-1> finish{emission 1}}
>
> #declare MyTesti = function // In order to get the HF_ macros to read
> { pigment // imported pictures they have to be
> { image_map // declared this way.
> { In_Image map_type 0 // <----
> once
> }
> }
> }
>
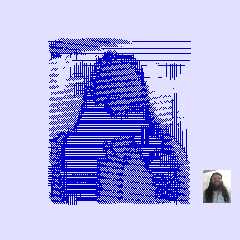
I had to add the file type in the image_map blocks, now it runs fine,
see attachment!
May I use this "filter" to process one of my bicycle handle cam videos
and publish it on Vimeo, of course crediting you?
See you in Khyberspace!
Yadgar
Now playing: Horizon (Jon and Vangelis)
Post a reply to this message
Attachments:
Download 'rastered_yadgar2011.png' (68 KB)
Preview of image 'rastered_yadgar2011.png'
|
 |
|  |
|  |
|
 |
|
 |
|  |
|  |
|
 |
Hi Matt,
> > "m@b" <sai### [at] googlemail com> wrote:
> >> Trying to emulate mechanical shading.
This is clever! I like it. :)
> The image is put into a function:
>
> #declare MyTesti = function
> { pigment
> { image_map
> { "My image.png" map_type 0
> once
> }
> // scale <1,1,1>
> }
>
> }
>
> (I am not sure where this function came from - I used it many years ago
> in another project.)
I see in your posted code that you comment that "map_type 0" is required - but
the docs say that this is the default planar mapping, so maybe it's not actually
a requirement?
> Each point on the image is interrogated and a sphere is drawn.
> The sphere is scaled by a constant in X and by brightness in Y.
> The sphere is rotated depending on the predominant colour: R, G, B or
> neutral. (Rotation must be a multiple of 45 degrees or the spheres don't
> join up to make a line.)
> The sphere is scaled to match the aspect of the input image.
I had this bouncing around in my head today, and maybe it would be faster to
make some pigment patterns and use a pigment map instead of sphere primitives.
http://news.povray.org/povray.binaries.images/thread/%3Cweb.5a7774f01a0c102c5cafe28e0%40news.povray.org%3E/
You could even just make a single linear pattern and the others would just be
rotations or scales of it. (have the line thickness be dependent on the color
channel value)
The other thing I was thinking was that you might also be able to get an outline
or shape-following effect if you calculated not only the value of any given
pixel, but the gradient of the function there as well. Then you could make the
lines perpendicular to the gradient / tangent to the curve.
I know TOK wrote the gradient functions in the distributed include files, and
there are edge-finding algorithms that give you the gradient of the image as a
bonus.
This looks like something super fun to play with, with a lot of potential for
future development! Good work :) com> wrote:
> >> Trying to emulate mechanical shading.
This is clever! I like it. :)
> The image is put into a function:
>
> #declare MyTesti = function
> { pigment
> { image_map
> { "My image.png" map_type 0
> once
> }
> // scale <1,1,1>
> }
>
> }
>
> (I am not sure where this function came from - I used it many years ago
> in another project.)
I see in your posted code that you comment that "map_type 0" is required - but
the docs say that this is the default planar mapping, so maybe it's not actually
a requirement?
> Each point on the image is interrogated and a sphere is drawn.
> The sphere is scaled by a constant in X and by brightness in Y.
> The sphere is rotated depending on the predominant colour: R, G, B or
> neutral. (Rotation must be a multiple of 45 degrees or the spheres don't
> join up to make a line.)
> The sphere is scaled to match the aspect of the input image.
I had this bouncing around in my head today, and maybe it would be faster to
make some pigment patterns and use a pigment map instead of sphere primitives.
http://news.povray.org/povray.binaries.images/thread/%3Cweb.5a7774f01a0c102c5cafe28e0%40news.povray.org%3E/
You could even just make a single linear pattern and the others would just be
rotations or scales of it. (have the line thickness be dependent on the color
channel value)
The other thing I was thinking was that you might also be able to get an outline
or shape-following effect if you calculated not only the value of any given
pixel, but the gradient of the function there as well. Then you could make the
lines perpendicular to the gradient / tangent to the curve.
I know TOK wrote the gradient functions in the distributed include files, and
there are edge-finding algorithms that give you the gradient of the image as a
bonus.
This looks like something super fun to play with, with a lot of potential for
future development! Good work :)
Post a reply to this message
|
 |
|  |
|  |
|
 |
|
 |
|  |
|  |
|
 |
"Bald Eagle" <cre### [at] netscape net> wrote:
>...
> I know TOK wrote the gradient functions in the distributed include files, and
> there are edge-finding algorithms that give you the gradient of the image as a
> bonus.
>...
Hi Bill
Please note that most of the credit for the Vector analysis macros should go to
Christoph Hormann, which did the heavy lifting. I just suggested some
corrections.
Btw.:
I agree with you; it may be that experimenting with pigment maps will be
rewarding here.
--
Tor Olav
http://subcube.com
https://github.com/t-o-k net> wrote:
>...
> I know TOK wrote the gradient functions in the distributed include files, and
> there are edge-finding algorithms that give you the gradient of the image as a
> bonus.
>...
Hi Bill
Please note that most of the credit for the Vector analysis macros should go to
Christoph Hormann, which did the heavy lifting. I just suggested some
corrections.
Btw.:
I agree with you; it may be that experimenting with pigment maps will be
rewarding here.
--
Tor Olav
http://subcube.com
https://github.com/t-o-k
Post a reply to this message
|
 |
|  |
|  |
|
 |
|
 |
|  |
|  |
|
 |
On 10/06/2021 1:00 am, Jörg "Yadgar" Bleimann wrote:
..........
>
> May I use this "filter" to process one of my bicycle handle cam videos
> and publish it on Vimeo, of course crediting you?
>
> See you in Khyberspace!
>
> Yadgar
>
> Now playing: Horizon (Jon and Vangelis)
Yes - of course - post a link.
My next thought was to try it with an animation.
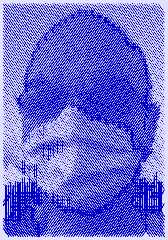
m@
Post a reply to this message
Attachments:
Download 'my_face_a.png' (144 KB)
Preview of image 'my_face_a.png'
|
 |
|  |
|  |
|
 |
|
 |
|  |
|
 |


![]()