|
 |
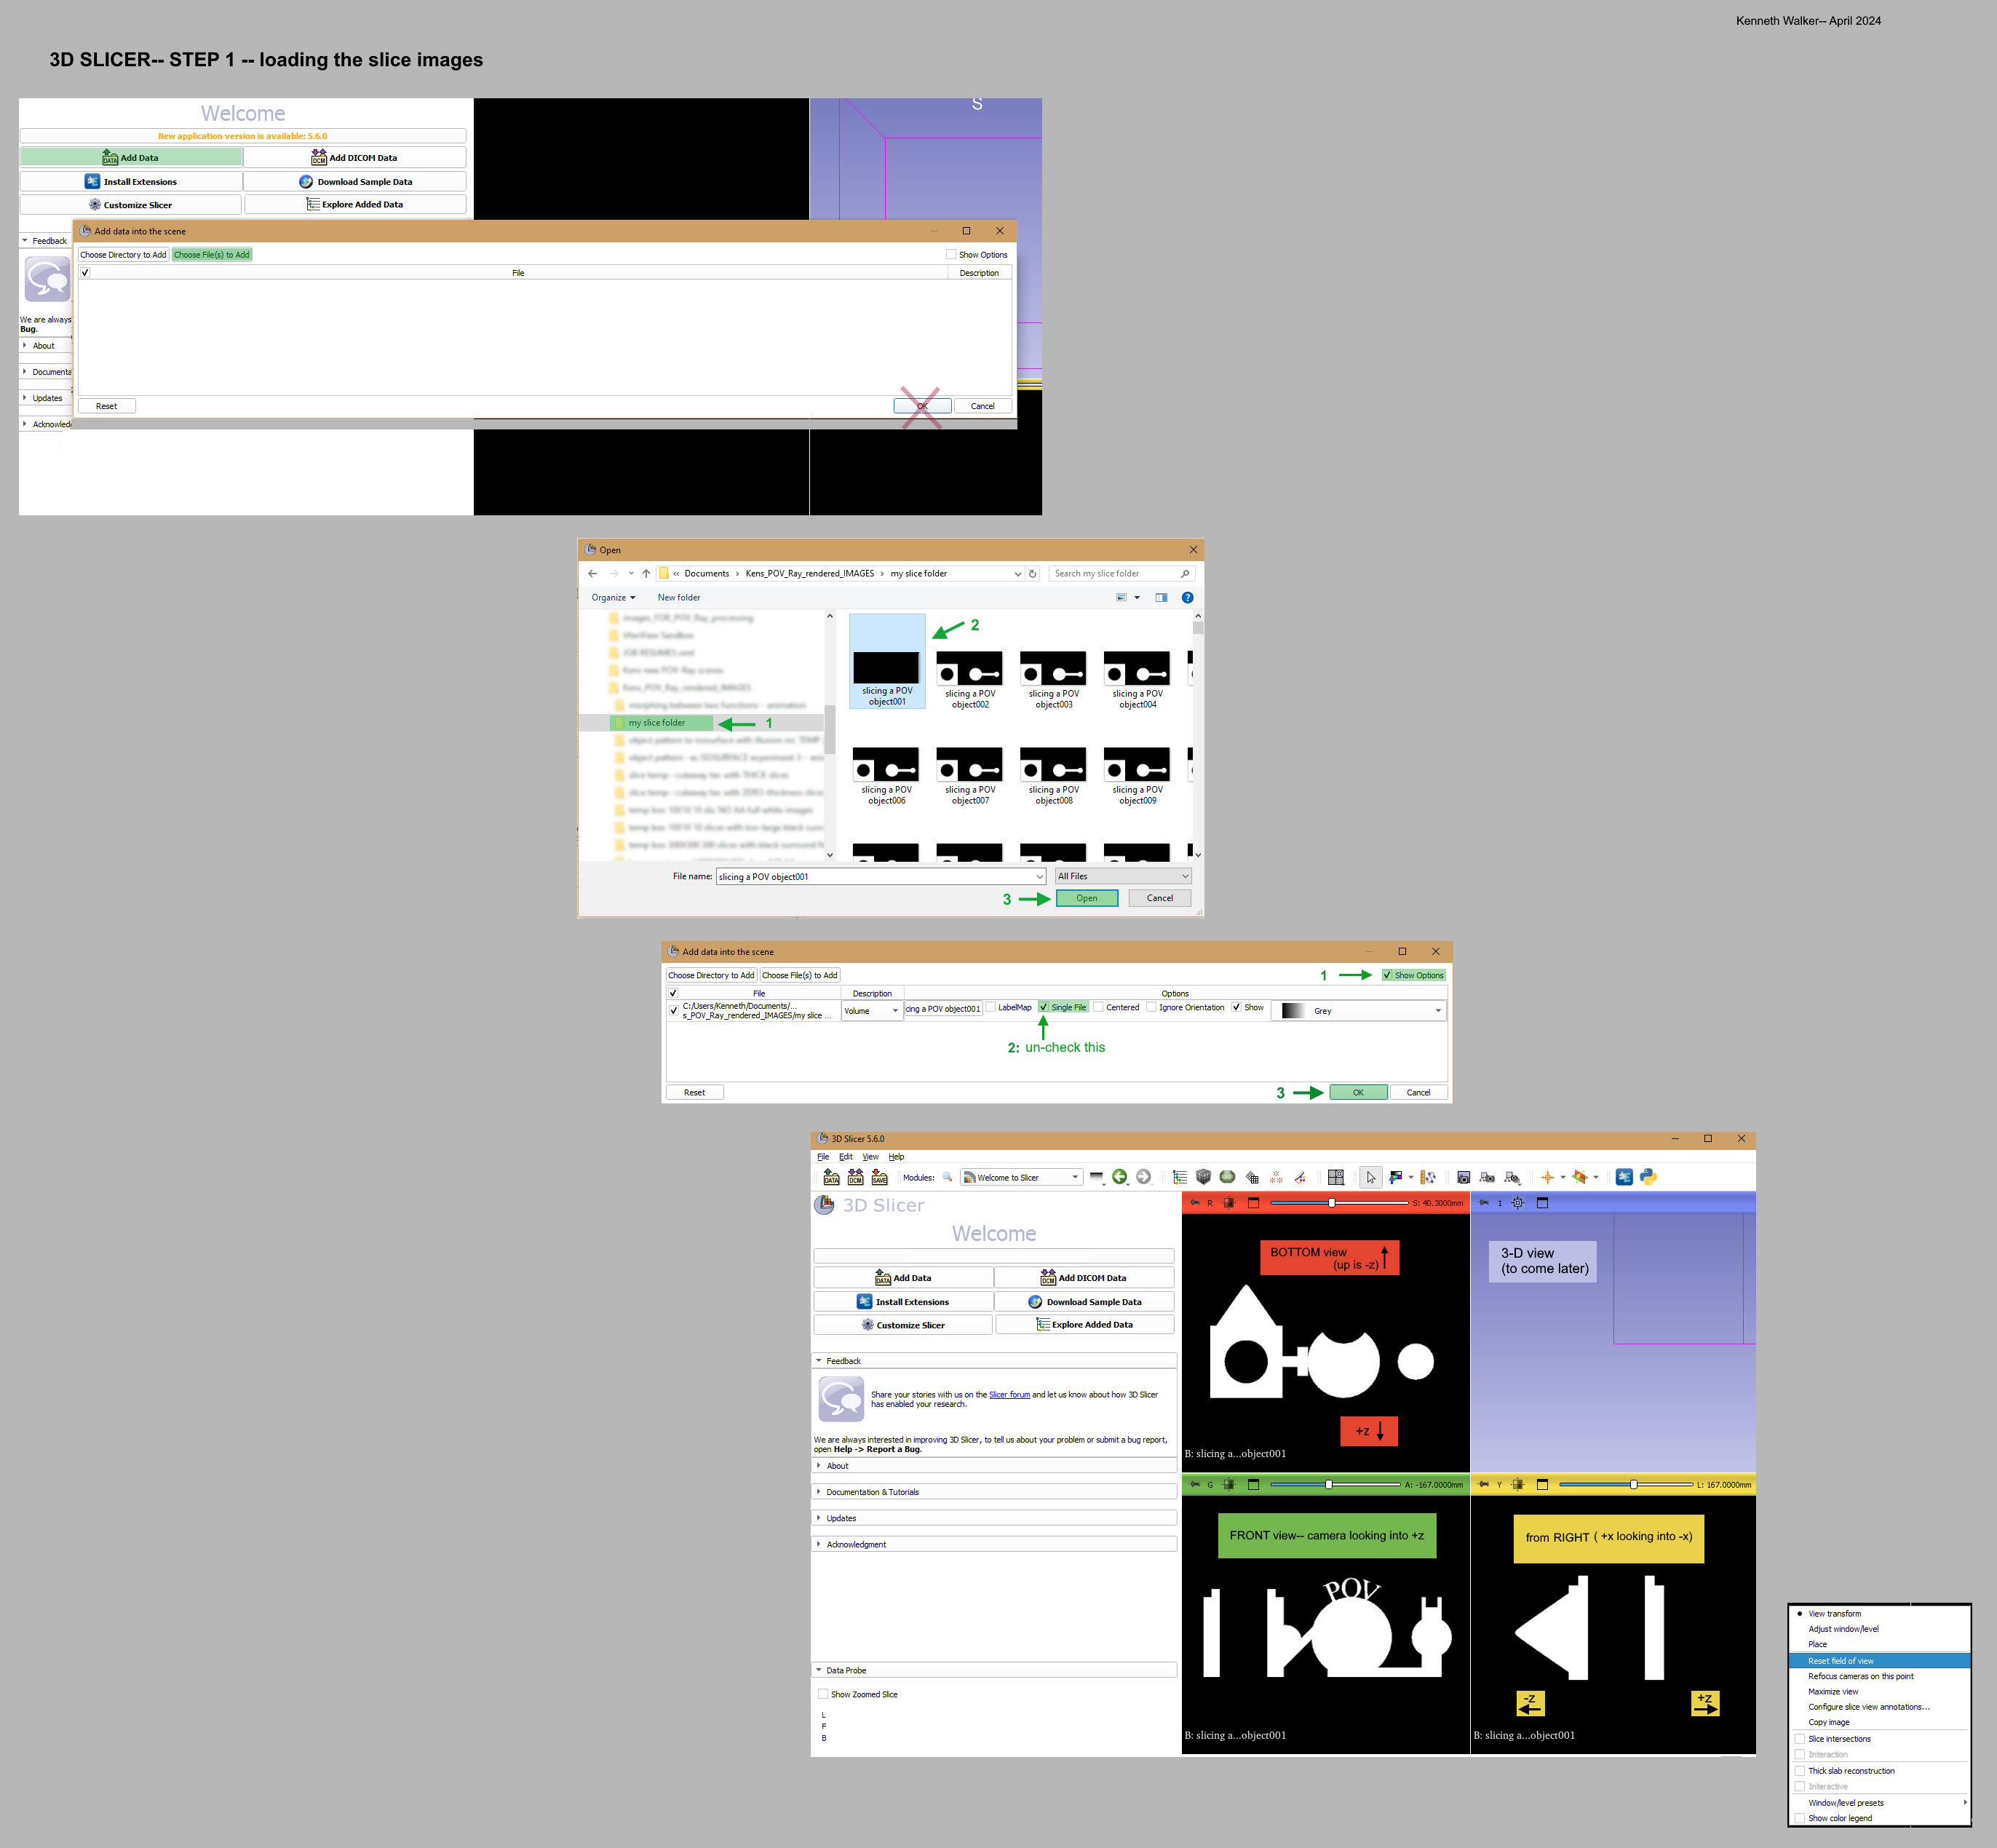
3D SLICER app-- STEP 1: importing the image slices
See the attached image as a guide.
(If you find that something does not appear to work correctly or if you make a
mistake, simply go to the main 'File' menu at top, choose 'Close Scene', and
start over.)
A) The large 'Add Data' button is used to import the slice images. The window
that comes up needs to be expanded left/right on your monitor, to see some of
the details that will eventually appear.
B) Click on 'Choose file(s) to add', and search for the folder with your slice
images. When you click on that, the slices will appear in a separate window.
Click on the first image there, and then 'Open'. That window will close, and the
first image's file path will appear in A)'s still-open window.
C) Click the small 'Show Options' box in that window in the upper right corner,
which brings up more choices. Then *UN-check* the 'Single file' box, and hit
'OK'. Give the slices time to load.
The slices will show up as the re-created model! In three orthographic views (no
3-D view yet). The sliders at the top of the three view-panes can be used to
cycle through the slices/voxels.
(3D SLICER does not use conventional x,y,z axes for the view-panes-- or even
up/down, left/right-- but medical terminology instead. The individual views'
orientations depend on the original POV-ray camera direction, which was looking
up from below. In the attached image, I have re-labeled the view-panes to make
them understandable.)
---- END OF STEP 1 ----
Step 2 will follow...
-------------
If any of the three object-slice previews seems to disappear, right-click on the
view to bring up a menu; choose 'Reset field of view'.
For moving the camera around in the orthographic view-panes (and later 3-D
preview):
GLOBAL ROTATIONS around the centerpoint: left mouse button click/drag (3-D view
only)
ZOOM: right mouse button click/drag
ROTATING clockwise/counterclockwise: Ctrl+left mouse button click/drag (3-D view
only)
PANNING up-down/left-right: Shift+left mouse button click/drag
Post a reply to this message
Attachments:
Download '3d slicer step 1-- importing the images kw 4_2024.jpg' (449 KB)
Preview of image '3d slicer step 1-- importing the images kw 4_2024.jpg'

|
|